

Home of K-fab
 |
|
 |
The Mini-Raptor Build, 2021
|
2016 build 2017 build 2018 build 2019 build 2020 build 2021 build 2022 build 2023 build 2024 build |
 |
 The Wizard |
 |
 |
 |
Jan 14, 2021
Oh what a beautiful year already!
Started out with the annual RZR ride in the desert. Took a couple of friends out with us. Got in about 35 miles and started heading back.
That's odd - brakes just went mushy. Hmmm... I know it's due for pads but mushy? I'll have to check.
About 3/4 mile (1.2km) from the exit of where we off road, I'm headed up the wash trail at mid revs and out of nowhere I hear a very quick crunch/thud and the engine goes silent. I've NEVER heard an engine go from 4ish K rpm to 0 like this. ONE crunch/thud and that was it. I found neutral and rolled as far as I could. Ended up having to winch it off of the trail so people could get by.
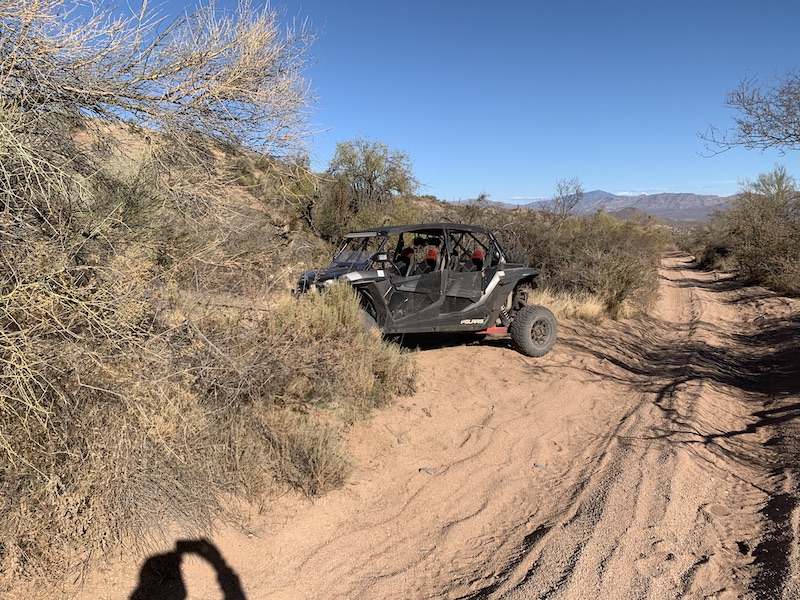
We walked out to the entrance and fortunately my friend with us has a friend that lives just around the corner so we got a ride back home.
Went into the garage, hopped in the pickup truck, turned the key and got pretty much the same results as the Mini-Raptor - nada. Okay, a few dim lights and the gauges flashed which is more than the Mini but still the same overall result of "You're not using me now."
Put the truck on charge (dumbass put it on 2 amp - gotta wear my glasses more). 30 min of that and the lights and dash came on more brightly but still no running truck. Shit. Getting dark. Guess it's a morning rescue.
So my January 2nd started with this view:
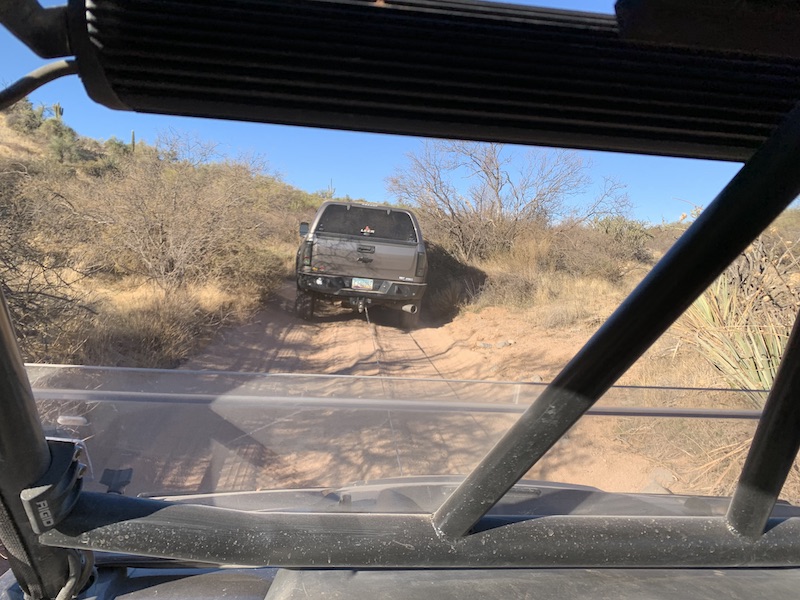
Dragged it to the parking area where we'd dropped the trailer and stuck it into the rolling box. I took the RZR on into a friend who has a shop. Yesterday, after a thorough going through, the brakes going mushy were the rear wheel bearing going out (fortunately on that trip). The heims in the rear suspension are toast (I have replacement in stock - yay!), front end's tweeked, brake pads are absolutely at the minimum - yeah, she's seen 8500 miles of off roading. Funny thing - when the guy looked at mileage and hours he pops up and says "Damn, you guys go twice as fast as everyone else!" - we don't beat on it either. Once they started looking at how well it's lasted, considering it's been on it's side and that I rolled it a while back, the thing's done really well. Hope to have it back in 10-12 days.
Still don't know what happened to the engine. We'll find out when it's pulled. Got a crate motor to replace it. All signs say it's much cheaper to replace it than try to repair. Even with a big pry bar the motor doesn't turn either direction at all.
We've had stuff going on, not much shop time. I was also fortunate enough to have bdkw1, our very own MBN Wizard, show up on the door step a week ago last Monday. He'd been out west and stopped here for a few days.
Took him out riding in my favorite area. We followed the trail that leads to the power line road that ate flyerrider a few years back. Flyer's had to deal with us being relentless about his crash too. (and we'll not talk about bullnerd and his new 450L...)
We got to the power line road and as bdk catches up to me I say "This is the area where you pay attention to the whoops - they'll eat you. In fact, I have an idea."
We now have the "Jesse" (flyerrider) pose:
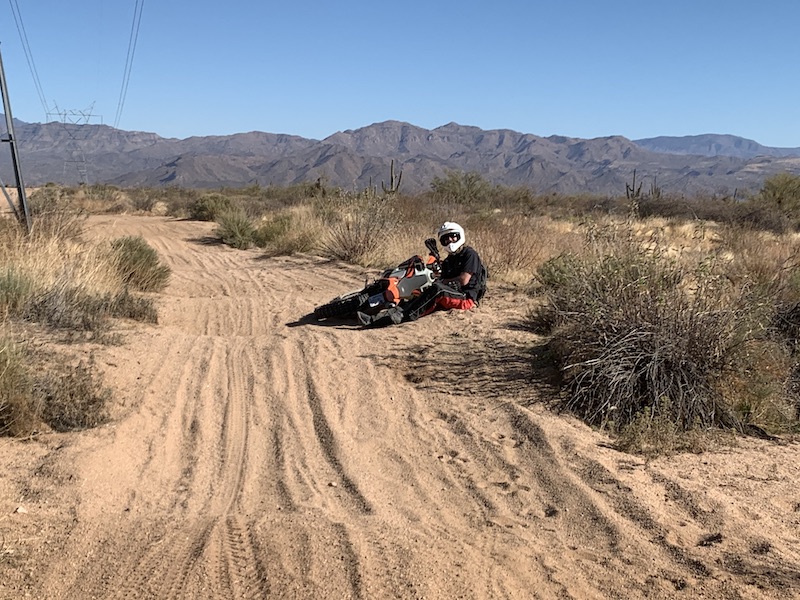
Sent this pic along with "Nobody ever listens". AHHHAHAHAHAHA!!!!! Got him with it too!
Had a blast playing around in the dirt that afternoon. I think I fell over once? - dropped the bike maybe? bdk stayed up.
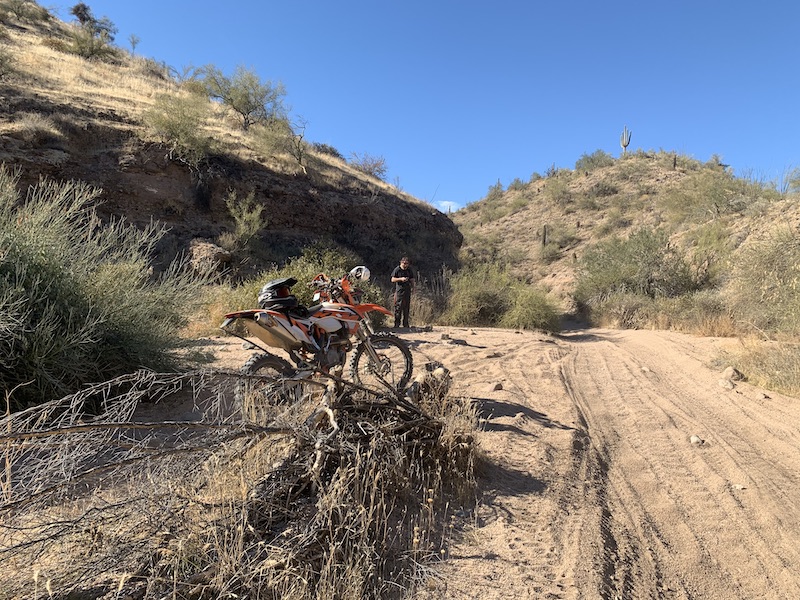
Thursday required a ride to Crown King. bdk has some friends in the area that ride so we all hooked up and took on 71 miles of round trip.
Of course I forgot to follow the "Leader stops at the intersections" because I thought the guys with us knew the route... That took a few minutes of waiting and back tracking before the five of us were reunited (oh God, old 70's song just popped into my mind!) and then got headed in the correct direction again.
First fifteen miles are fire road and then there's the CK rock - turn right. This is where it gets rough.
bdkw1 in the flesh!
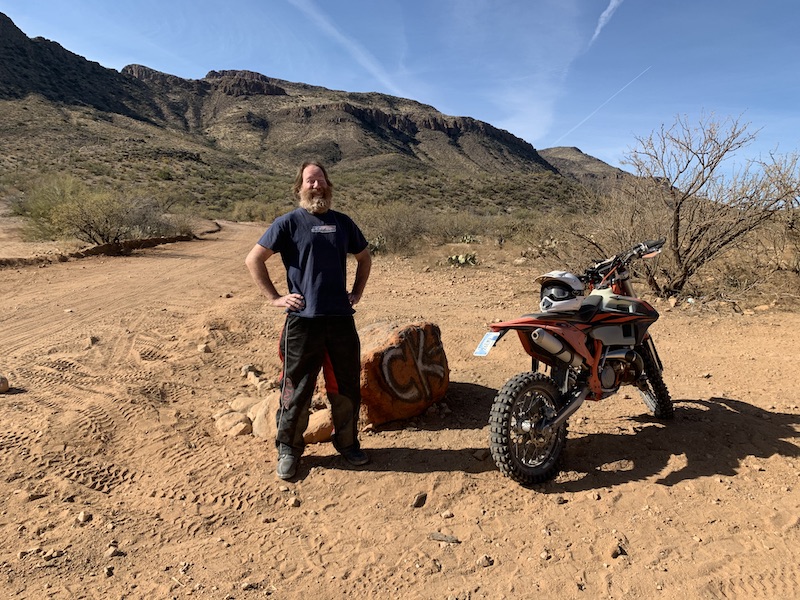
And me doing the Jesse, just for the sake of it.
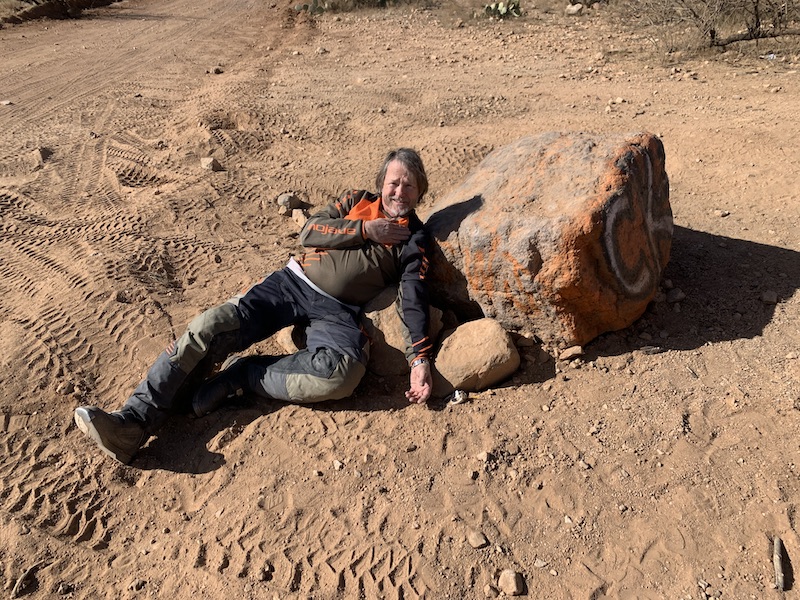
Don't know if this has been mentioned before or not, but there's a rock garden that sucks. It's beside a mine and there's a quarter mile of crap. The RZRs have beaten the smaller stuff into submission but the watermelon sized rocks for about 100 yrs just plain suck. Ask TALON about it when the water's running. It was about 2" deeper than my boots are tall and it SUCKED. Wasn't nearly as bad this time.
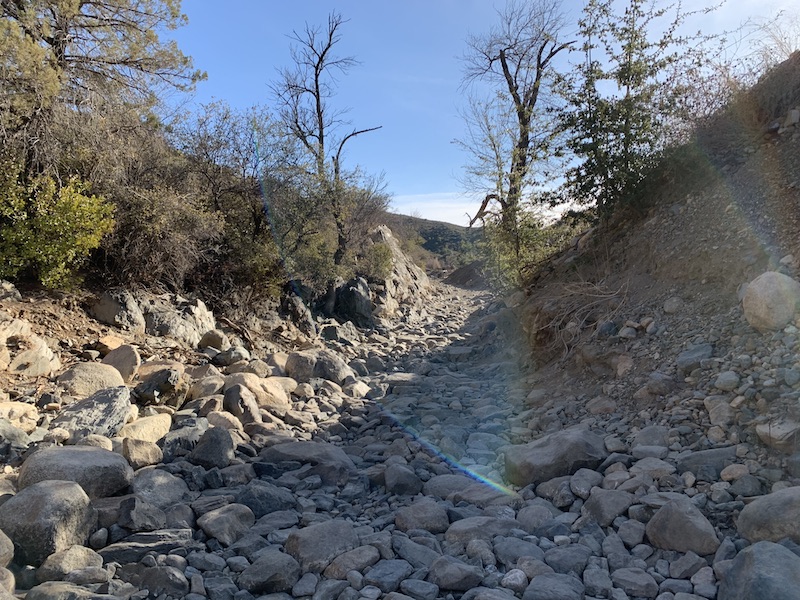
There's one spot that's gotten worse and more challenging over just the past two years - can't tell you how much the SXSs have destroyed this trail. They've taken most of it down to bedrock and it's F'n ROUGH! Anyhow, I'd seen a video the night before we went on a line waaaay over to the right. I hit it and went right up. Time to stop and pull out the camera - I KNOW someone's not gonna make it.
10 days of riding and not a fall. Two days with me and TADA!!! The Wizard's B&B bash plate finds rock, stops bike and well - watch the video. I cut it off just "this much" too soon. "Turtle! I'm a turtle!" is what he yells. (you didn't think this wasn't gonna get published did ya B?)
We made it up to Crown King, had a great lunch and I discovered that I have a new hero/inspiration. One of the guys with us, who ran a very solid, good pace, is 76!!! I have goals! He dropped the bike a couple of times over the day (we had to help pick it up) but other than that, Jim rips.
There was one other "Lead guy waits at the intersection" incident - I was NOT leading this time, ahem bdk... We got back together after about 15 min or so. All in all it was a killer day and an ass whipping ride.
Okay, enough about the side adventures and back to the Mini-Raptor.
-----------------------
darwinpayne2000
It sounds so simple, right? Positive. Negative. Twelve volts. Zero volts. Hot wire. Ground wire. How many ways can you wire this stuff? Apparently, many, many ways, depending on the number of relays, switches and resistors they throw into the mix. I think we've all spent more time than we wanted chasing a wiring gremlin.
Me
Boy that's the truth!!!
Started out with trying to replace the burnt up throttle cable. Actually found the company in SoCal that purchased all the equipment from the place that I used to use here in Phx. Cool - I know where to get custom cables.
First cable ended up being too short (I'd taken some length out as the melted one was too long) and the inner cable was too long. The part that threads into the throttle bodies wasn't correct either. Another phone call and I have a PERFECT cable sitting on my doorstep at a deeply discounted price from the first. Dude that makes them is very easy to work with. Cable in, throttle adjusted and I'm golden there.
Had also been waiting on OEM heat shields. They're on backorder and pricy ($115 +/- depending on who). Searched eBay and came up with two for about sixty bucks. That works. I got two bottoms as they have tabs that align and they'r fairly well mirrored.
Pressed the little hump out of them (I thought they'd be in the way of rolling the edges to form around the right side header pipe) - was a bad move, it crushed the insulation stuff and let it delaminate a bit. Oh well, there's ways around it (besides Super 77 which isn't gonna hold up).
Snipped the lip off one edge, bolted the two pieces and folded the lip of the other one over the edge. Fits well, holds tightly. YES!
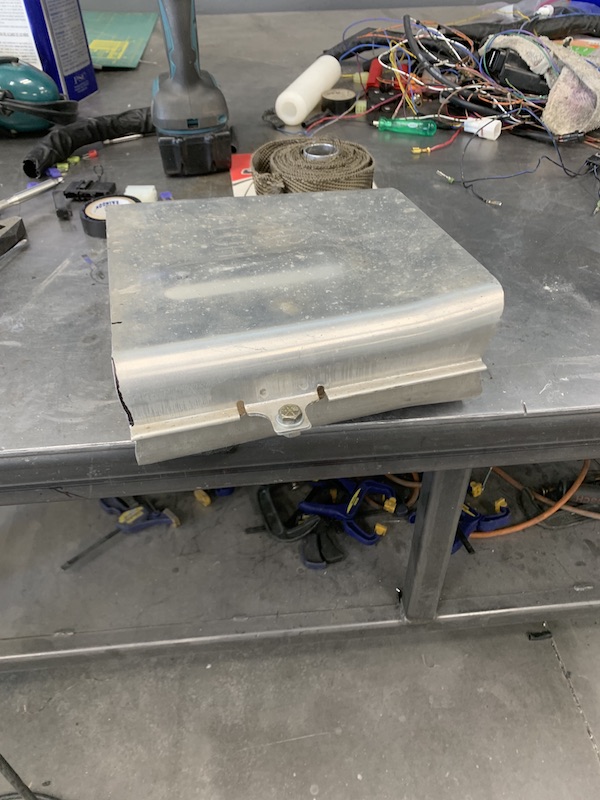

Here you can see some of the delimitation:
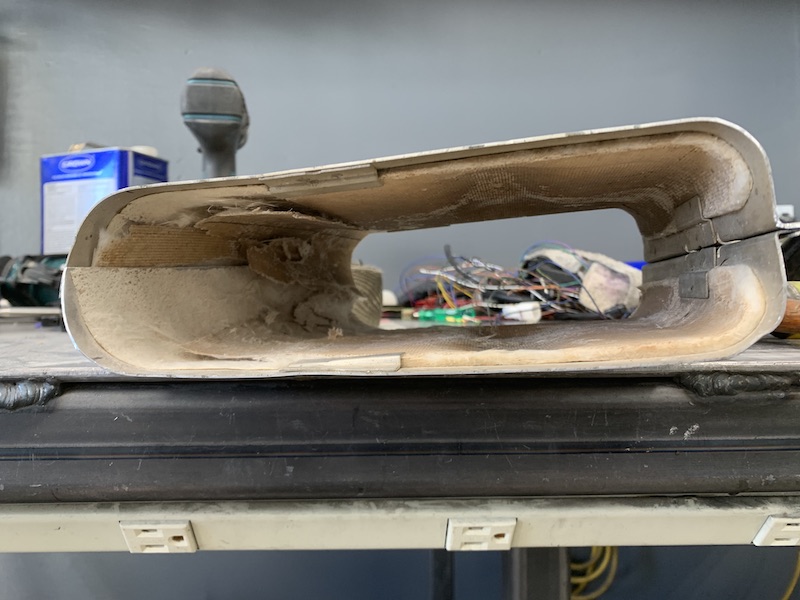
I put a lip on the other side so I have a U-channel to tuck the top cover into:

And then I covered both the top and bottom shields in the magic gold reflective insulation. I figure this with more air space along with OEM heat shielding BETTER FU***NG WORK!

Cerakote, header wrap, reflective gold foil over itchy OEM fiberglass sheeting on the OEM shields. Other than forced air (have fan, not sure where/how to put it yet), what else can I do???

Still need to clean up and redress the back shield. I went ahead and pulled the high temp carbon setup off - I know that goes poof so I'm not taking the chance.

I'll be throwing a bag of marshmallows and a wire coat hanger in the Mini-Raptor with me when I get it up and running again. If it decides it's going up in smoke again, I'm gonna stand beside it and cook a bag of 'em.
Have a little bit of detail stuff to get finished up and then it's time to start chasing electron lines (wires).
Off to the shop with me! Hopefully I'll report back later tonight that the engine goes vroom, vroom.
Jan 14, 2021
Bullnerd
Hey, My new 450L works just fine!

Me
Doh! I'd not seen the arm. Knew it was hurt.
bdkw1
I'm going to have to start up crashing lessons to show you guys how to do it with style.
Jan 16, 2021
jimmyg
You all seem to chase pain and injury like me and the fridge. I'm board I wonder what's in here to eat?
Me
Seems to be the way of life for me starting at 5 with a concussion from spinning off a stool in a hamburger joint and stopping the concrete floor with my head and then my first broken collarbone in third grade, bailing outta a tree (I don't remember it, add concussion #2).
51 years later I'm at 28 (I think?) snapped/crunched/shattered bones, specializing in clavicles and ribs. I need to post up my recent clavicle pix - even I'm impressed! Lol!
jimmyg
Other than that good progress and like always you side story's are always worth a read. Classic.
Me
Thanks! Glad you enjoy the tales. I enjoy living them.
My wife keeps telling me I need to write. I sit back and read some of the stuff I posted on Yellow Dog Racing over the years and find I'm quite entertained by my own writings. I pretty much put on paper the shit that's float around in my pea brain as if I'm talking to my buddies around the camp fire.
-------------------
Quick note (haven't uploaded video yet because I'm sitting here in bed with my morning cup 'o joe) but the Mini-Raptor LIVES!
Well, kinda... I turn the key, it now turns on the ignition and fuel system and it did one turn of the crank before the battery said "I'm not playing with you yet. Charge me."
There's life coming back out of it. WOOOO HOOOO!
Got the exhaust system buttoned up yesterday. Realized that I hadn't installed the header gasket so I had to dig around on the table and locate it.
It (heat shielding) ended up going in better than I thought it was. I'm really pleased that it's almost exactly parallel to the cam cover gasket when you look down on the same plane. Nice.
Also got the little cover in the back covered in magic gold reflecting material. I'll probably put a piece of it on the rear bulkhead once powder coating is done. The turn down in the headers is pretty close to it.
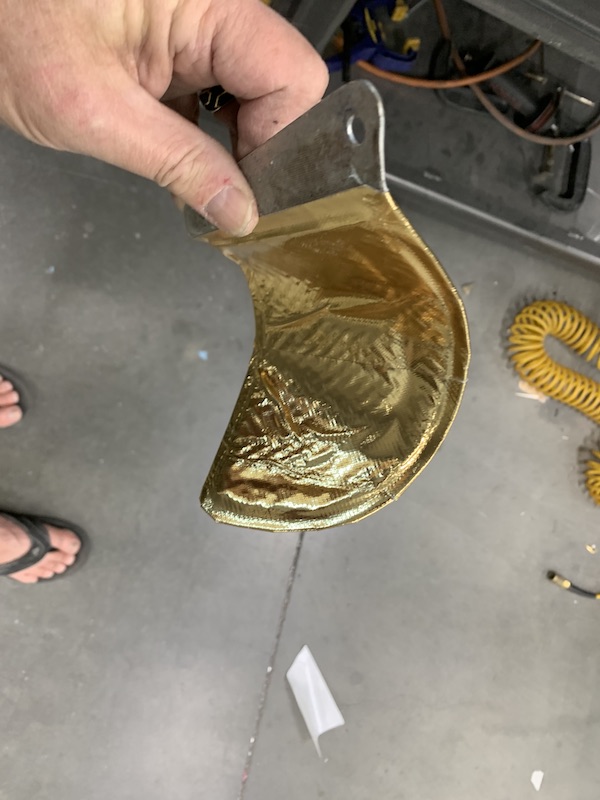
Had planned on wrapping the collector and tube that head to the muffler but after fighting with trying to get the cloth around the tapered section and being that it hangs out in the breeze I finally said F it and it'll stay just as is.
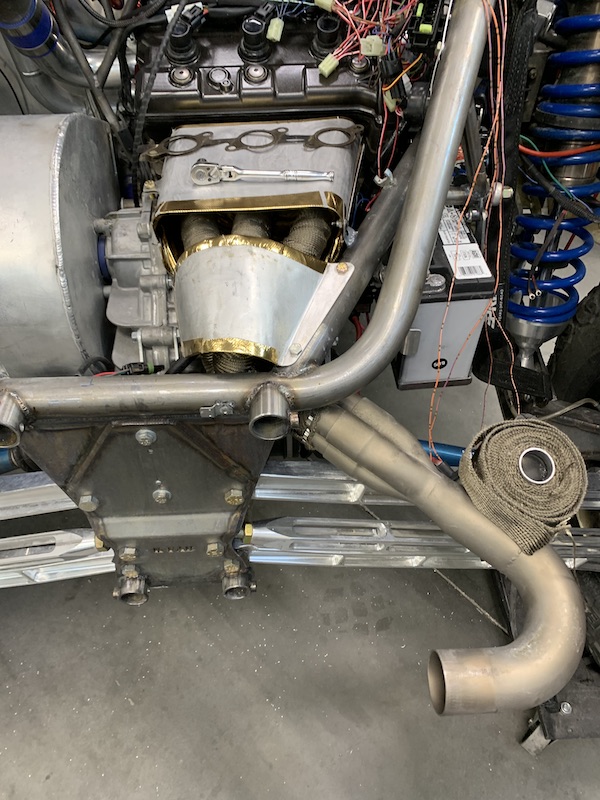
So I got the header all tidied up and went back after the wire harness.
ONE LINE AT A TIME! Go to colored wire diagram, find wire, chase wire, mark off of diagram. Everything was good. Looks like my first attempt was correct (although I was able to pull out one of the junction thingies).
So I started checking components from battery out. Big fuse, check, switch, check, ignition/fuel system relay, uh...
Pull relay, play with ohm meter, get funky readings, finally put 12v across activation leads and I get a spark. UH OH!!! Just to make sure I reversed polarity (since there's a diode in the relay), still get spark. AHA!!! Little bastard!
Find spare relay, put 12V across activation leads and "CLICK". Dis one iz goot!
Plug in relay, turn key and I get this!
WOOOOOOOOO HOOOOOOOO!!!!!
Shit happened!
Battery flat but I had things make noises, buzzes and clicks. YES, YES, YES!
Put battery charger on, shut down the shop for the night and went to the house with a huge grin.
Headed down to reinstall all the disconnected sensors, senders, crap that got pulled out of the harness while chasing the bad relay.
-------------------
I mentioned being a clavicle specialist - found some old x-rays and then my most recent.
Left clavicle - snapped it in two spots coming up short on a double jump back in 1997.
1997 x-ray:
23-24 years later, check the bridging under the big knot! Looks like a #2 pencil will fit just fine. I keep thinking I need a titanium ring inserted through it. That way next time I get in a pinch where I need extraction, all they gotta do is toss me the clip on the end of the winch and drag me out.
Broke my right one at the dunes years ago (soft spot in the sand sand, over the bars I flopped) and it never knitted.
Didn't realize I had an x-ray of it from then.
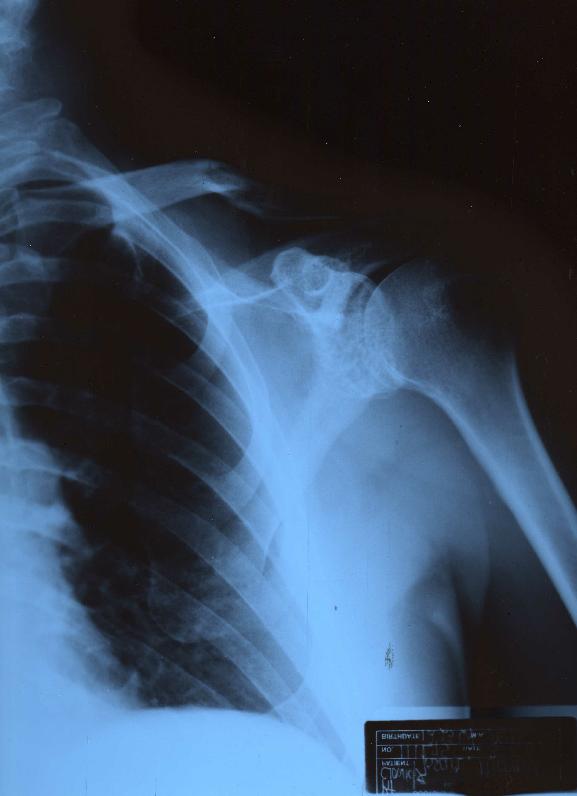
And here's how it looks now (pretty gnarly - the ends pivot like an elbow):
I'm pretty sure if I knew exactly what to look for I could find the breaks in the ribs in both shots - I can think of at least five on each side.
Jan 17, 2021
Spent most of yesterday afternoon tidying and routing wires, getting the loom cleaned up.
I'd mess with a section, attach the positive battery lead, turn key, get noises.
Worked on the leads that run up to the dash. All seems fine. Hit the power button and nothing. Huuuuuh?
Walk around to the back and check with the ignition key on the rear panel (what I'd been doing as I worked).
Nada. WTF?
Checked my little connection points - all had the plugs in them, everything is correct. Aaarrggghhh!
Wait, what's the black line with the ring terminal doing just hanging in the air? (in the Power Commander harness). Touched it to the intercooler, turned the key and the MR has life. (still not started it yet) Went to the cabin controls and YES! They work. Stupid ground.
Unwrapped the junction that's in the PC harness, pulled one of the filler plugs in one of the two connectors, relocated the ground into the harness and stuck a lead into the other side of the plug so it's integrated into the harness and not another lead hanging about and called it a day.
Hoping to get into the shop today and try to finish up the harness. This depends on if my wife decides to do the usual Sunday napping - if she does I'm watching Supercross, as I got it recorded.
Getting closer! Finish the wire repairs, redo the hood mounts and then it's testing time again. I'm hoping to get out in the next 4-5 days.
Jan 19, 2021
Spent the better part of the day getting the wire harness closer to finish. Tidied up each wire, ran each appropriately, added in a few components like the intercooler and supercharger cooling fans. Removed a bus bar and put everything into the harness.
Still have to wrap up the section between the middle and right cylinder then I'll pull the entire harness out of the Mini-Raptor and wrap it. I paid attention to how Yamaha did the Nytro harness and saved all the wrap stuff. This should let me pull the entire harness in one piece and have all the components plug into it instead of them running all over here and there. Should look entirely OEM Yamaha when done - at least that's the plan.
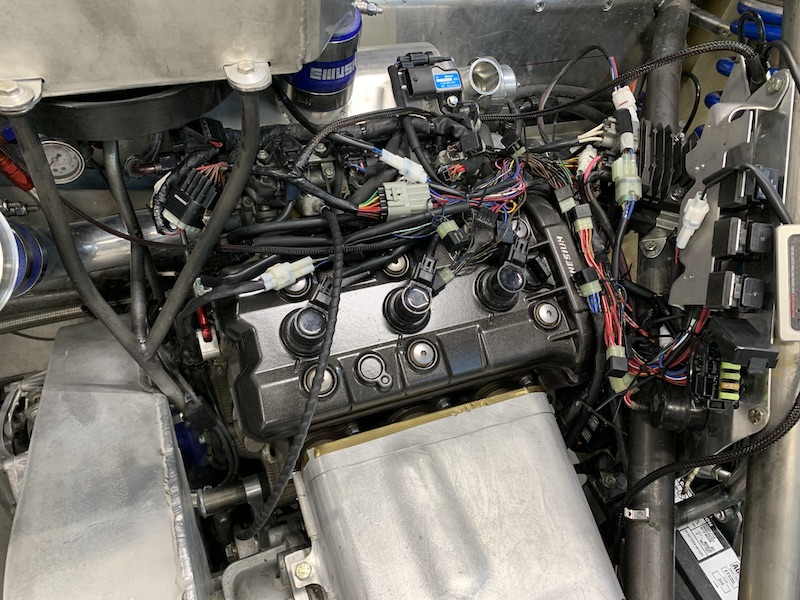
Of course I kept making sure I had power with each change/mod and that it would at least turn over. She tries to come to life, but coughs and sputters. Maybe Covid, not sure and the testing lines are long and I'm not sure where you'd swab a sled motor to find out.
I think I have cylinders 1 & 3 backwards. It hits on one cylinder and doesn't sound like the other two are playing nicely.
The leads to the coil pack are all the same gauge, red and have a different colored stripe for each cylinder. They all three plug into the ECU right next to each other so getting two of them backwards would be easy - especially if I was thinking that cylinder 1 is 3 and vice-versa.
Headed back to the shop after a quick lunch. She should be running by the end of the day. I have to go into the front wire harness next and find out why I'm not getting power. Maybe that's what that blue wire hanging there is... (was looking at one yesterday that heads into the cabin thinking "Huh... do I put power to it to see what pops or lights up?")
Kuma
no wiring diagram?
the only thing I really know about those electrical thingys is they all have a limited amount of smoke packaged in them and usually if you let any smoke out of them they won't work anymore.
Me
Oh, there are diagrams all over the table - and I seem to now know what every color does...
Agreed on the smoke factor. That stuff is precious when it comes to electronics. Fortunately I've not let any out yet.
Harness complete but w/o wrapping. I chased everything tightly with zip ties and then pulled it so I could wrap it up.
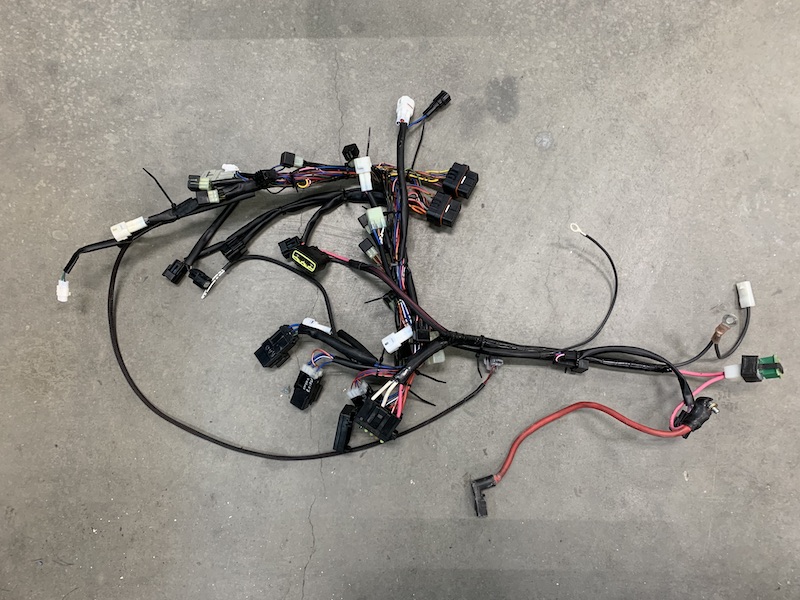
TADA!!! I've impressed myself with this.
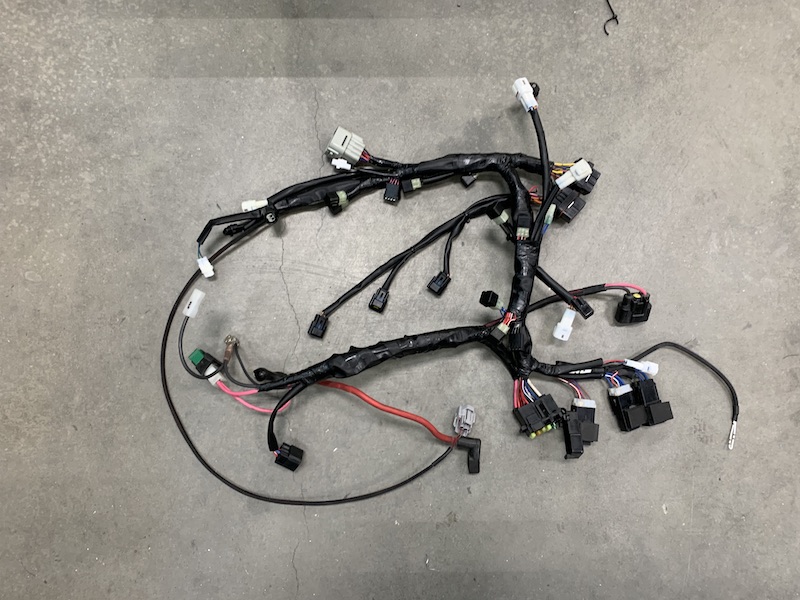
It fits like a glove.
There is one sensor that has me completely baffled right now, though - and I can't find the lead.
See the pressure sensor on the top of the plenum box that has no plug in it? Uhhh... No can find de plug! Actually I can't figure out what it goes to. I can see the plug in my pea brain but where'd it go? I thought it was part of the AiM Lambda sensor but no... It's not part of either of the Power Commander pieces either. It's definitely not Yamaha - that plug and the wires that I recall are not what they use.
I'll be crawling around underneath tomorrow connecting other stuff and hopefully it'll show up.

Since it didn't want to start yesterday and acting like it was hitting on once cylinder I started thinking. Was 99.7% (survival rate) that I had the spark leads switched at the ECU. As soon as I got the harness out of the back of the chassis, I switched the leads.
After a couple hours of wrapping and sticky fingers (I hate electrical tape) the harness was back in place and everything plugged in. Turned the key and nothing. REALLY??? Okay, think... that's plugged in, this is plugged in oh, let's take a look at the spade plug that grounds the system. AHA! Plugged the two connectors together and this is what happens now:
Still have to clean up other wires and get power back up to the front of the chassis.
PROGRESS!!! May be another test run in my NEAR future.
Jan 26, 2021
Still have to put the headlight assemblies back in the hood but other than that, the Mini-Raptor's ready for testing again.
Post fire looks even better than pre fire. I still have to do the cover over the clutch system and I'd like to get some more panels inside the back of the "bed" but we'll see. Gotta move up front and finish the dash.


Had to redo the hood mounts. The driver's side unit snapped from oh-too-small tubing and having a stalk above the support brace. Perfect example of what happens when you have a dead tube instead of putting the load at the joint.
Old cut out piece compared to the new mount:
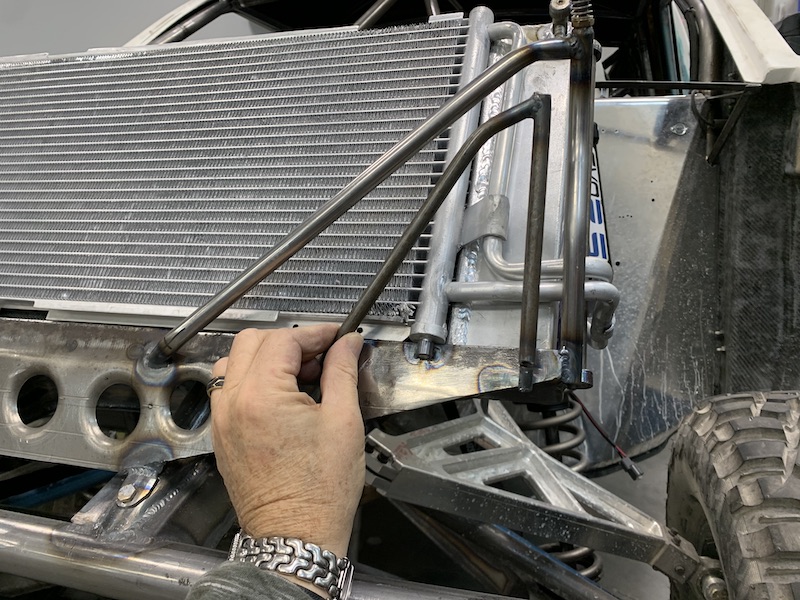
One side done, one side needing to be done:
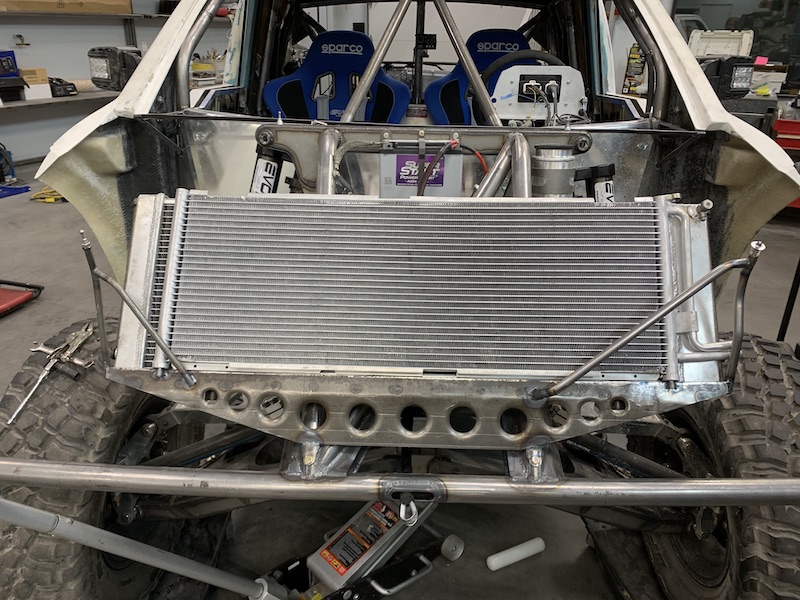
Finished up. Bigger, badder, beefier. Let's hope they're bigger, badder, beefier enough. Thinking there may end up being a pair of screw in mounts where the bumper is. There's a bit more flex in the area on the hood that the grill light bar is attached to.

Now I have to wait for the mud to dry up and then it's back to testing. Been raining (we actually had about 45 minutes of snow yesterday) so I'm not willing to head out and get it covered in wet dirt.
Feb 4, 2021
Uh... Need to update a tad.
But I'll leave this (from about an hour ago) here:
Feb 5, 2021
bdkw1
All ready plowing bush's with the P side. I see how you are.
Me
There was a tiny bit of water in the dip.
My OMAS (Ohio Mud Avoidance System) kicked in and took over.
It's a built in nanny...
Feb 6, 2021
jimmyg
Would rather see you in a helmet but at least you had your hearing protection on. Otherwise what ride!
Me
Flyerrider & Bullnerd busted on me (rightful so) as soon as I got home and the video uploaded.
Originally Posted by Flyer's text to Bull & me
Damn! It scoots! Seems like the rear end is way more planted than what I expected with the short wheelbase. I can't wait to see how hard you can push it when you know the trail and aren't going full Mike with the protective equipment. At least put your shoulder straps on bro! We don't need any more Neanderthals on this text thread.
The "Full Mike" is referring to a helmetless Bull, a CRF450L and about 40 feet of crash marks that he doesn't recall from his very first ride.
In my (lack of) defense, I'd only planned on a neighborhood drive to see how things were regarding heat and the shields. I'd drive a couple of blocks, stop & check. Did this three times (stop & check) and found myself facing the power lines.
Now I've known that the power line road is there - been down another section in the RZR. We used to unload and go in at the intersection you can see about half way thru the video, just before I turn left and follow the power lines on out. Sucks that they closed that off and made it strictly hiking and biking as that intersection is less than a mile from my home.
As best as I can tell, the road is legal if you have a State Land Trust usage permit (I have) plates and an OHV (Off Highway Vehicle) sticker (do not have for the MR yet - Covid has obliterated our license & registration bureau and I've not been able to get an inspection/VIN number assignment). So that little rip is probably quite illegal.
Anyhow, the temptation was too much and instead of stopping and clipping myself into the harness, I got to the power lines, turned left, did the paranoid "I know the cops are gonna show" scan of the area and then found the fun pedal.
It's quick. I thought it would pull harder but I'm not at full tune and there's clutch work to be had.
It handles really well - surprised how well, actually. Goes where I point it nicely and reacts to dancing on the pedals.
Suspension is at full soft - got all the adjusters completely open - and it rides VERY smoothly. I purposely tried to bottom out the front a couple of times and it did so w/o much of a fuss.
I'm also pleased with just how solid the thing feels. Our RZR has a bit of flex in the chassis - it's not something you really notice or makes you thing "stuff's moving", it's just a feeling & sounds (creaks, pops - all totally RZR) and I noticed right off the bat that the MR just feels solid. Even the bodywork was quiet. Good stuff.
Getting ready right now for a 100 mile dirt bike ride. I'll update this afternoon with pix and build progress provided I'm still able to function afterwards.
Feb 8, 2021
A bit outta order here, trying to catch up.
First - DynoJet is killer in customer service.
They sent me the correct unit WITH a MAF sensor (bottom) and said "send the other one back when you get this one" complete with return postage and all. Thank you Dynojet!!
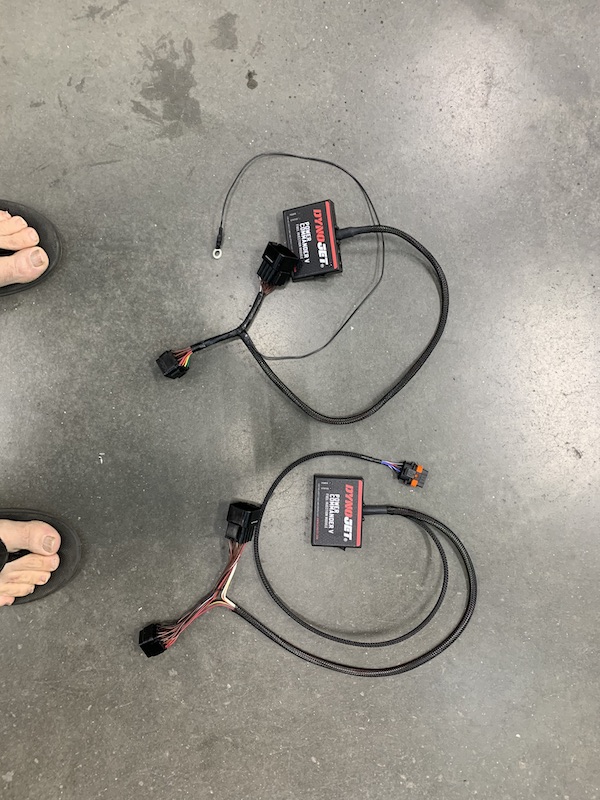
This means the Mini-Raptor's running again. Woo hoo!
Fired it up and ran around the neighborhood, stopping every couple of blocks to see how the heat shield and header wrapping was working. It smelled bad and was smoking (expected some). I headed back to the shop to let it cool down.
The fancy gold shit's burned off but it's left the glass insulation and everything back there actually seems pretty happy. It quit smoking the after the second run (video a few posts up).

Considered adding forced air over the system but after a bunch of conversation with FabDoc and a couple others, I may be trying too hard to contain the heat instead of letting it just flow on out. It seems to be okay now - like it's bedded in. I'll be keeping a close eye on it until I don't think I need to, though.

Here it is idling and warming up before I went on my little jaunt the other day. No smoke at all from the shielding.
One thing that definitely had to be address was that the spare tire was in the wrong spot. It actually touched the rear heat shield so that had to get moved.
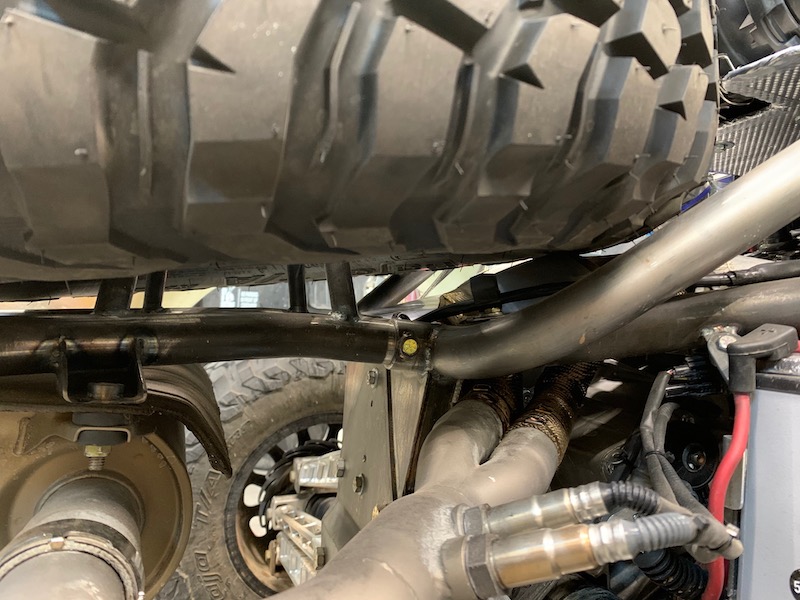
Cut the back tire mount off, reconfigured it, leaned the tire back a bit more and raised it about half an inch.
Shameless 525 Industries tube prep sander placement:


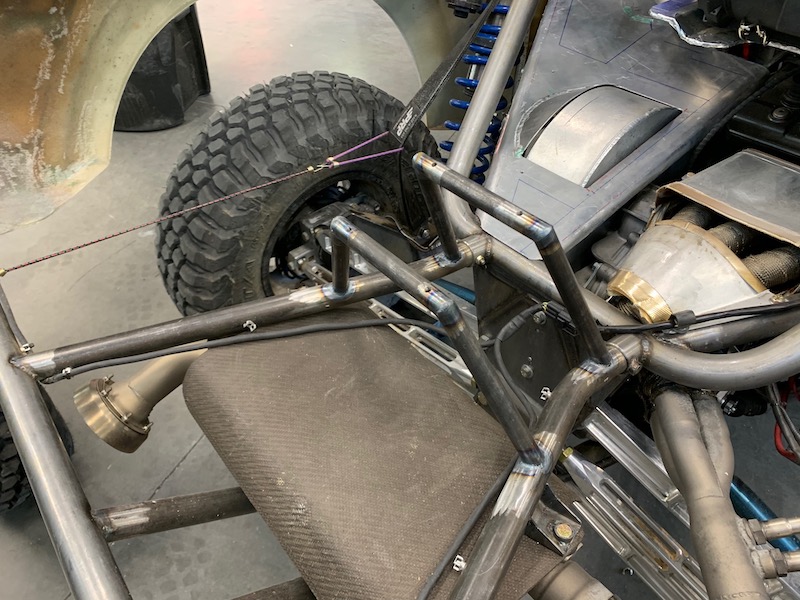
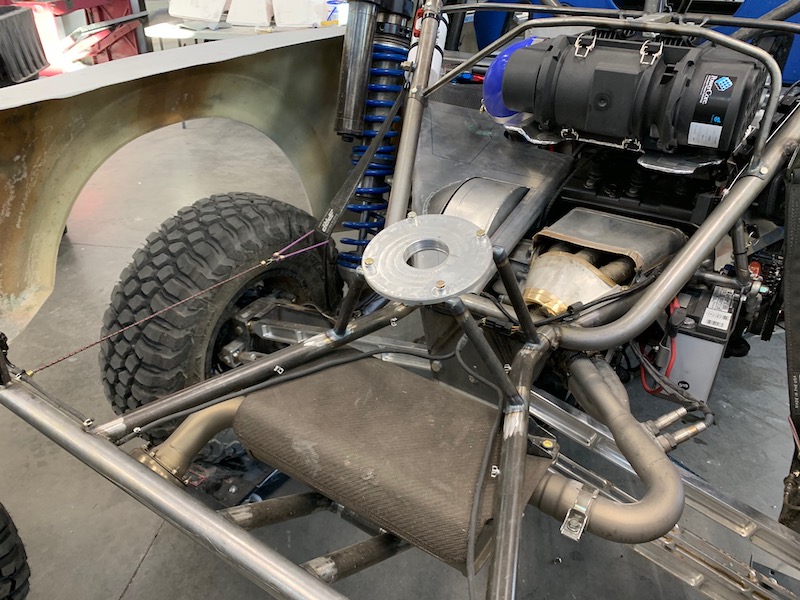
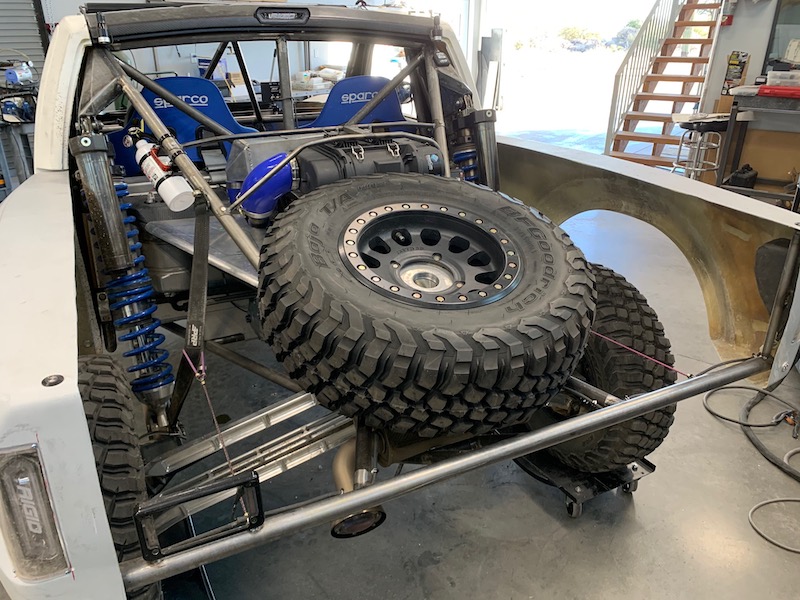
Mo betta clearance, Clarence:

I'll probably make another romp or two around the neighborhood along the power lines here in the next day or so and if all seems to be good I'll head on out into the desert and start playing with things. Still gotta get the Autotune figured out. That should be next.
Feb 16, 2021
Another test run was done today.
Helmet on, goggles in place, ears plugged and harness tight.
Nobody can bitch at me this time (and yeah, I see my thumbs in the wheel a couple of times - was aware and kept telling myself STOP THAT!)
Some stuff better, some not so much.
The Good:
Spins the tires on asphalt - I had to get across the road so I stepped on it - I mean why not? It made me think of riding in the Trophy Truck back in '06. Punch the fun pedal, suddenly can't see over the hood from all the weight transfer and rear end squat. Fun stuff.
Played with shock valving a bit - it's better, but still way light. She bounces badly after a good G-out. I'd just thrown in half a turn on everything to see if that would make any difference.
Engine seems more responsive so I think the Autotune is working correctly. I dumped the last mods it made into it and now I'm starting to see higher boost pressures. Up to 5 psi (of 8) now from what I see on data logging. (just starting to go through that). I need to dump the latest tune in and see what that does.
Locking diff works. Kept wondering why the drive train seemed to spool up and I wasn't getting the drive I was expecting when I first took off in the dirt. Oh, clicky the diff button, yeeee hawww. Open diff in the dirt SUCKS. I drove on the street with it open just to see what it was like in corners on the way to the dirt. I like it for the street.
Four wheel drive - really makes the front end go where I point it very nicely. I like that I've adapted the RZR drive train - know it well, it works well, it's proving good thus far.
I think it may need a lighter roll bar - it rides really flat and the back end is loose - then again, that may have to do with a comment below.
I'm really impressed with just how solid everything seems to be. I'm not hearing creaks or squeaks or sounds that shouldn't be there. I did hear the body tag the front left wheel ever so slightly once.
The Bad:
It decided that it was not going to start last week. Turns over, has fuel, has spark but no vroom, vroom.
Doesn't smell like it's getting any fuel.
Diagnostics time. Hold buttons, turn key, wait, push buttons... Key through the diagnostic numbers. Check injectors (you can key them on/off), each one fires five times. Turn key, vroom, vroom. Hmmm....
More diagnostics:
05 - air temp reads 22 (not sure if this is F or C yet)
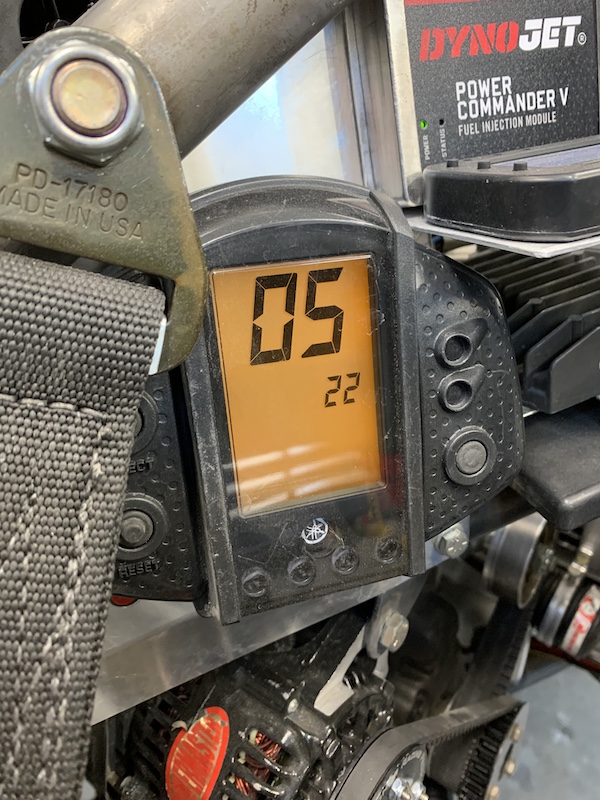
06 - water temp reads 68 (now I'm thinking F as it's 68F in my shop) Okay, this is weird.

Make a call to good friend and killer mechanic. He says he's guessing that it's something to do with the air temp sensor (we're both thinking F). Okay, all good. Easy enough to get online and order one. Have it the next day (needed some other stuff from Rocky Mountain so it was convenient).
Today: Plug in sensor, same.
Okay, let's check ECUs - change out, same.
Shit.
I checked the resistance and connections on the air sensor and all was correct.
Make another call to Don and discuss.
Start reading codes and stuff from the service manual and start realizing things are in C. So it thinks the engine's warm therefore it's not going into "choke" mode. Unplugged the water temp sensor, turn the key and vroom vroom.
YAY!
SHIT!
The water temp sensor is the hardest piece to get to.
I checked it's resistance reading against another one that I have and the resistance reads quite differently between the two. I need to get to the impossible to reach plug and attach the loose water temp sensor to the harness and see if it thinks things are good.
Coming home the rear feels loose. Almost like it's trying to steer a tad...
Dat's not good.
Get home wiggle wheel, rear wheel bearings are loose - both wheels wobble badly. Gotta jack that up and figure out what's gone bad.
Muffler cover decided to go poof and of course, burned up some wire (fortunately a short easy to replace piece).
It did this when I parked in the garage.
Got out, saw a little bit of black smoke and orange fire, walked over, blew it out and if it had decided to go big I was gonna push the bitch out of the garage and walk away. Gonna pull the carbon off of the shield, go get some Cerakote, coat the aluminum shield and be done with it.

"Oh, oh, oh, my truck's on fire"... (only Bruce Springsteen song I can stomach - that dude is HORRIBLE)
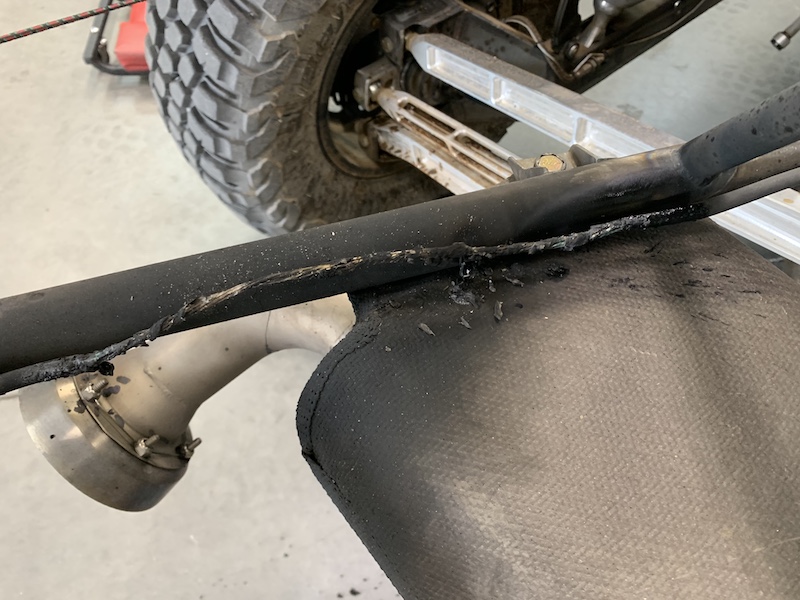
The front shielding seems to be content.
Yay...
Secondary clutch temp sensor is acting weird. I checked the connections and things seem good. More shit to look at. Last time it was a cold solder - tiny wires are tender and easy to do that too.
Oil temps were high - 235F Need to look into this. Not really sure what high temps are for a sled engine but that seems too much to me.
Oil temps stayed pretty consistent so maybe it's good? Research time.
Water temp on the dash is legit - and a tad high. I'm not sure that the rad fans were getting activated (that's supposed to be controlled by the Yamaha ECU - does it through diagnostics).
Fuel regulator has decided to leak. When I got out I see a small puddle under the car. The whole clutch side is covered in wet dirt that stinks - this thing is determined to go up in smoke. If it tries hard enough I'm gonna step out and walk away.
I'm becoming f'n tired of this project again. SOOOO close and then more Gremlins. I know they have to be weeded out but man...
Got shit to do this week so I'm gonna step away from it for a bit.
Grumble
Grumble
Today's run part 1:
Today's run part II:
Feb 19, 2021
Okay, maybe not as bad as I thought.
Made some washers and stuck em' in. They're not as flexy flyer as the OEM units. Double stacking, they still go slightly conical but nothing like the OEM squishies.
What the single OEM looked like when removed:
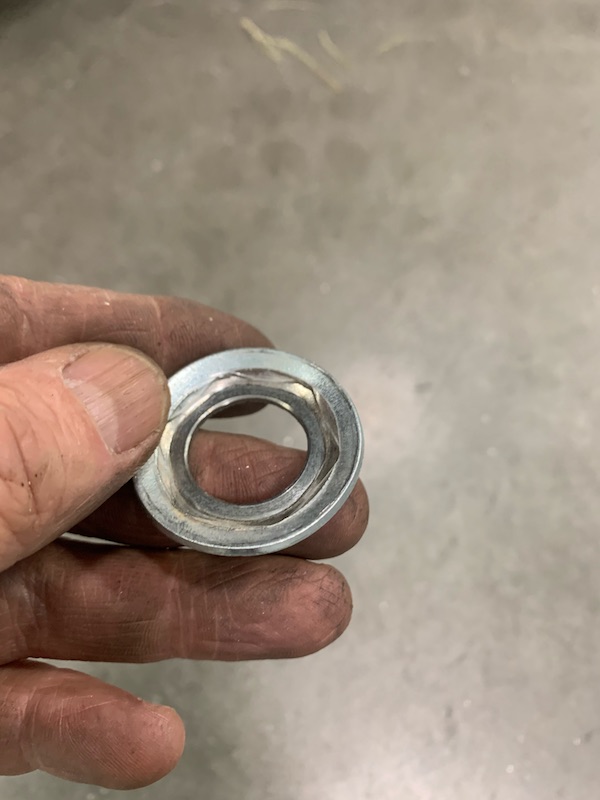

My new pair next to the old one:

Tightened everything up to spec and all the wiggle is gone. Think I've dodged a big bullet. Checked up front and they, with the double washers, are just fine.
Now it's find the fuel reg leak. 90% sure it's on the input side and is either the AN fitting not being tight enough on the nipple or the nipple's sealing ring is compromised. It's that harder white plastic stuff and I think it needs to be an o-ring or a brass washer instead.
We'll see...
Also talked with my buddy Don and discussed oil temps. Said that 235F is absolutely fine.
Told me to set the alarm at 335F.
His old (absolutely monster of an) XR650 ran 320-340F all the time and it never had any oil related issues.
Mar 4, 2021
Okay, I think things are in order.
First thing to address was the water temp sensor. Since I had to pull the intake system off (it's really not that bad) to fix a fuel leak due to Shit Ass Chinese AN fittings I was able to get to the sensor with no issues. Pulled the old one out (not a drip of fluid escaped - and I even put a vacuum on it to make sure there wasn't an air bubble), checked it's resistance and then the new one and yeah, they're way off. Old one went straight to the round file, new one in the manifold.
Went about replacing three of the Shit Ass Chinese AN fittings with good old Russel fittings and now there's no leaky, leaky anymore. Well, there is oil leaky, leaky around the stator cover but that's something to mess with when I pull it all apart for painting.
Fixed my fire damaged wire harness on the rear bumper, plugged everything in and hit the starter button. Vroom, vroom - she starts right up like she's supposed to. Stupid smart engines! One sensor decides to report badly and everything goes to shit.
--------------
While I waited on UPS to arrive with the fittings I got the final piece of the puzzle for being street legal installed yesterday too.
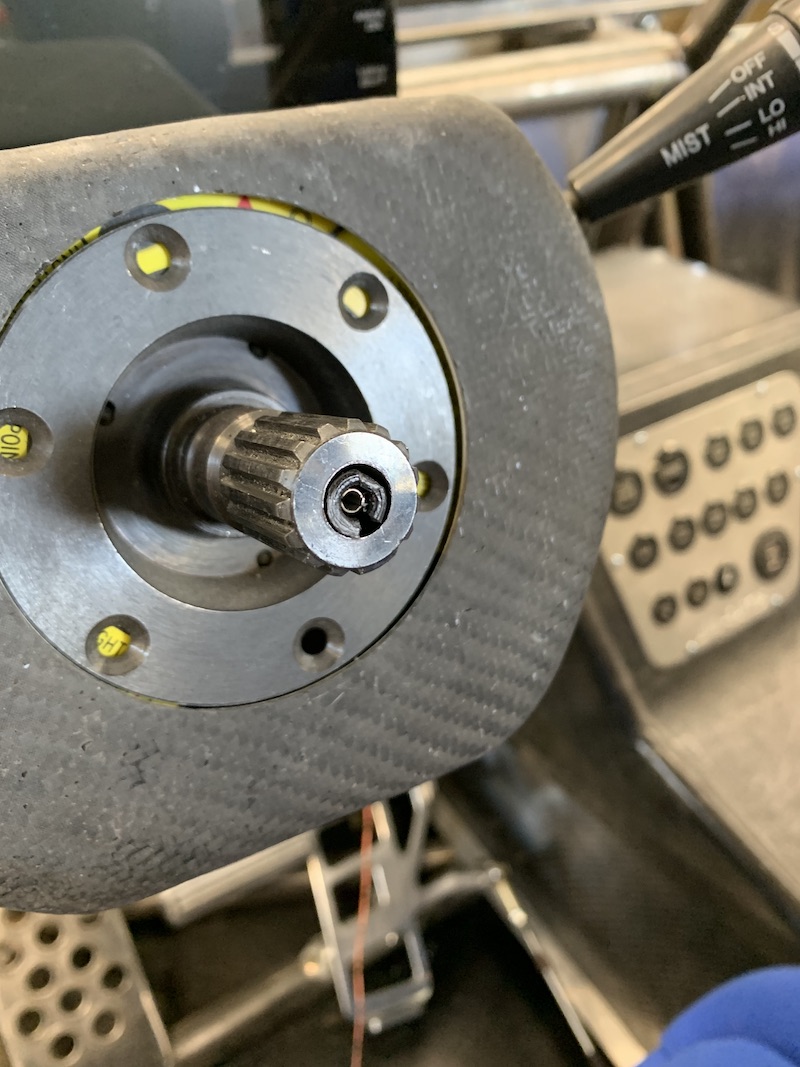
It may not quite be modern F1 (probably more like 1980's) but I have a quick release steering wheel with ONE pin that gives me horn control.
Modded a set of Delphi plugs, made a piece that locates the male pin in the quick release and then shoved the female part into the steering shaft.
Female receiver:
The little plate that snap fits into the back of the quick release and holds the male pin in place:
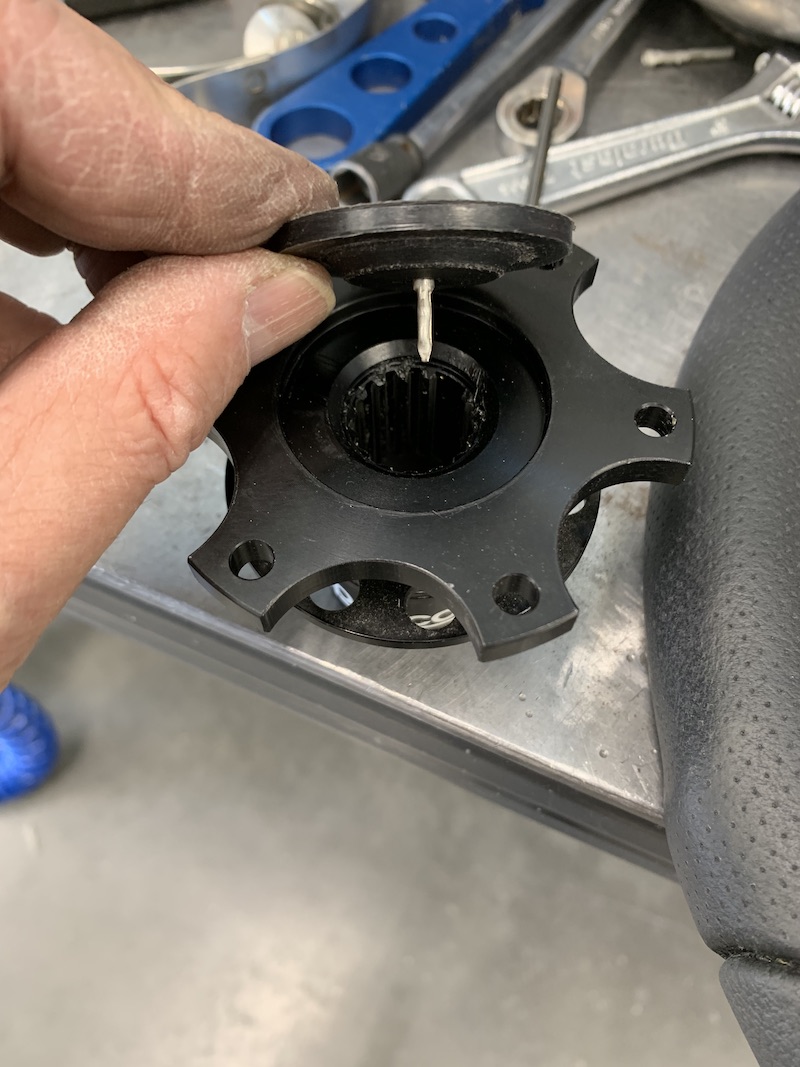
Here's the pin and adapter in place in the quick release:

And the finished steering wheel ready to snap back in place:
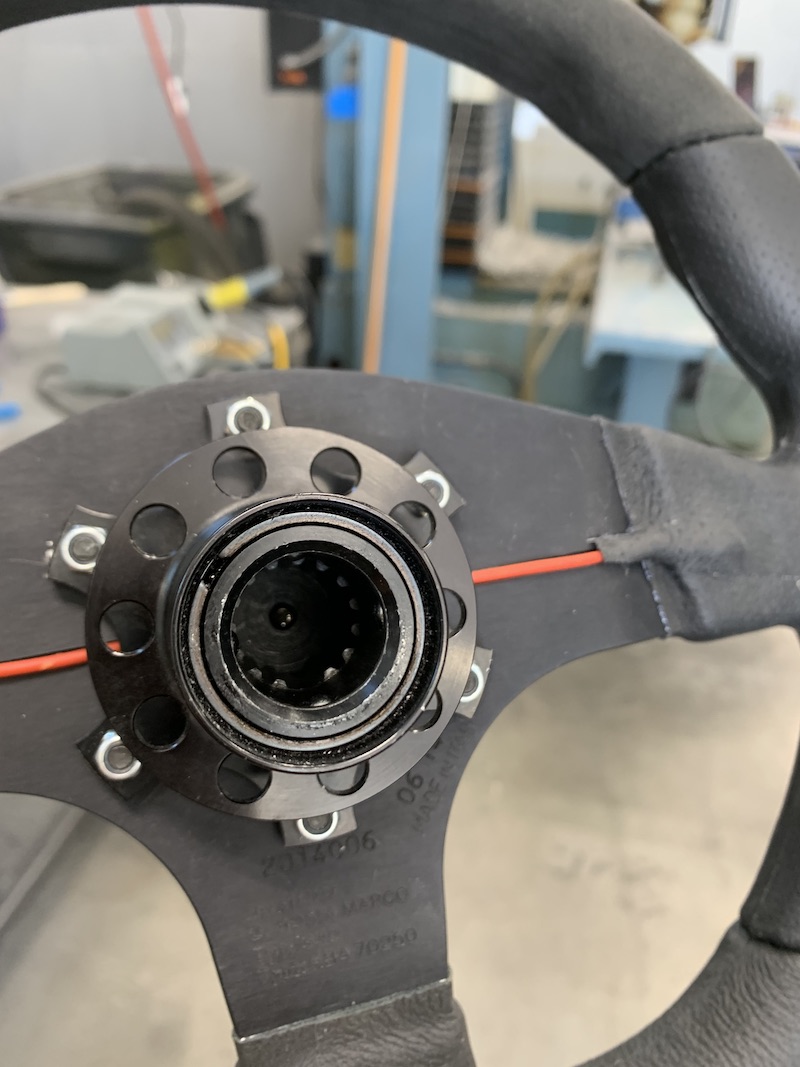
Had my first go around with the AZDOT in the process of getting a VIN assigned and plates.
I thought the inspection was going to be the tricky part. Walked in with my pile of receipts and such ready for battle.
Nah, the guy was VERY cool (he was all about the Mini-Raptor) looked until he found numbers on the sled engine that matched the paperwork and then disappeared into his office.
Came out after about 5 minutes with (more) paperwork and a neat little blue and silver metal sticker with an AZ assigned ID number. The Mini-Raptor now has a VIN. I asked if he wanted to see any of the "street stuff" like brake lights, turn signals, running lights and such and he said "Nope, got what we needed."
Next was the plate department. There's where it began to be a bit of a pain (now two steps). Gave them all my paperwork, all the paperwork the inspector gave me and she starts typing away. Had me fill out another form explaining where parts came from and such then tells me I need a surety bond since I don't have the original copy of the sled title (it went with the engineless sled after I stripped it).
So now I'm waiting on my insurance agency to get my bond so I can go back and stand in line for who knows how long.
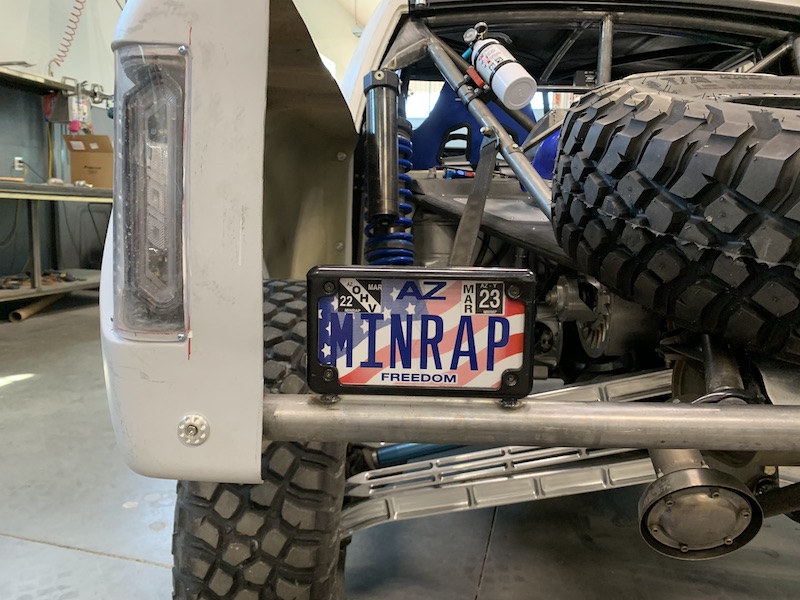
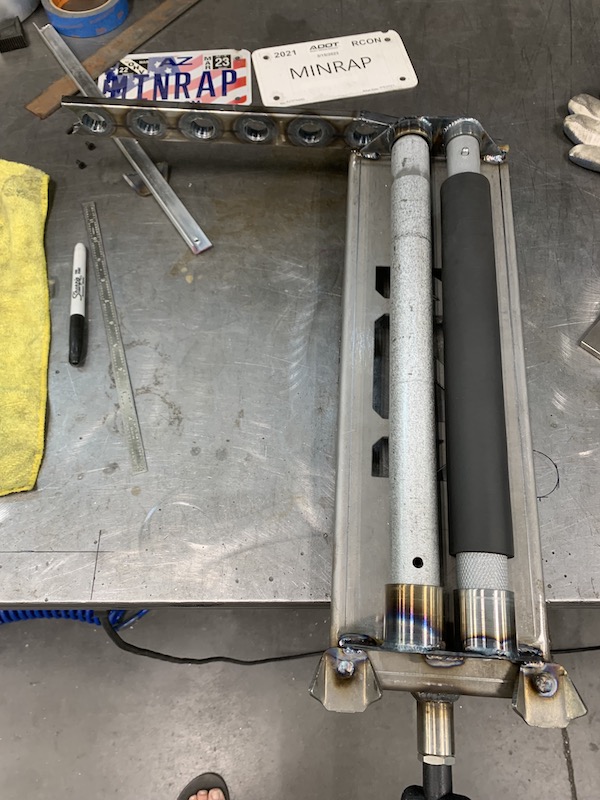
I'm tickled - I'm gonna be able to get a personalized plate with "MINRAP" on it. WOO HOO!!!!
For the record, I had to represent whilst doing stuff on the MR.
Thanks TALON!!!
Hate having to wear these stupid masks...
Mar 4, 2021
Second step - titling & registration.
(Expanded recap) Itty bitty woman (of whom had an itty bitty mask covered voice "What? Excuse me?") looks papers over.
As what seems to be part of the DMV process she has to go ask someone else questions.
Comes back and tells me I need to get a surety bond (I believe stating that I purchased engine legit - had copy of title with record of when I bought and sold sled) in the next 24 hours and come back.
Okay.
Google search, phone call, discover insurance can do this.
More calls, numbers traded, codes given.
(End expanded recap)
Email arrives with proper paperwork. I print my bond and add to my pile.
Off to the DMV again.
Wait in line outside, guy comes and asks people their business, gets to me, I say coming back with paperwork, he says come with me.
Cool, I got the golden ticket! Or an orange card with a B in the middle of it. Either way, I'm in.
Wait in inside line.
La, la, la...
I hand her my pile of papers and explain that I'm back with my surety bond.
She, in proper DMV form, says "I need to talk to someone." gets up and walks away.
She stops the itty bitty woman that helped me earlier.
They turn towards me, I wave, itty bitty woman recognizes me, looks at paperwork then says something to woman helping me.
Woman comes back and says "You need to wait 24 hours for the bond to set in, not come back in 24."
"Oh."
I go back tomorrow.
Good thing is she said I have all the correct paperwork.
Mar 5, 2021
STREET LEGAL!!!!
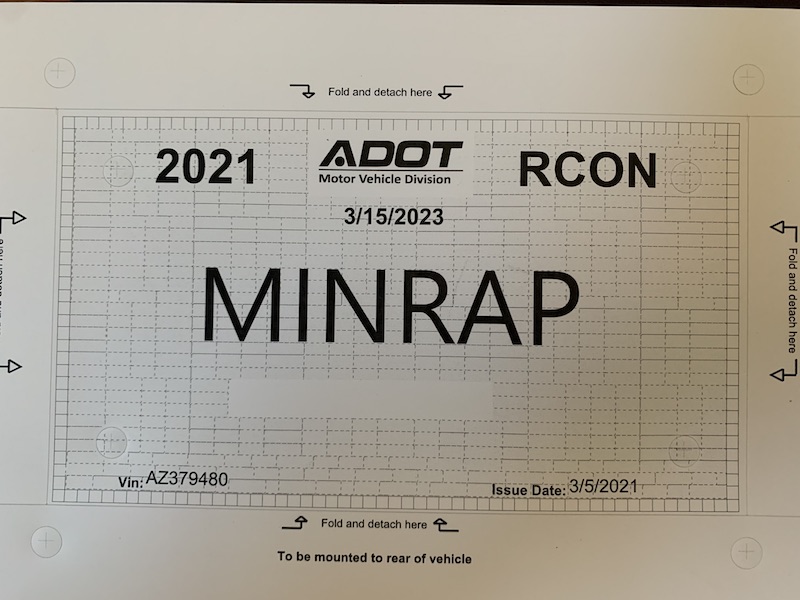
Had to laugh at/with the guy behind the counter at the DMV. He was VERY cool and I had a good time dealing with him.
As I request the personal plate he asked (required) "What does MINRAP stand for? I'm guessing Mini-Raptor, nothing else?"
I said yes then proceeded to ask "What if it's code for big boobies?"
He laughed and said "That would get it flagged. I think Mini-Raptor's probably the correct response."
Carbon time.
Making a new cover that goes over the clutches since the last one went poof in da fyrah.
Two layers of carbon, one layer of fiberglass and one layer of fiberglass veil is the make up of the panel. Oh, threw a couple stiffeners in to see how they work and such. They'll get used in the door panels so I figured this was a good place to give 'em a try.
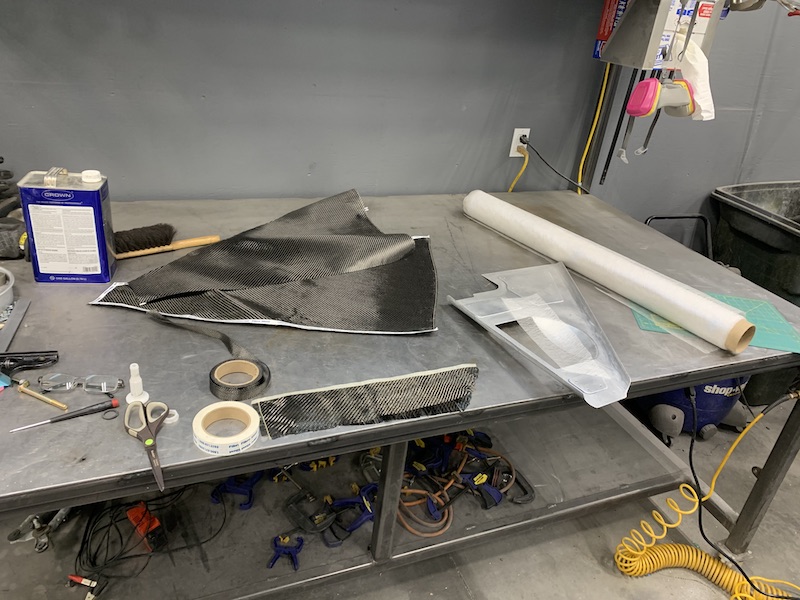
Little trim detail between the hump and the main body panel section. I like using the 1" wide tape for covering where stuff meets.
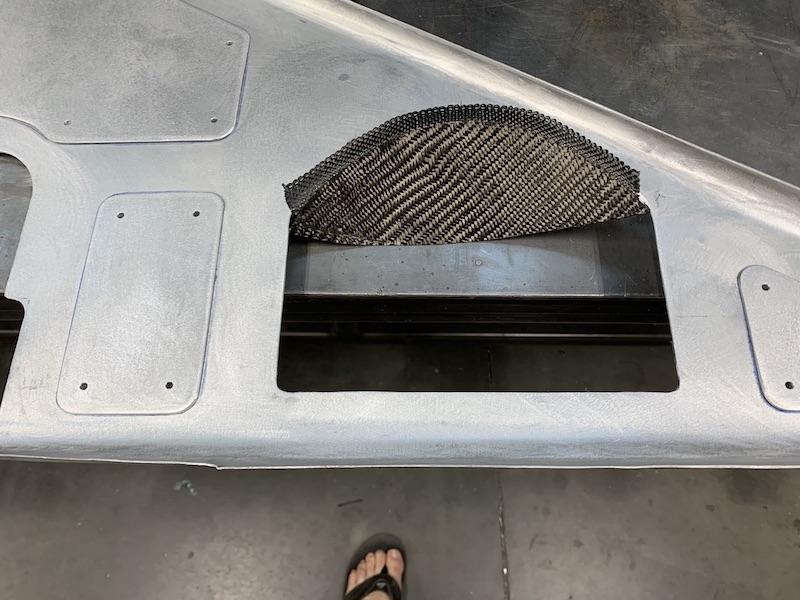
Everything cut and placed in the mold:
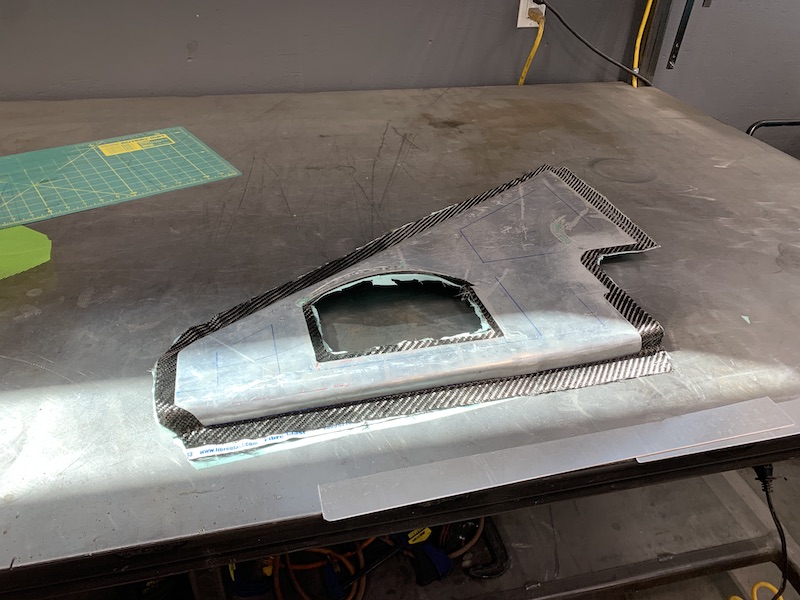
Pulled it out so I could clean up the mould and get ready for infusion.
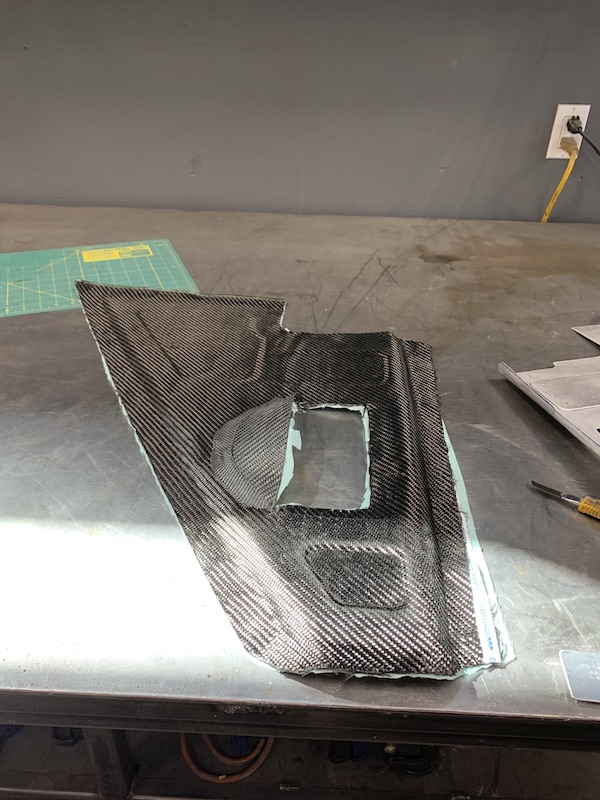
No leaks! Always a great start.
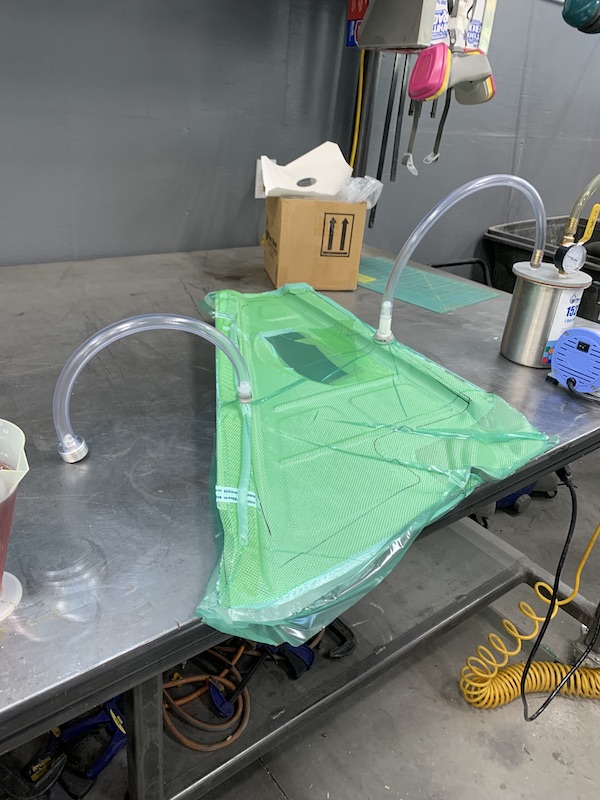
Infusion in process.
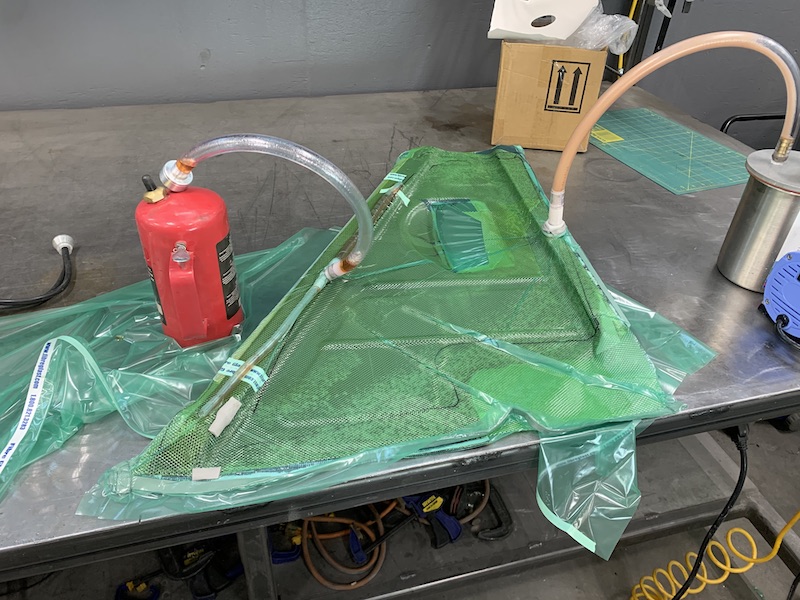
70 minute epoxy my ass. I've mixed the stuff half a dozen times now and it doesn't start to set for closer to four hours. Yeah, I've checked all the variables too - temp in range (68-72 depending on time of year), I've mixed according to weight, according to volume... Always have to walk back and forth between the shop and house four or five times every evening when I do this stuff. Works out, though. I make sure all is good and leave the little vacuum pump running over night and in the morning I usually have a part.
I pulled the bagging and peel-ply off this morning but didn't get into trimming and removing it from the mold - gonna go do that in just a few (after I'm done sitting here typing all this stuff.)
Got my OHV sticker in the mail yesterday.
I am COMPLETELY legal now! WHOOP WHOOP!!!!
Gonna pull loose one of the sway bar links and take 'er for a spin and see what it's like.
Update on the day (it's been good).
Panel came out pretty sweet. Dumb Ass (me) once again forgot to apply release agent on the mold so I had a bit of a fight getting the carbon out.
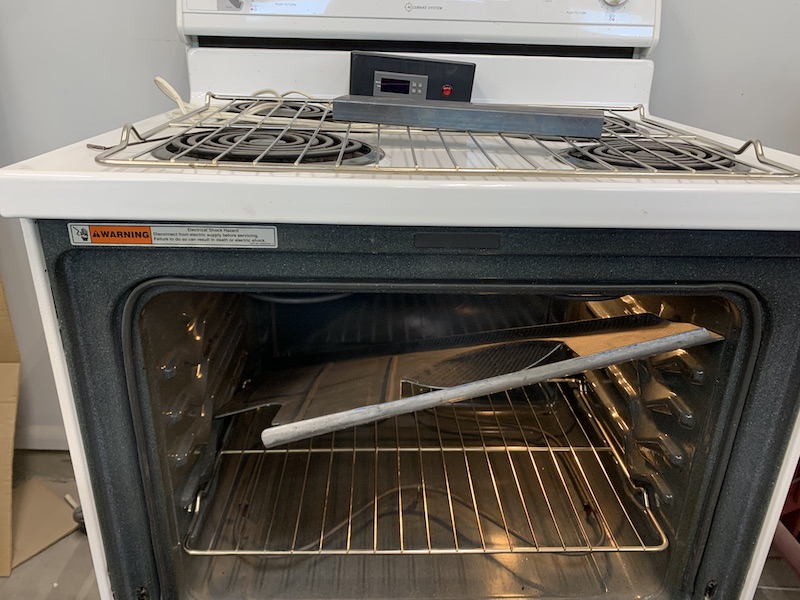
BUT - the epoxy still hasn't fully set up and hardened so it's slightly flexible. This made popping the piece out easier but it was still being ugly so I got smart(er?) and put a little heat to the aluminum panel and the flexy fiber came right out. I cleaned up the mold, put the panel back in (it pretty much clips in) and then stuck the thing in the oven at 180 for 8 hours as instructed.
Starting to pull the piece out of the bagging:
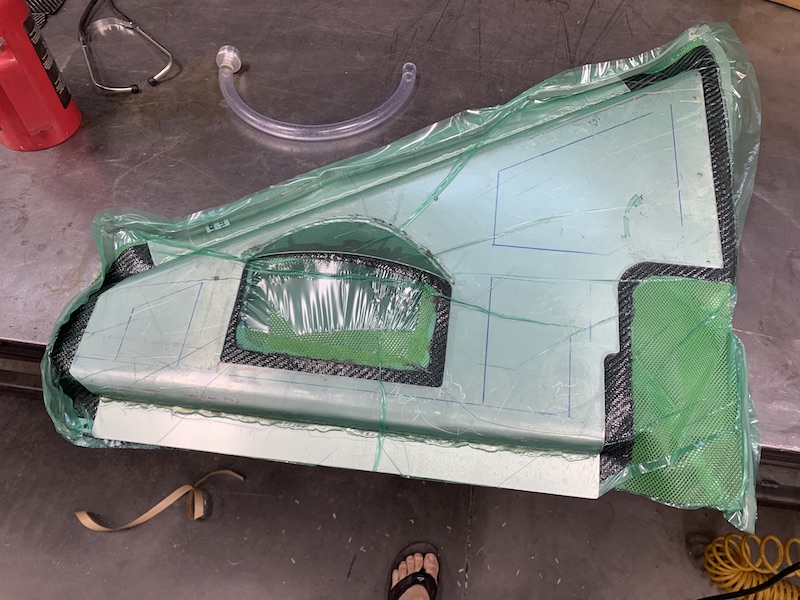
Looky here! Dumb Ass (me) remembered to use peel ply this time. See how the old burnt up one still had the infusion mesh firmly epoxied into it? Not this time!
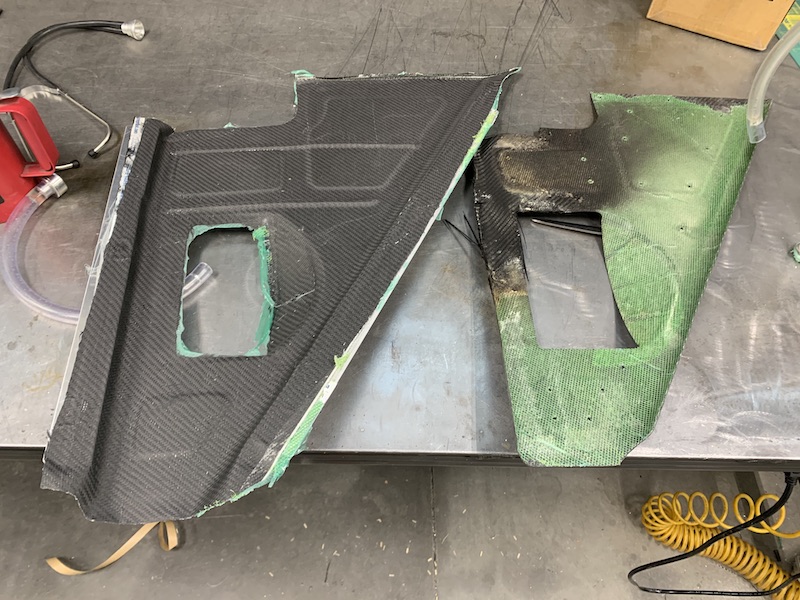
Trimmed and ready for install once it's not a floppy piece anymore:
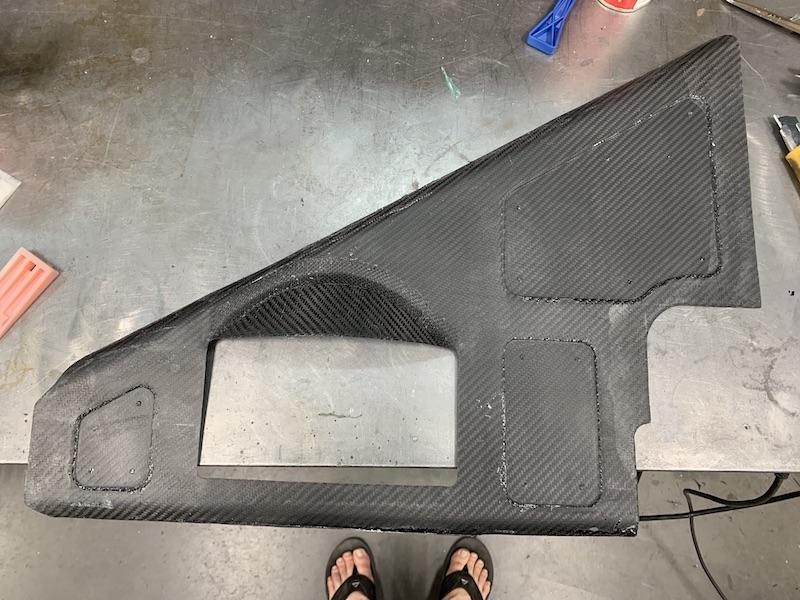
So off to the oven with it - and it just barely fits. Kinda had to play Tetris with it to get the door shut. If you hold your tongue just right it all works.
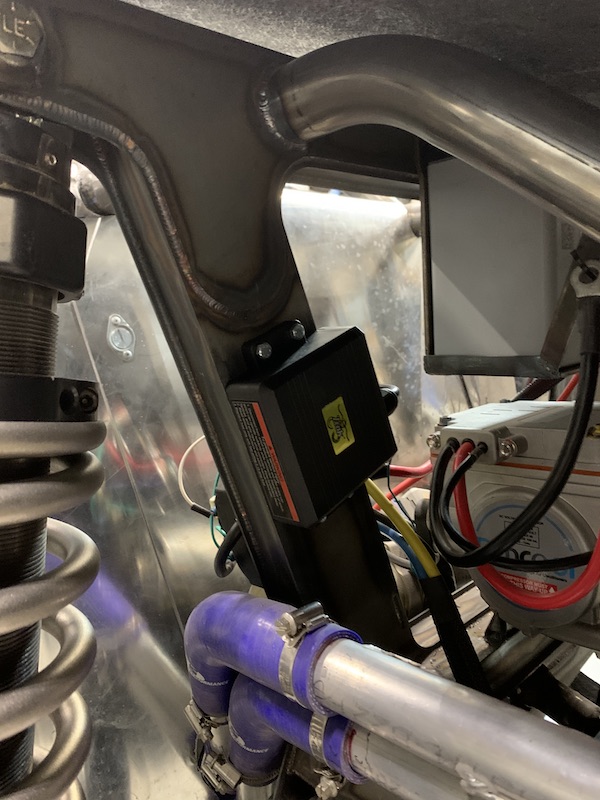
Got a magic black box installed too. After all, every build needs a black box, right? It's the wireless winch control.
Mar 15, 2021
Panel done and I'm pleased with the results. Had a little bit of porosity around the aluminum accent covers but it's nothing I can't live with.
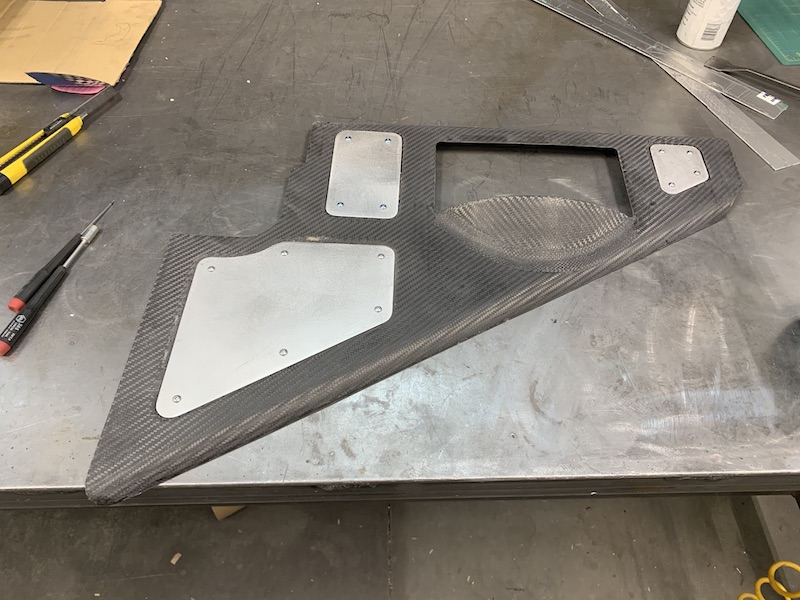
The panel mounts to one of the frame tubes and to the panel that covers the oil sump tank. The part over by the engine floats. Can't attach it to the engine or the tubes that support the intercooler as the engine and trans are rubber mounted (using OEM bushing mounts) and that allows movement.
I was able to support the inner part of the panel a bit by built in stiffness (rounded edges make it quite stiff in the front to rear orientation) and also by putting a small mount of tension on the point where it and the sump cover meet. It helps pull the panel "up". Still, I know things like this are gonna vibrate and move and such so I went ahead and made a floating mount for the panel.
Took some Delrin, rounded the edge the panel will ride on, cut out a pair of Nuuuut Pockets and bolted it to the clutch cover.
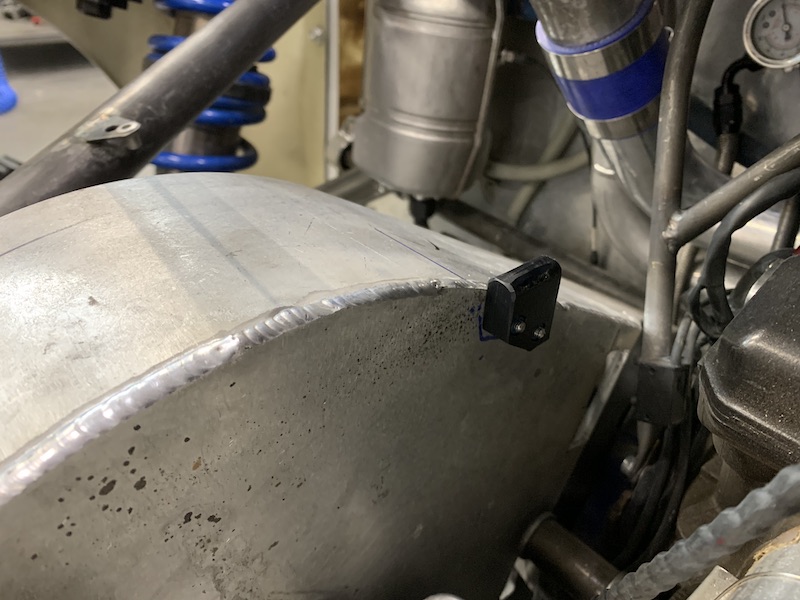
This makes me happy.

Kustomfab dropped off his project last night (looks really good and is a lot larger than I expected it to be) on his first scouting mission out here and as a bonus is leaving his bead roller too.
He's trading in the snow of WI for the sun of AZ so I offered up some storage while he moves. I know the logistics of trying to move a household and vehicles across country so I figured I'd help out. Why not, it's what ya do for good people and I have storage room.
This means I'm going to learn how to operate a new tool and/or smash/pinch fingers and make up rear panels for the bed area and inner door panels (which will probably become molds for carbon) with it.
Oooohhhh... I wonder if I can do the hood louvers with it?
Light bulb moment as I sit here typing. Put it down so I don't forget, otherwise I'll find myself standing in the middle of the shop, staring at the tool thinking "There was something else. I know there was something else... And where the Hell are those damned injectors?"
Mar 16, 2021
Knocked out a couple things today - quite productive.
Spare tire UFO holder downer thingy was marring the rims and I'm afraid of galling so I cut out a clip on Delrin ring: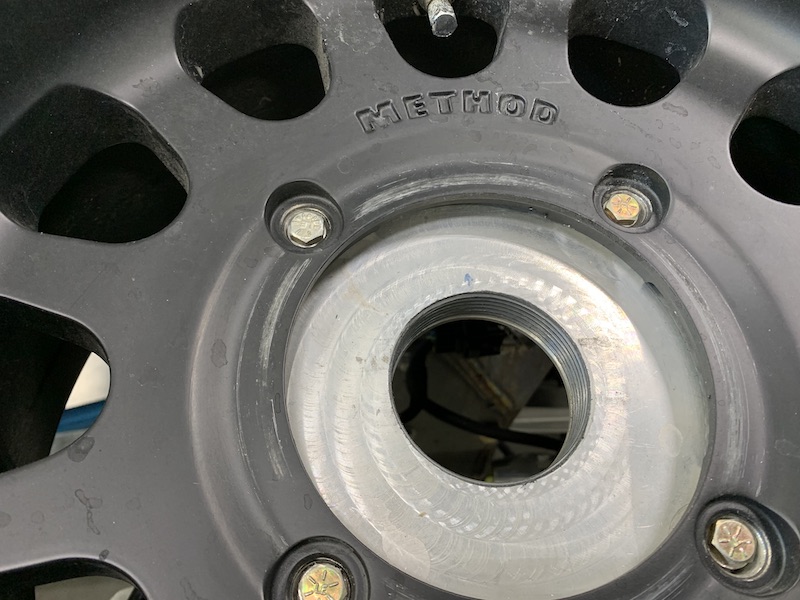
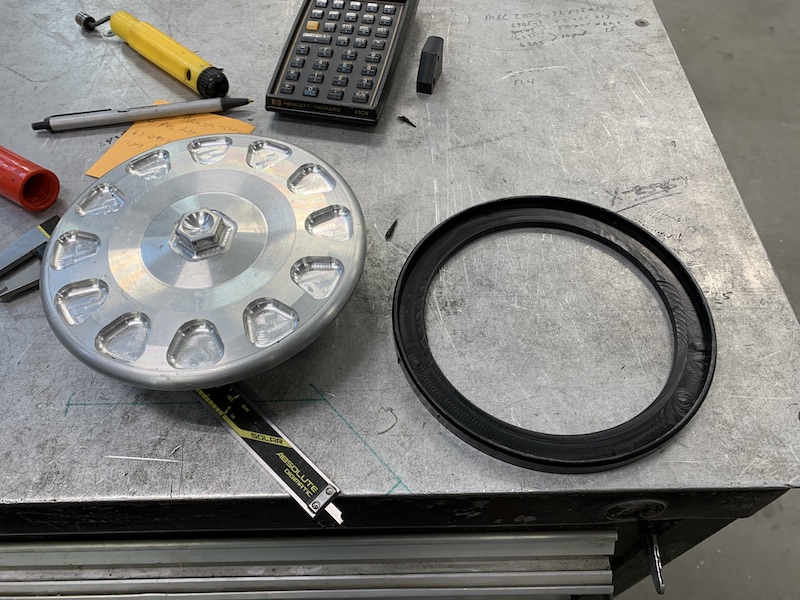
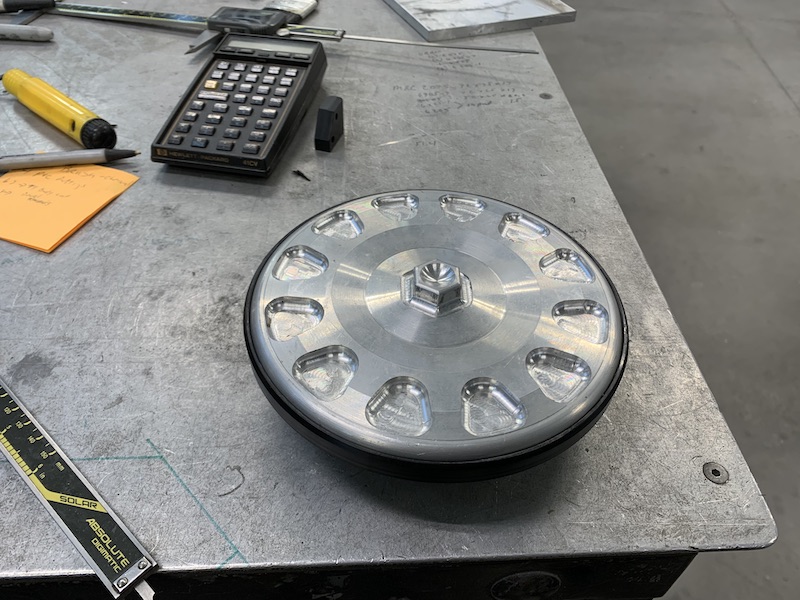
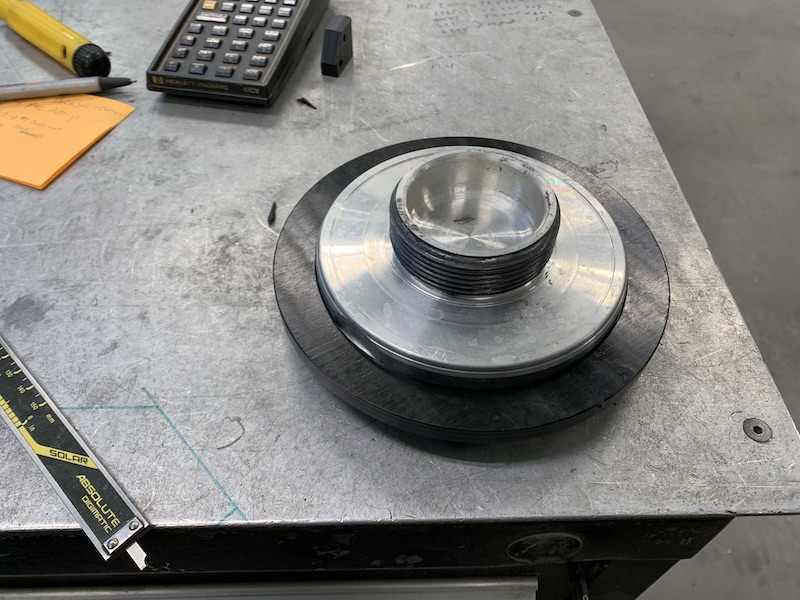
I still worry about the course aluminum threads where it screws into the mount. - will keep lots of anti-seize on it (keep thinking I may make a Delrin threaded sleeve, kinda like a thread insert.
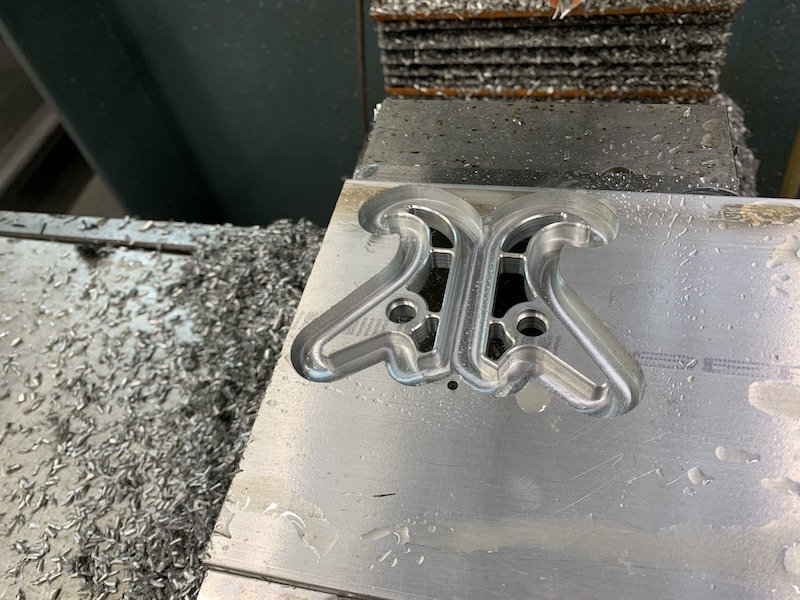
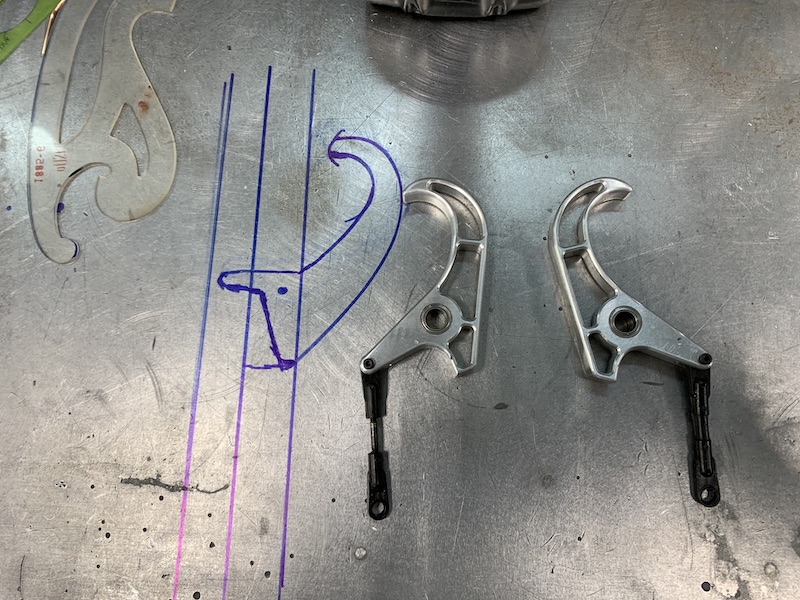
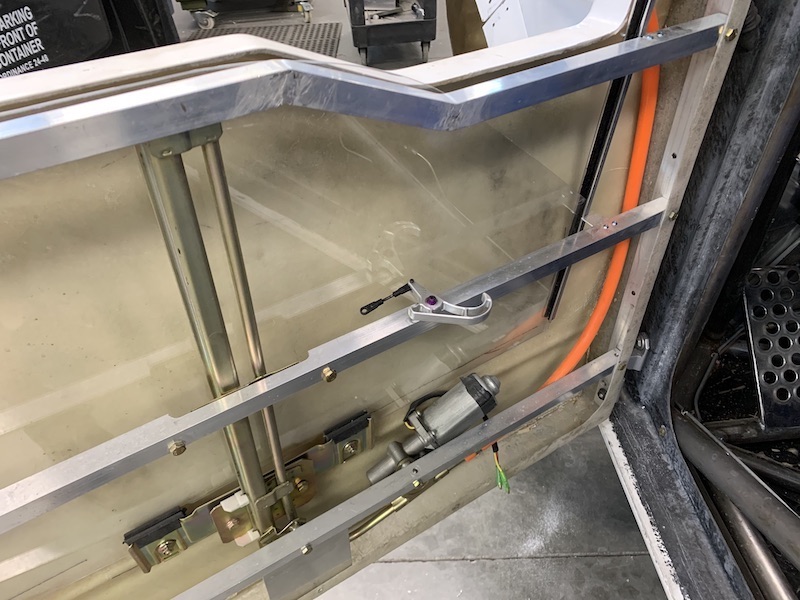
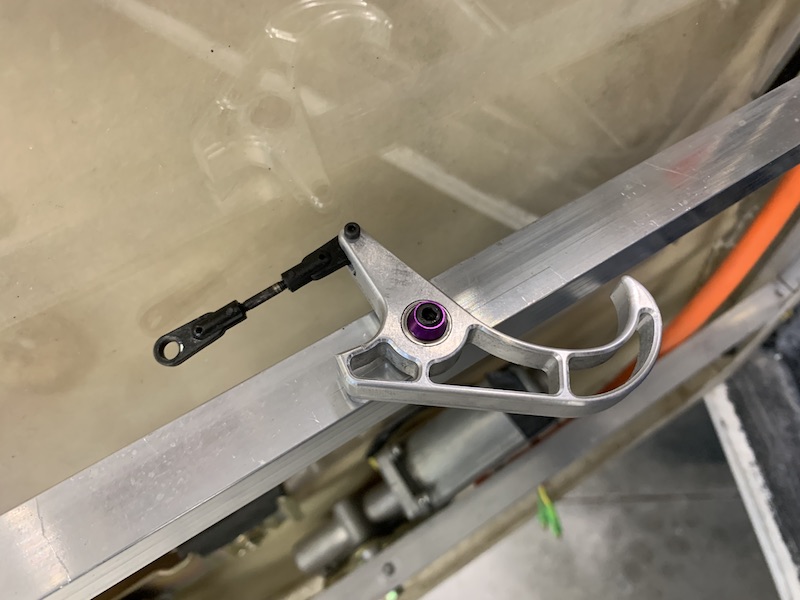
Also got the inner door handles made. They pivot on bearings and are going to use R/C helicopter heims.
I need to go find some bicycle control cable so I can make actuation cables - Amazon next stop on internet.
Here they come out of the billet:
Came out pretty close to the concept drawing:
Installed and ready to run:
--------------------
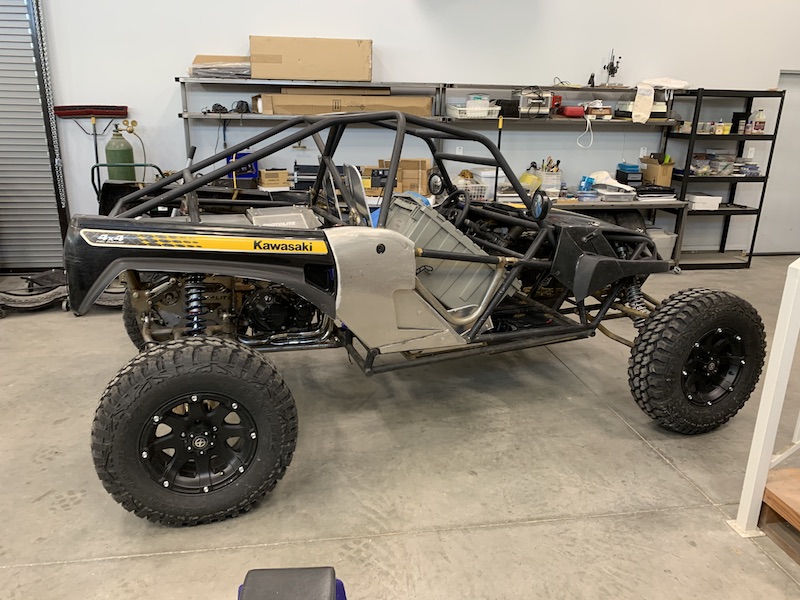
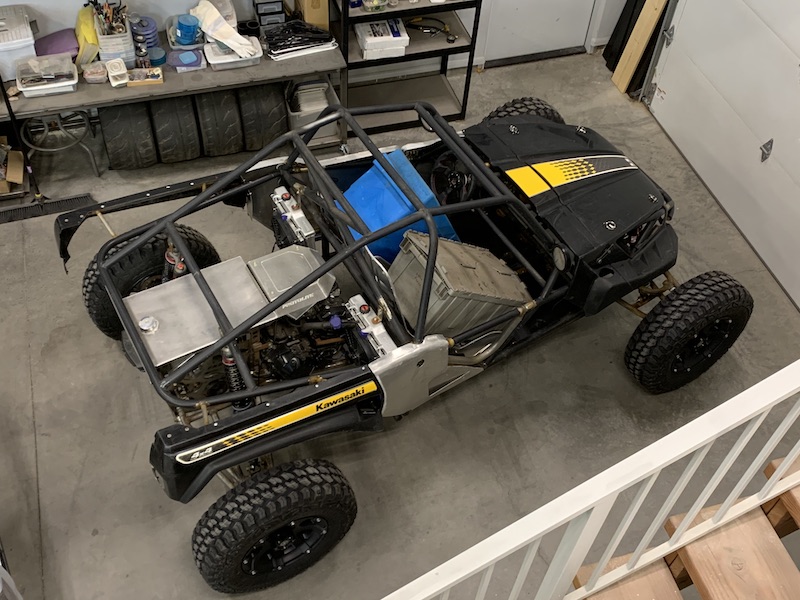
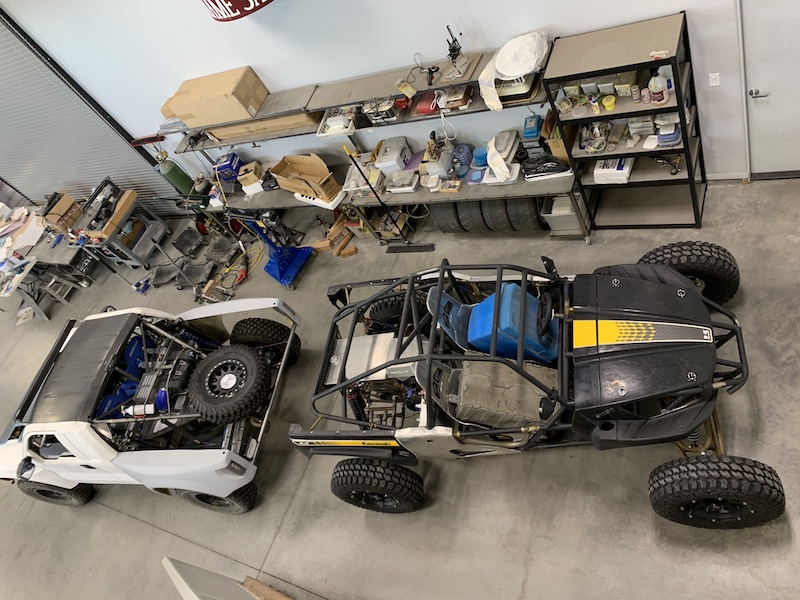
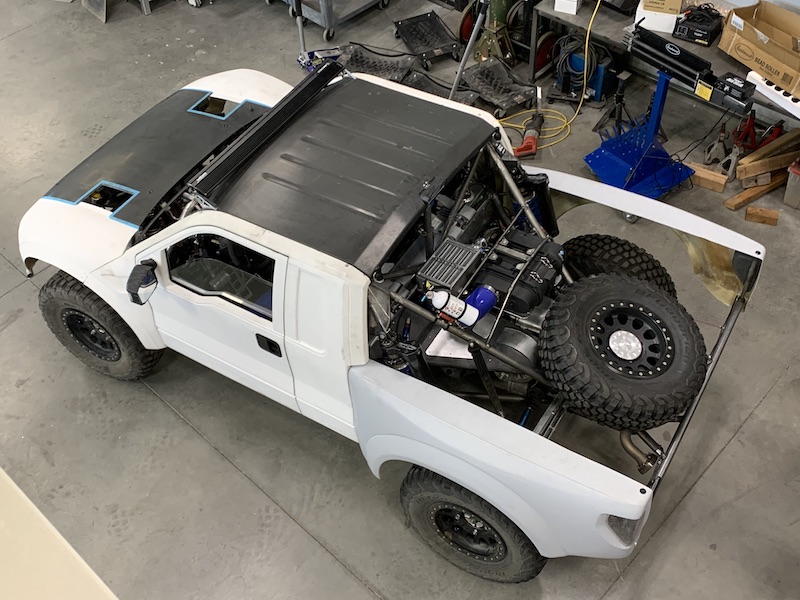
Side note - Kustomfab2000 dropped his car off for a while. Told him I'd store it while he runs away from WI.
Anyhow I was surprised at it's size and snapped a few pix of his Proto-Die based ride and the Mini-Raptor from a couple points of view.

Mar 20, 2021
Inner door latches finished. Pretty impressive what you can do with R/C airplane hardware, some bicycle brake cables and a little engineering ingenuity.
Saw a DIY cable end making video a couple of years ago so I set about making ends that would fit into the door handles and pivot:
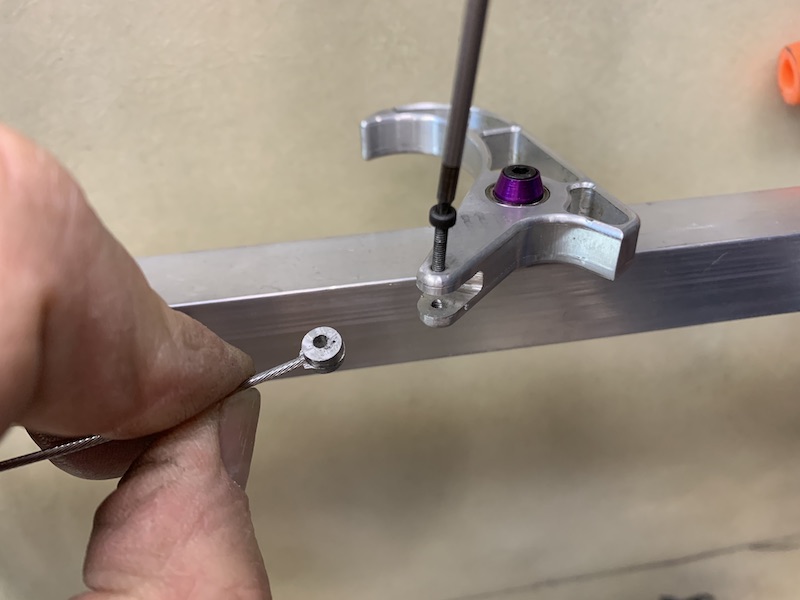
Movement limiting pin in place and cable stay mounted. The stay has .200" of adjustability for pulling slack out and such.
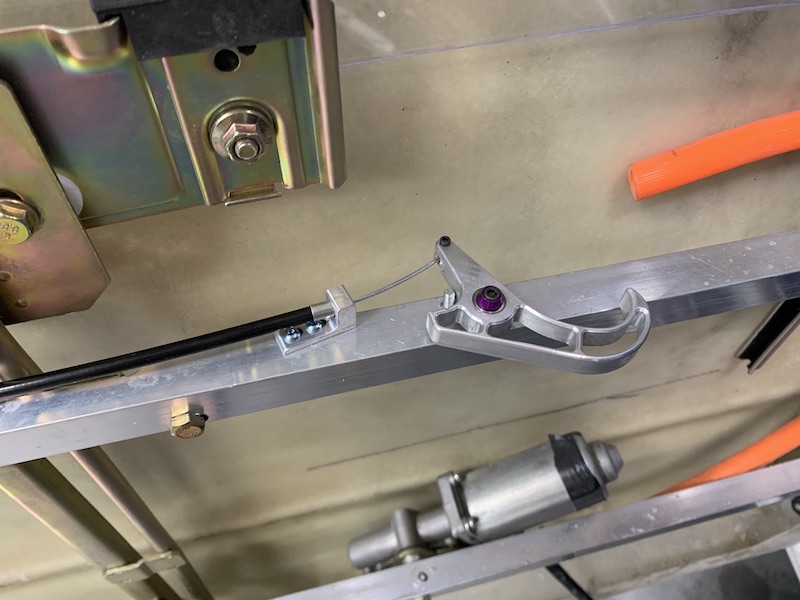
Came across a piece designed to adapt a control wire to a servo arm. It pivots, it has a through hole and a set screw hole. I figured this would work perfectly. It does work, just not quite perfectly yet.
The little hole in the elbow on the actuation lever was a perfect spot to attach a control cable so I did.
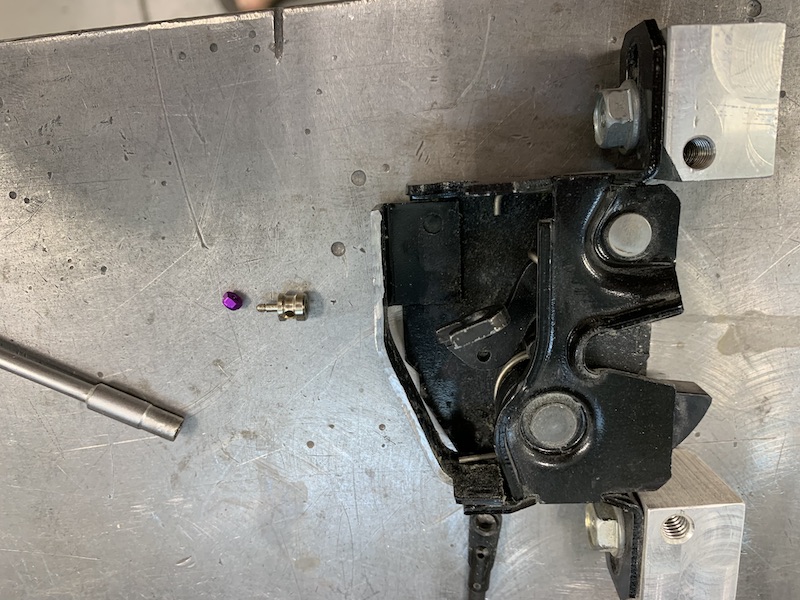
You can see where I mounted it - purple lock nut.
The little cylinder with the tit on it is the cable stay/mount. It got pressed into a hole I drilled on the bottom of the latch.
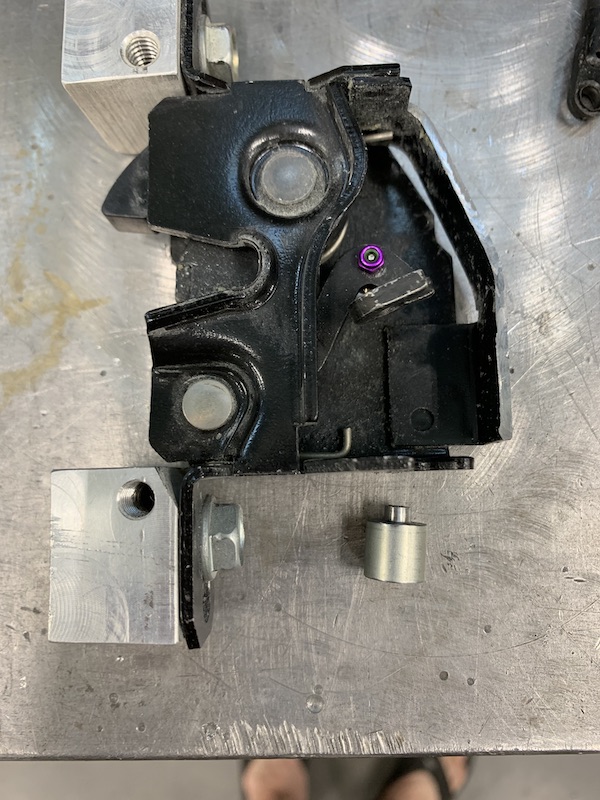
Here's the original idea on the setup. The actuation cable got the set screw treatment in the adapter. It works but it doesn't let the cables float. When I open with the outside handle it actuates the inner handle. Not ideal. While dicking around with it all I noticed that the actuation arm moves away from the cable and the loose end of the cable floats. I ended up pulling the set screw out of the adapter and putting a locking collar on the end of the cable. The cable now floats. No pix - it's tight and hard to see (and get to).

Driver's door all set up:
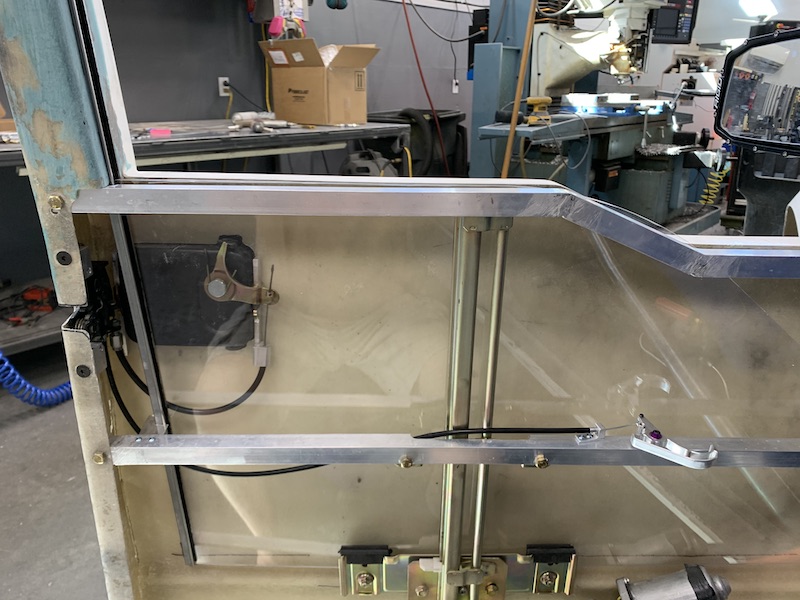
Passenger's side. Paid no attention to the fact that the latch is universal and not left/right so I cut two actuation cables of the same length (driver's side) while I was doing the first one. Yeah, I know better... Ended up having to make a second cable and sheath. The passenger side ends up being about 4" longer. Regardless, it works too (actually better than the driver's side - there's a small amount of hang up on the door latch that I need to adjust out).
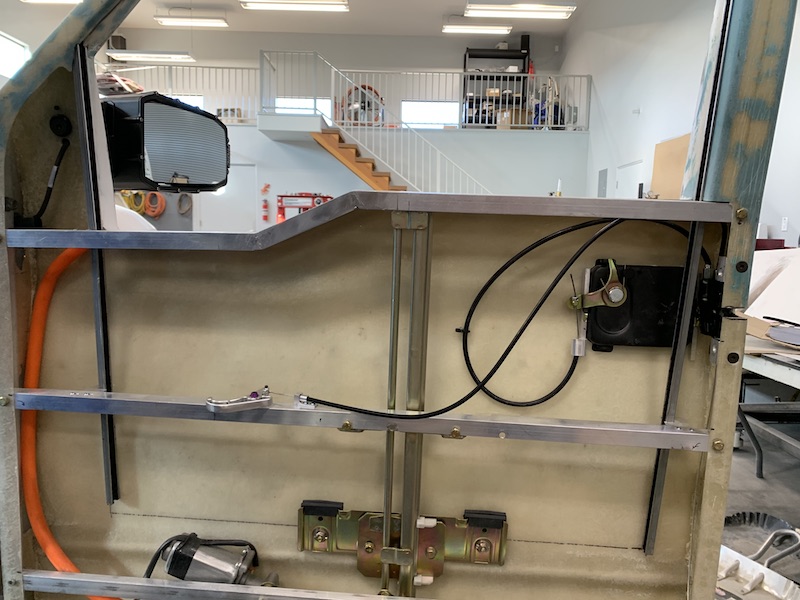
Panels are next. Got a sheet of .050" 5052 and Kustomfab left his bead roller and a bunch of dies with me for a while. Ima gonna learn a new tool and make fancy panels. They'll more than likely become molds for carbon panels (Hi, my name is Richard and I have a c/f problem).
Mar 25, 2021
Time to catch up on more. Been kinda busy and knocking out little things.
First off - Check the plate!
Should have purchased this a LONG time ago! Body tooling - who knew it worked so well? It's even good ol' Harbor Freight. Kinda hard to screw up metal blocks and hammers, eh? Time will tell....
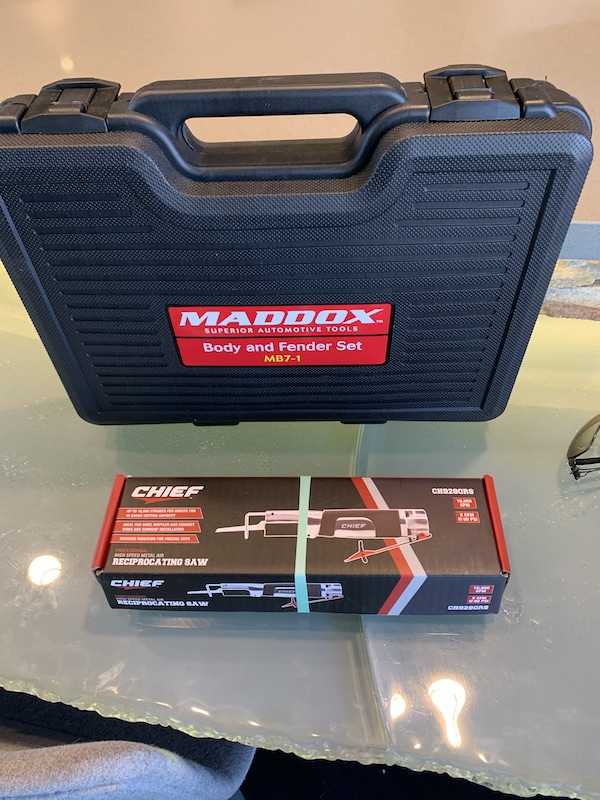
And with these tools I'll be able to screw this (5052 .050" thick) up - got a whole 48 square feet of screw up potential, actually.

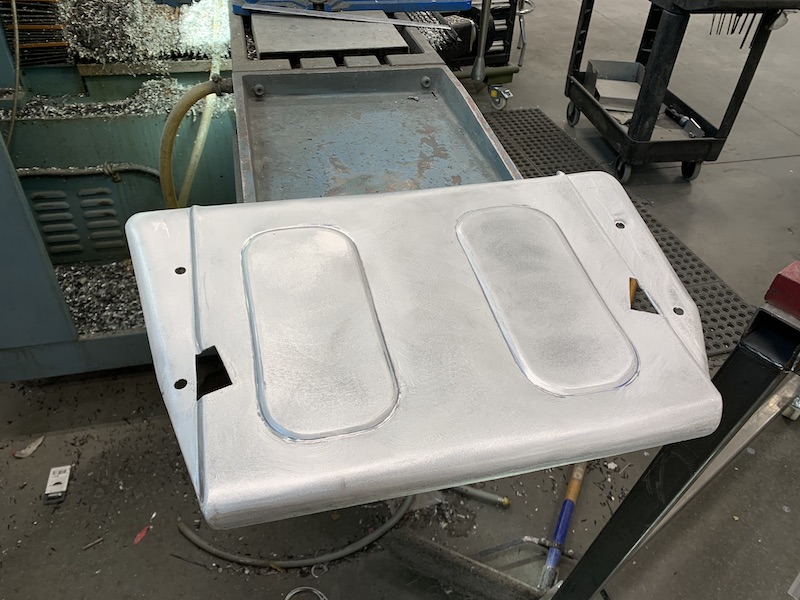
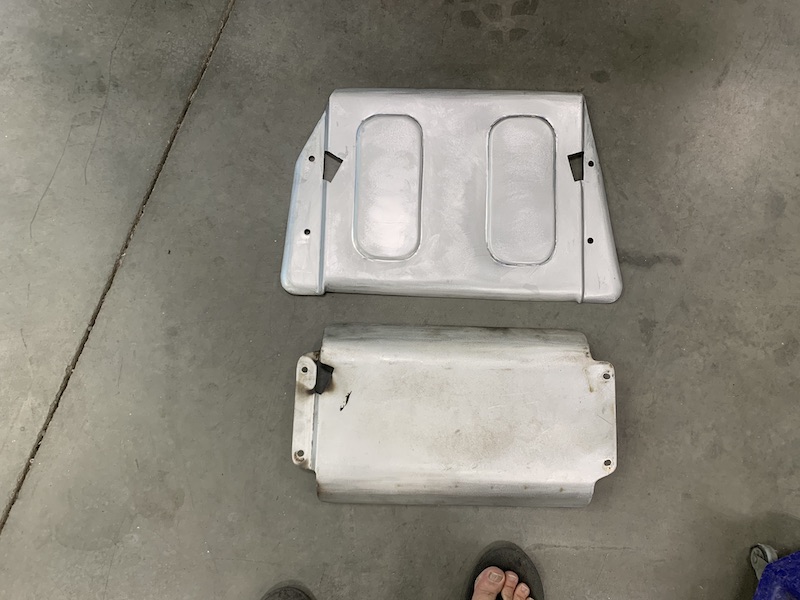
So the old muffler heat shield wasn't wide enough. It ducted hot air right out on the tail light wires. No bueno, leads to melted shit and swearing.
I went quite a bit larger and hopefully have ridded my issues.
My last test run was a good one but once I got home and sat there for a minute, I smelled smoke. Hopped out took a look and it's billowing out from under the old shield. I think it was the adhesive and such that was holding the fiberglass heat shielding stuff in place. Regardless, it was bad, burning and not good. Enough of this crap...
Test run - 2:41 I put in another clip and I suck at editing. Wanted to do the fade thing but no, I don't know how to...
Not only did I make it bigger but I also increased the air gap above the muffler - it was tight on the original shield, now it's closer to .375" everywhere.

There's a perk to storing Johnny 5 (what we're now calling Kustomfab's car - pix eventually as to why) here while he makes the move from the midwest out here. He brought his Eastwood roller and left it with me. This thing's cool! I'll be able to screw up a bunch of that sheet of 5052 with it.
Here's my first attempt which went well except for a slight warp which is taken out when the shield is bolted in place.

Test mounting:
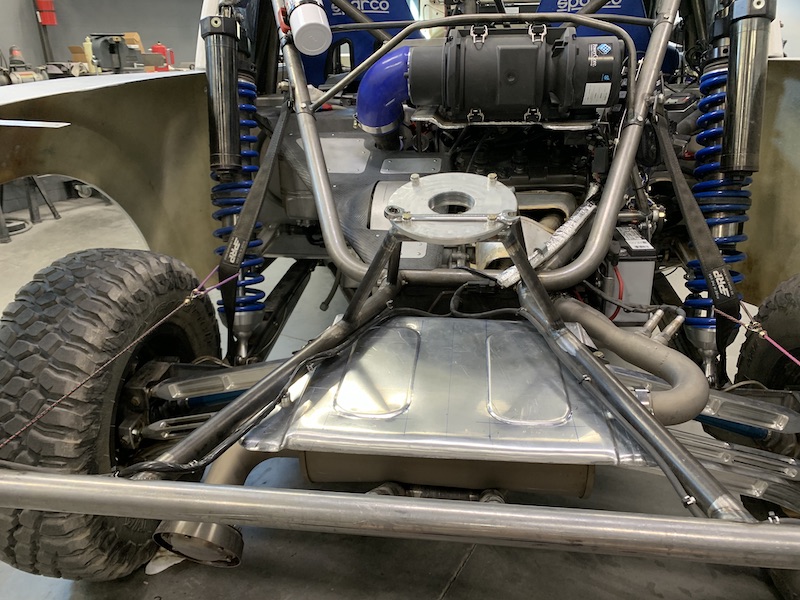
Here it is orbital sanded and ready for installation. I'll get it Cerakoted when I take everything to powder (in the far future).
This gives a size comparison between the old and new:
So I'm still on the fence with the sway bar. Disconnected it and the back end seems a bit more planted but the chassis stays really flat (look at the "I just made it" turn at the end of the video. No bar, no roll).
That said, I thought "I'll take it out since it's against some of the wire harness."
Nope, I won't take it out. It has to go in when there's nothing in front of the engine. So it stays for now - hooked up on one end, maybe both - will figure this out with more testing.

After getting my ass kicked by the Chinese puzzle of removal, I decided leave it and fix the possible rubbing issue. Nothing a little radiused edge shield can't fix, right? No mo rubbing by the sway bar.

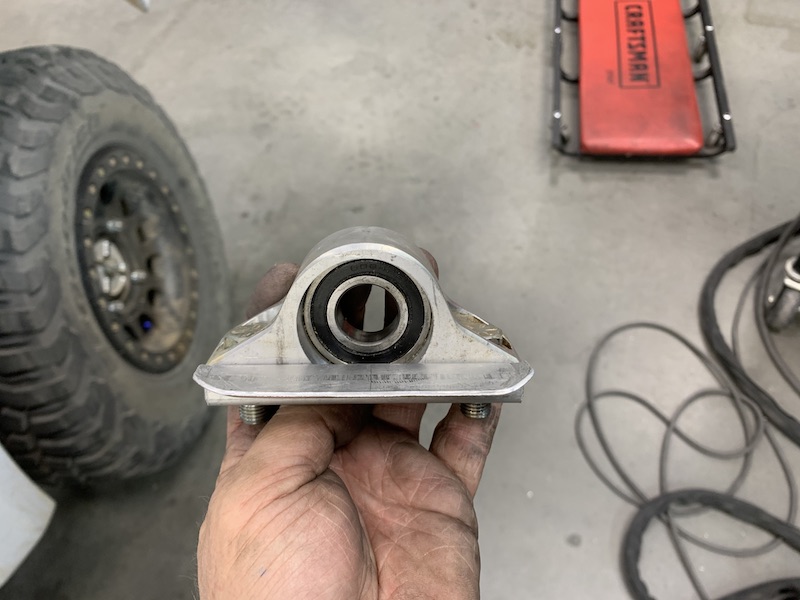
One other thing that has reared it's ugly head on is the oil reservoir. First, I had it over filled by about 330 cc. It pissed oil all over the left rear of the suspension. It's done this on both of the last runs. I put a longer hose with a loop in the system but no, still pissing away.
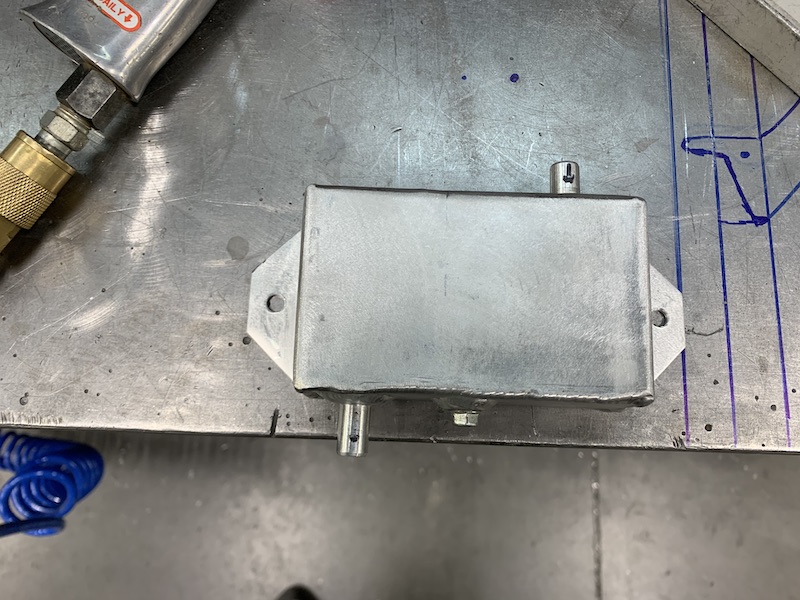
Secondly, the vent line does send vapors out and it likes to weep a tad. To deal with this I made a little separator system that the vent will go into.
Made a little box with a baffle in it. The vent comes in the top, any oil that may get spewed will fall into the box. There's a separate chamber with a small gap in the bottom that allows the vapors to cruise on out but keep the oil in. I can also drain the box if need be.
The box vent tube has an internal tube that stops about .125" from the top so the box has to get full of oil before it pisses outta the vent.

Drawing to show the innerds (yes, porpoisely mispeelled):
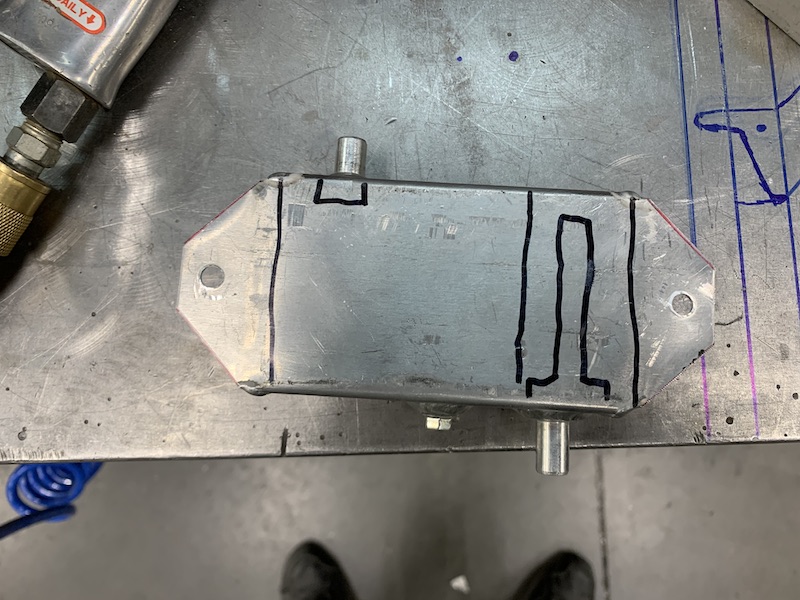
And da finished boxen that still needs to get installed:
Whilst doing this stuff my window control buttons showed up:
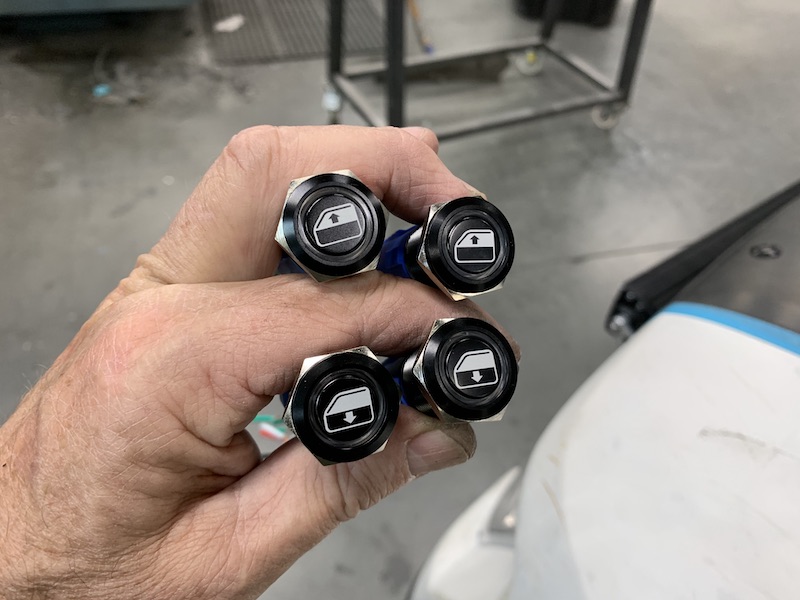
The check list gets shorter.
Gotta figure out the fuel sender and how to make it talk to the AiM dash. Sender is a non-moving parts piece that measures capacitance and I have to figure out how to convert that into a useable signal. It's not supposed to be hard, I've just not researched it quite enough yet to grasp just how it does it's job. Once I have a working gauge I'll not be wary of taking the Mini out to the desert and spending some time out there with it.
Suspension feels good - still needs rebound damping. Found two small launches and it flies off them nicely but after landing it jumps back up to ride way too quickly. I also need to take the GoPro and a tripod out to a set of whoops I know of and do some more video work to see just what the suspension is doing.
Testing - fun, worrisome, fun, I hope I make it home. The video above was shot on a power line road that's about half a mile from my house so I can drive there, screw around, come home, make changes (provided shit quits smoking) and then go back out and run again.
I'm starting to feel the love, I think.
Mar 30, 2021
Whilst doing the order/build sheet I checked the "Comfort and Convenience Package" box. Doing so included power windows and HVAC.
Checking that box produced this:

All the present controls. There will be more buttons, knobbies and components in the dash, which is next after the windows are done and working. Kinda wild how distorted this shot makes the center console look. It's actually straight.

Apr 12, 2021
Center console controls are complete (or at least I think they are? - something will show up)
The HVAC system is my next major component tackle. I'm in touch with Rencool on getting the rest of what I need for the system. Rencool (who makes the control module and the DC compressor) supplies mining equipment with their systems and they offer bespoke setups so I should be able to piece together everything. Not sure how much of the Samurai! stuff I'll actually end up using - probably the ducting and maybe the heater core? Dunno yet. The dash will end up getting finished once I start running duct work. More on that later in this ramble.
Power windows. Who'd-a-thunk that wiring two buttons to change polarity to a motor would be so freaking complicated.
Started out with a pair of quad relays and control circuits.
Good stuff
3 of the 8 relays were kapoot, ah Chinese quality. I'm still amazed at what you can find on Amazon and how cheap the stuff can be (both cost and quality).
Fortunately enough of them worked to let me figure out the circuit. It's a double pole, double throw (DPDT) relay required to make things work. Unfortunately all that I can find is single pole, double throw (SPDT). That means I had to double up on the relays and have one for each pole.
Here's the start of all this silliness with the two circuits:
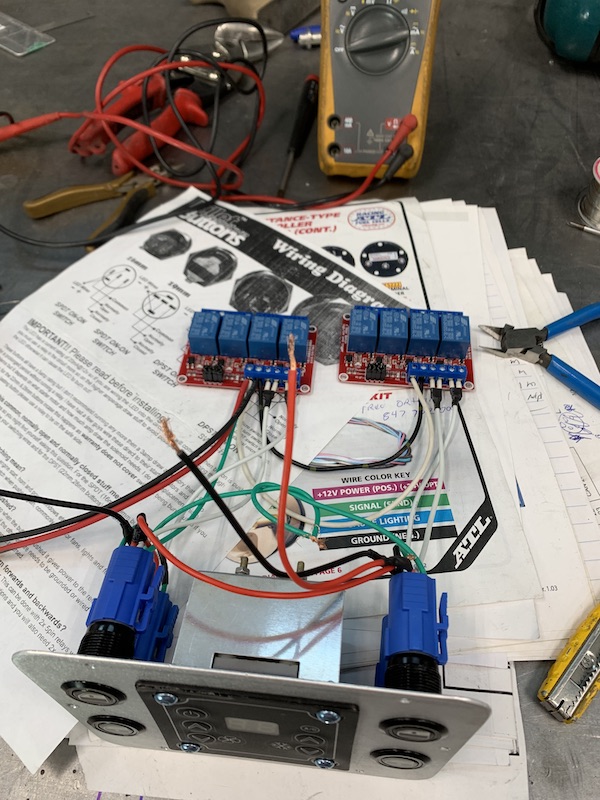
So back to Amazon and low and behold, they offer an 8 place setup. Clicky, clicky and two days later I've a single circuit with 8 relays and inputs sitting in my hand. I figured I had some working relays on the four place units so if any of them in the 8 place didn't work I had replacement parts.
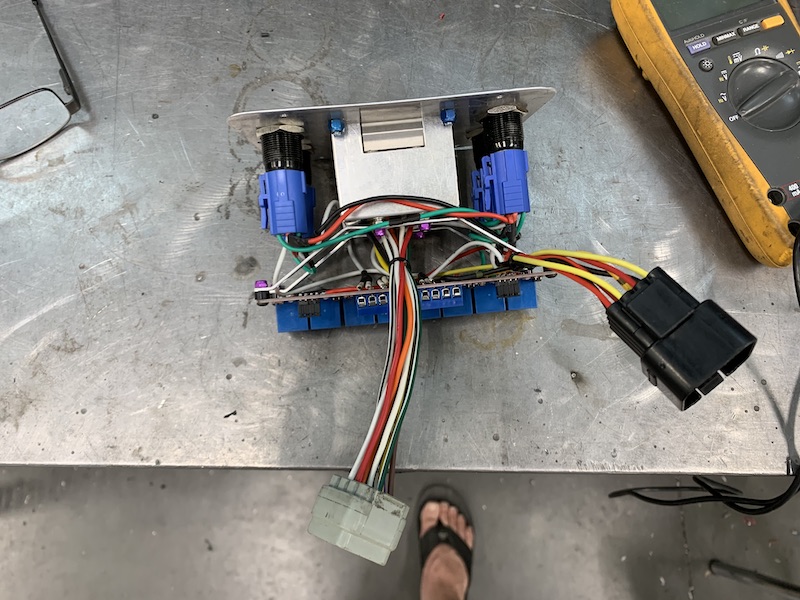
Got to wiring and making things work correctly and then figured out how to mount the circuit to the control panel. It ends up being a fairly tidy package. I didn't take pix of the final work (yet - will next time I pull it out). It now has all the jumpers soldered to the board and a single pigtail with a plug instead of the spaghetti setup. I had to make sure the plug in the back of the HVAC control still was accessible too. The bigger group of wires is for the HVAC:
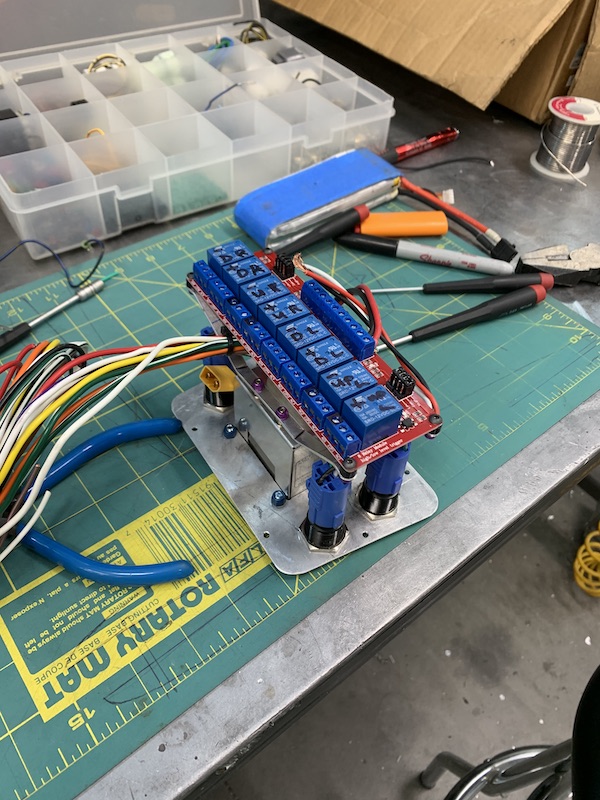
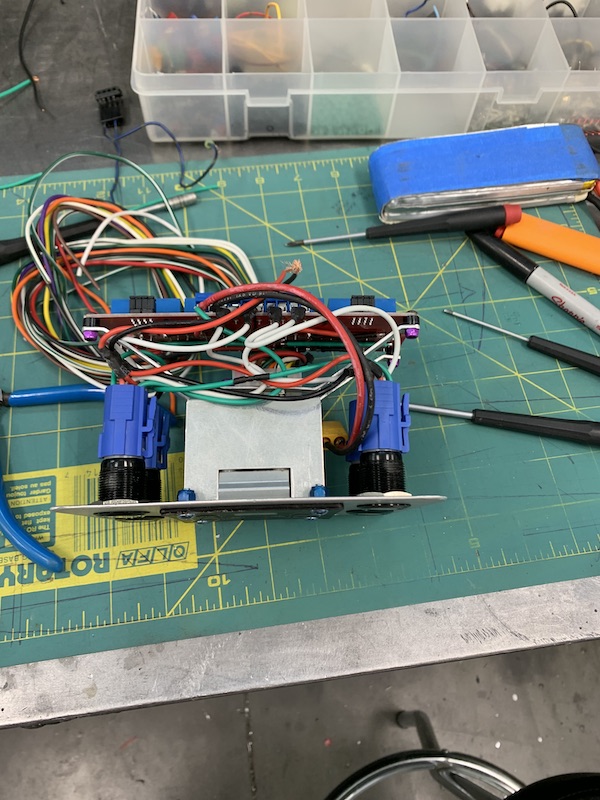
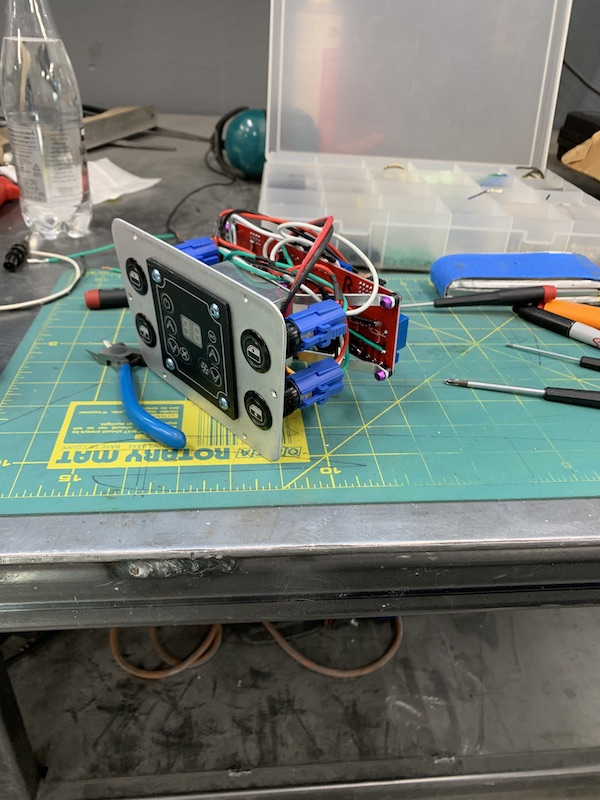
-----------
Well shit... I'd typed a bunch more info regarding what's next in line but I've obviously pissed off the system and it's cut out a few hundred words of stuff. Does this on occasion...
More to come as I move forward in this project.
Apr 14, 2021
Pulled the little control panel back out and worked on the HVAC wiring - it was just a loom coming off of a plug.
Every time I'd try to manipulate a wire it would come out of the plug. WTF??? Horrid job of crimping and according to the diagram and pin layout, the plug wasn't correct either. They'd put two wires in incorrect spots.
I decided to ditch the connector all together and went deep. Pulled the circuit boards out of the box, unsoldered the plug and then wired directly to the board and put Yamaha OEM style (Sumitomo HM90) on it too. The whole thing plugs in now - one tail for windows, one for HVAC.
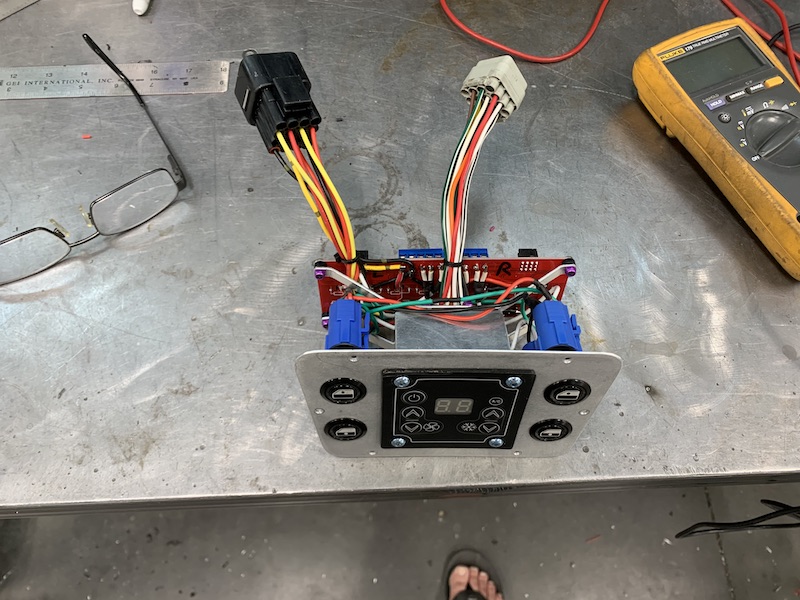
I also ticked another boxen off the check list and got the blow off valve set at 7.9 psi to activate.
I've never messed with forced induction before so this is a whole new world to me. Fortunately my buddy Jay is well versed in this crap and I was discussing how to set the blow off pressure and he pipes right up "Got a pressure gauge and some way to put some into the blow off?"
"Yeah, I have a pressure brake bleeder."
"Perfect. Plumb this to that and build pressure. When the blow off piston moves, that's your set pressure."
Simple enough. Made a quick adapter, grabbed my Longacer gauge and started playing with the preload on the valve.
It cracks at 7.9 now. You can just see the piston starting to open up.

Still in touch with Rencool - got an email this morning with parts listings and pricing. Can only get the hoses in 5 meter lengths! Will be sourcing them locally when the time is upon me. Parts to be ordered either today or tomorrow. The desert calls this morning (perfect weather, meeting two other guys in my local riding area) so I'll work on things later this afternoon.
Part of what I'd typed in my last episode got canned. Every now and then this forum likes to dump my posts - not sure if I get too wordy and over the limit (if there is one?) or what.
List of things to get done and the order, sort of...
Windows next. Shouldn't be a major endeavor as I already have a working, fitting pattern. It's just going to be a bit of warming up so I can warp the top edge so that it fits into the groove. Gotta install the fuzzy channel stuff into the door.
After windows it will probably be door panels and bed paneling. I'm looking forward to playing with Kustomfab's bead roller again.
Not sure if the panels will become molds for composite panels or if they'll end up just getting covered in a couple sheets of composite. I'll figure that out as I move along. Keeping the aluminum under the carbon, especially in the bed, will help with rock and FOD. The door panels will probably be molds - no reason to make the doors any heavier than they already aren't.
Dash and HVAC system are going to be done hand in hand. I need to get the duct work in and the dash isn't set up for it yet.
I still have to figure out how to seal the cab and there's a gap below where the windshield fits to the existing fire wall - thinking that there will be a second false firewall that goes from the one that's there up to the windshield shelf. This will give me quite a bit of working room for venting and such. We'll see - build on the fly type of setup.
Progress!!!
Apr 18, 2021
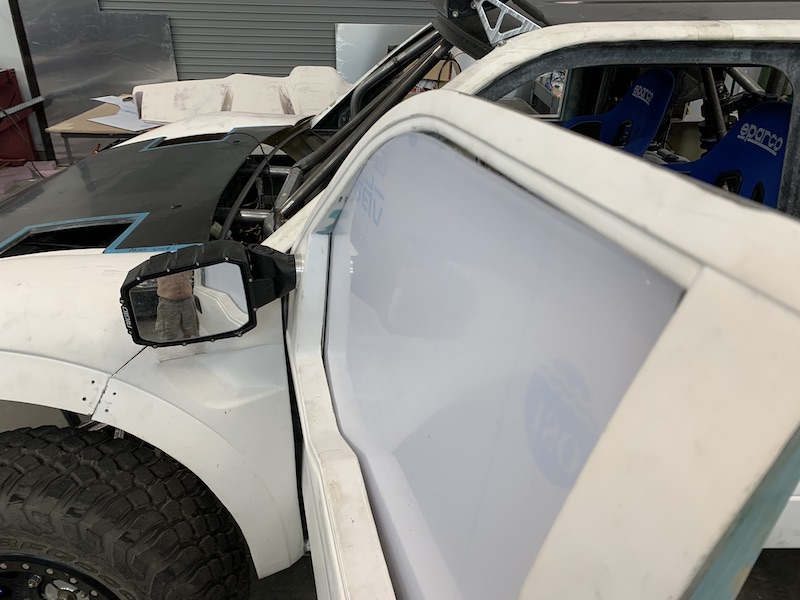
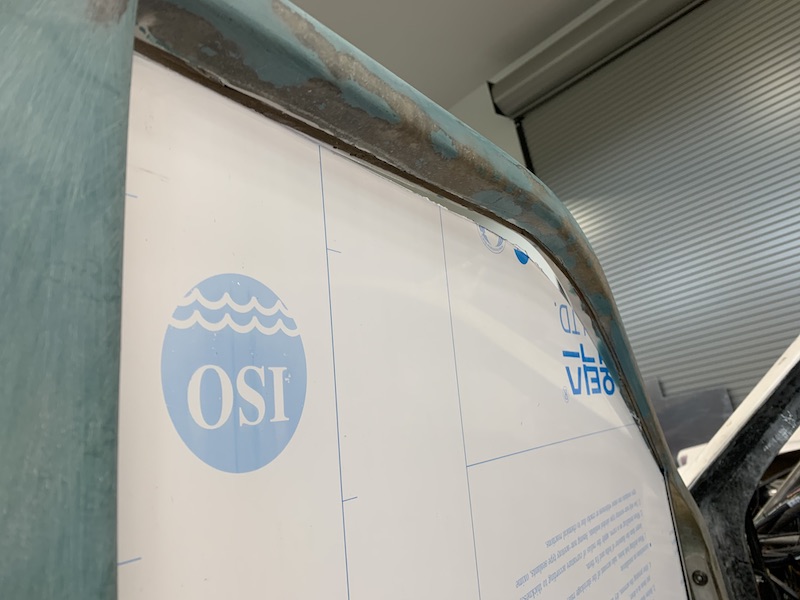
Door windows made and installed. I still have to warp the upper edge of the 6mm Lexan so it fits into the upper rail groove. Thinking I'll be using that heat tape I used to bend the belly panel edges along with a heat gun and some patience.
My window control circuit worked for three test movements and then decided that UP was it's only plan of action. If I'd push the down button it would pop the fuse. The relay stuck and poof, let the smoke out. I guess that's what I should expect for a $9 Amazon Chinese junker circuit.Got a new (hopefully higher quality) unit on the way - should be here tomorrow. Amazon does have its perks.
Had the suggestion of putting clear wrap on the windows to fight static and scratching. Think I'll give it a try.
Driver's side window ready for install/test fitting:

Window in place:

Here's where the edge of the window doesn't go into the top of the door frame. Warping will be required.
Apr 20, 2021
Got my new, supposedly higher quality switch board from Amazon yesterday. It's bigger, has a thicker PC board, actually seems a bit more simple in design, and all the relays have "Passed QC" stickers on them so that guarantees they're good - right?
I actually like the circuit layout better and it has solder points for the leads and such so that made this one cleaner.
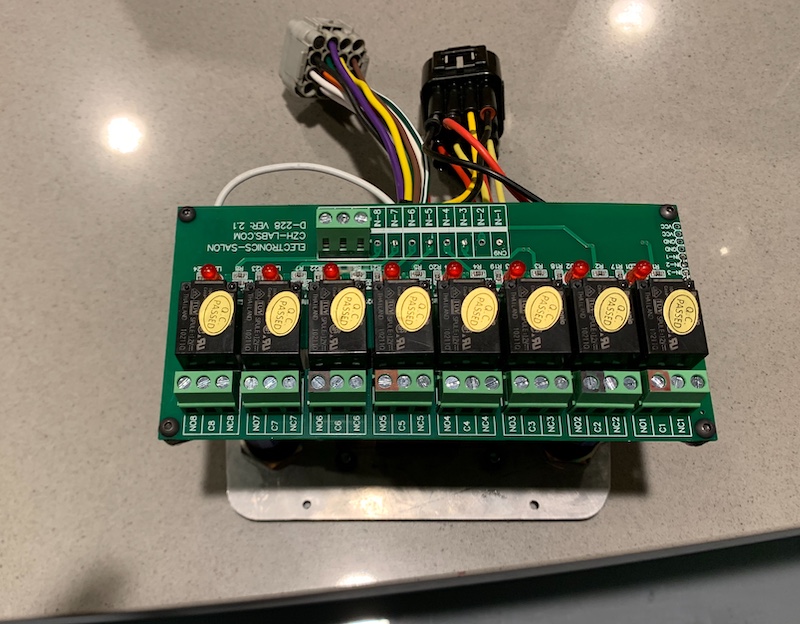
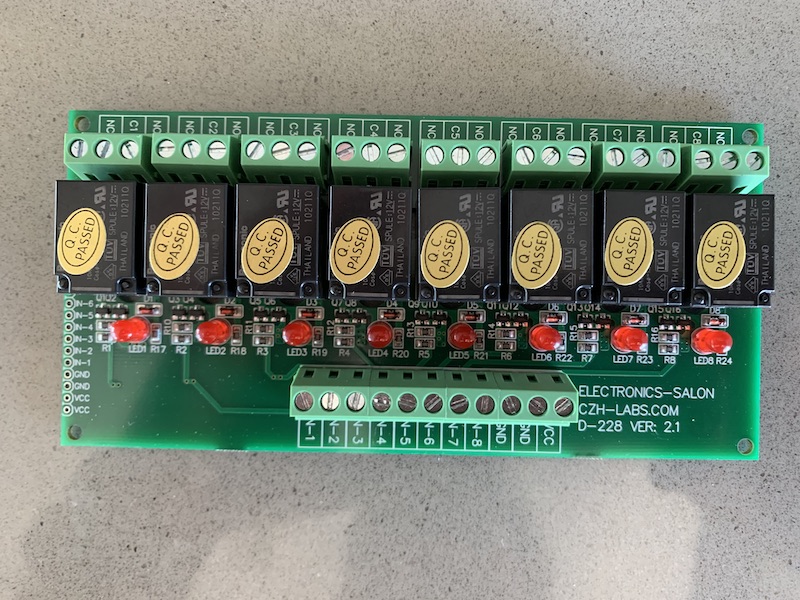
Here's the old bad electronics board for size comparison:

Plugged it in this morning and all works - until the right side window gets about 3" or so from fully closed and then the 10 amp fuse makes a pretty little blue light and lets the smoke out. Looks like I need to massage things a small amount to get rid of the extra force required to close.
I'm starting to think that not only was the first circuit board a cheapo but if the relays are rated at 10 amps and I'm popping a 10 amp fuse the contacts in the "we didn't pass QC" relay(s) may have arced and stuck. That would explain the "I'm going UP" any time I plugged the fuse back in with the first circuit before I let more smoke out of it.
I'm a tad worried that I'm taxing this circuit to the max. Time will tell. If I do, I'll go to the 20 amp relays and get double pole so I only need four of them. I've not printed a circuit in many, many years - may be more Amazon shopping if this green board goes poof.
Oh, being larger, it doesn't want to fit into hole now. Trim time (there's room for trim - just hope it's enough).
Apr 30, 2021
Well....
I'm outta the shop for a couple of weeks.
High speed over the bars on the bike.
Broke my left clavicle for the 7th time and popped six ribs #4-9 with displacement of 5 & 6. Clavicle not bad, ribs SUCK!
I'm still not getting too old for this shit at 56!
May 20, 2021
Howdy guys.
Healing up. Three weeks as of yesterday. I am SICK of tv and the couch.
The last three days have been the big hump I've been waiting to get past. The bones are fusing and no longer flopping about. Makes life better. Instead of hurting at localized spots I now just feel like I had my ass kicked severely and am generally sore.
Clavicle is back to being one piece and I was able to sleep on my right side last night (insert trumpet fanfare).
Btw, follow up x-rays at two weeks showed 7 broken ribs. They missed one on the first eval.I'll be back in the shop here soon.
Side note: Just found out last night that I'm desert racing again in August. Reno to Las Vegas with Best In The Desert. 550 miles in a UTV. My brother's dragged my dumb ass back into the navigation seat.
Gonna be three teams of two racing a Honda Talon. The owner of the car and a navigator, my brother driving with me navigating and then my nephew, Michael, with Flyerrider navigating and keeping his driver toned down and driving smart.
Should be fun. Owner of the Talon is 9th in points and a good driver. My brother is a killer driver and racer - understands that you gotta finish and is good on equipment (but SUCKS as a passenger) and Flyer gets my nephew, who's young and filled with testosterone. Maybe we'll get Flyer a big rubber dildo to whack Michael with.
Hey Wizard, you wanna come play? August 11-15.
Jun 1, 2021
BORED AS HELL!!!!
Last Thursday someone turned off the intense pain switch and set it to just "had the shit beaten out of". Still bruised and sore on upper rear of arm and shoulder. I think my clavicle may actually be knitting up - not feeling hearing the pop anymore when I move certain ways.
Got in a little shop time last week - basic, easy to do stuff. Been needing to get the passenger's rear window installed - and that's where the fuel filler is located.
Left a piece of fiberglass in place to mount the filler to, cut the Lexan window out so it all fits nice and tightly. The area under the rear windows will get painted black (look like frame) so that'll hide the glass I left that the filler attaches too.
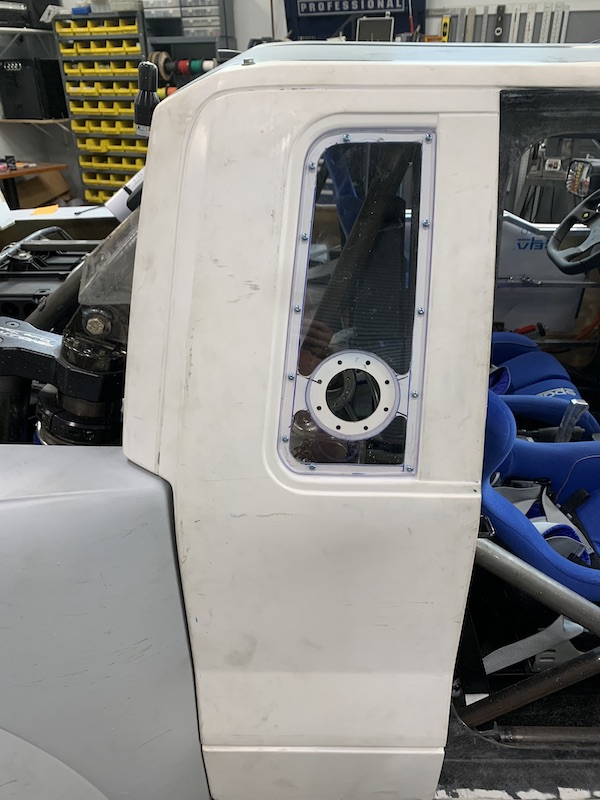
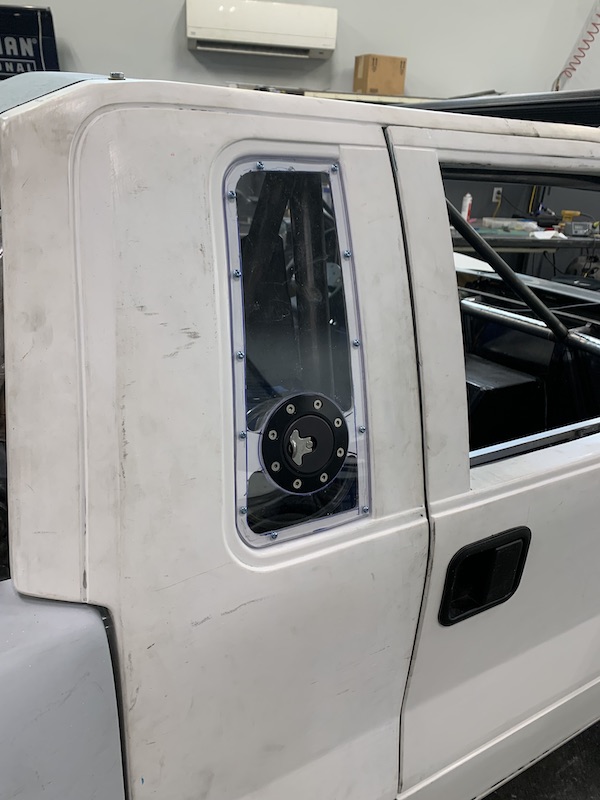
I still have a little trim/detail work to do around the filler.
Been messing with the door inner panels now. Gonna play with the bead roller that KustomFab left and see how badly I can warp stuff.
Feels good to be healing up and able to muck about in the shop again.
Jun 11, 2021
I'm thinking that my clavicle has decided to knit back into one piece. Things seem better and better daily. Ribs are still tender but I can cough, sneeze, fart w/o dropping to my knees.
Concussion has been interesting. Can't focus on more than one thing well at all, memory is fuzzy at times and sharp as can be at others. Other aspect of the concussion is my balance. It's 98% good and then I have these little 'tippy' moments. I'm not used to that shit at all. Squatted down the other day on some non level ground and promptly went from squat to seated. Argh.
Still feel like I got the shit kicked outta me.
Gonna stay off the bikes for a bit - heat has descended on the area, riding season's about over and I have the desert race in August so I wanna spend the next month and a half healing.
I have actually been down in the shop mucking about with panels.
I got the window actuation stuff tied in even better - lower triangular piece supports everything and gives me a lower ledge to screw the bottom of the door panel too.
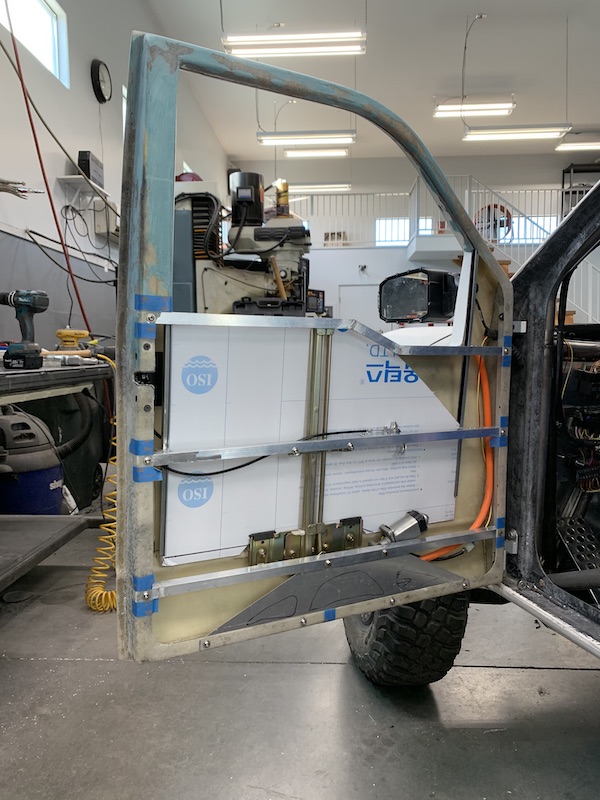
Still trying to decide if I want to cut speed holes in it - gonna have to fold it a tad more to clear the door panel recesses.
Speaking of door panels, I've started on them too.
Got the first one cut and roughly fitted - waiting on McMaster order of fasteners to show any moment... Still have to detail the edges and get a few things dialed in.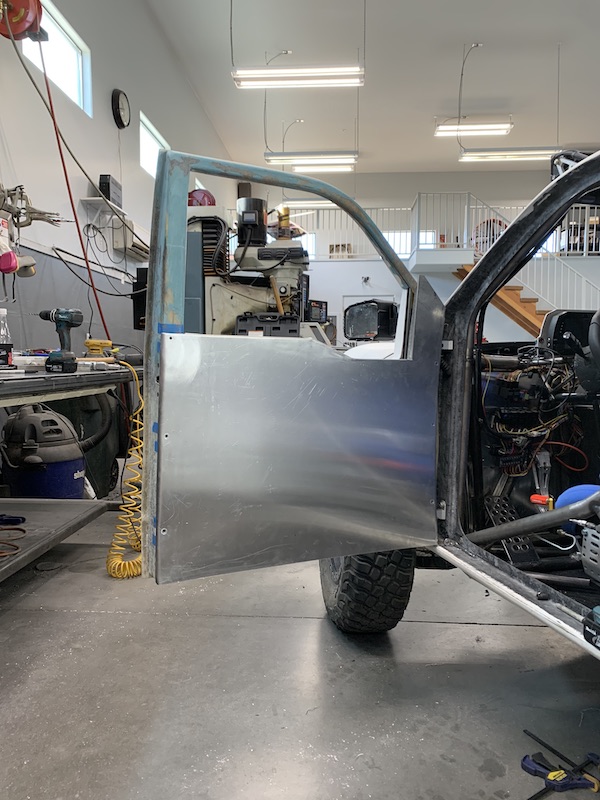
Gonna do recesses in three sections of the panels - still trying to get them drawn up and I have to screw around with the bead roller to figure out how not to destroy the panel. My first test piece actually worked pretty well.
Got a week off of shop time - guests coming in and then plans next weekend. To top it off, I have to drive back to Gallup, New Mexico this afternoon to go pick up my pickup truck. It took a shit on us last week during a trip to Colorado and I had to leave it 4.5 hours from home. What a pain in the ass! Emissions shit of all things...
Jul 18, 2021
After nine weeks of driving the couch from being broken, I've spent the last two weeks working on other people's stuff. Feels fantastic to be back in the shop making stuff. I'm sore but grinning.
Prepped a Honda Talon for a BITD race in August, helped my brother and his son start getting their Canned Ham X3s race legal (doors, bumpers, spare mounts, etc.) - all kinds of non MR stuff.
Have had a chance to ride in an X3 RR (my understanding is most hp, quickest, blah, blah) a few times in the last week. The thing is quick and has very impressive suspension for a stock, out of the box vehicle. Needs rebound damping but otherwise it's a whoop eating monster.
Being that up until now I've not had anything other than our 4 seat RZR as a comparison (it's a tour bus and down, at minimum, 90hp) to the Mini-Raptor, I was actually kinda disappointed with the acceleration of the MR. It just didn't seem like it ripped like I was expecting.
Got silly tonight - decided to go do a little night run up the street. I've not had it out after dark and wasn't really sure how the lighting (7 yr old Baja Designs 44 inch LED, last generation on roof, Rigid 30" LED bar in grill, Rigid Reflect side mirrors with LED that give peripheral fill) would work.
First off, a Baja Designs light bar KICKS ASS! Thank you bdkw1 for the insider info on "those are being phased out, get one cheap."
Holy shit there's light! It out powers the Rigid bar in the grill big time. To the point that the grill bar is pretty much overdriven and kinda useless fill in light. BD bar needs to be pointed up a tad - didn't realize how far and wide the thing fills in. Took the wrong wrench so it's still pointed lowish but that's a quick fix.
So, like I was saying, I was impressed with the Canned Ham's acceleration, it's quick.
Mini-Raptor made me really proud tonight.
I don't think the Canned Ham can begin to keep up.
Trans gearing (RZR 1K international - it has a locking diff) is keeping top end around 80 (I'd like it to be closer to 100 because the chassis can handle it) but man it gets there quickly. It pulls hard from the moment I step on the fun pedal. No turbo lag/hit like the X3. It's almost an electric type of pull. Plus one for supercharging.
What was kind of a bummer (due to over expectations) turns out to be quite the pleasing happening. The Mini-Raptor is damn quick and that makes me happy!
Gotta a few more things to do on the Canned Ham (tire mount, three front bumpers) and then back to MR stuff.
Still need to complete the inner door panels and rear bed panels, dash and HVAC SYSTEM and seal up the cab and this was the little boot in the ass I've needed to get me motivated to get shit done.
Jul 19, 2021
So my nephew comes up to me this morning and says "I'm going out to the desert, you wanna come with me?"
"Yeah, but I don't wanna ride."
"Oh! You gonna take the RZR or ride the bike?"
"Neither."
He looked at me a little puzzled and then it struck what I was saying. We'd just had a conversation about my little run last night.
Off to the shop with the Mini to get a few things gathered and then off to the fuel station.
12 miles (20 km) later we're sitting at the entrance to off road heaven. I let him take the lead.
The MR needs shock tuning major league. The rebound (lack of) is really bad. Compression seemed okay but with the rebound bounce it was really hard to tell what was going on. I was running through some rough stuff and having fun with the right pedal.
"Hey, what the?" The hood's come loose again. Crap. Stopped, checked, broke the right front, popped the other three off the pins. Crap.
Got the hood back on, added a couple turns of rebound damping and headed back home. I may have gotten in a mile, if that. Time to turn around and head home. I waited on my nephew to come back (we had stated "If I don't show up at point X, come find me"), let him know I was good but done and to go play.
I had to stop half a dozen times to reseat the hood - little hits would knock it loose. Heck, highway speeds and vibration knocked it loose. I got smart and tossed the winch rope over the hood, around the V-bars and then back to the bumper. Worked like a champ and let me drive home at regular highway speeds.
Street manners are great. Unlocking the diff in an asphalt parking lot (I stopped at a drive thru on the way home) was sweet.
That's another test run down. I'll call it 80% successful, especially since I drove home with out issue.
I can't help myself in round-abouts. They're fun - and damn the traffic in front of me!
Here's my run into the desert. Watch how quickly the hood decides it's not happy with what we're doing. I turned around and limped out to the street.
Aug 27, 2021
Hood Saga continues (in a good way - at least I hope).
Two pair of Autofab mounting hardware arrived a couple of weeks ago. Been busy with other stuff but now am back working on the Mini-Raptor.
As cool as the Quik Latches are, they're not up to desert abuse. As usual, I took the Wizard's guidance/suggestion and ordered the right hardware for the job.
Here, this gives an idea of size:
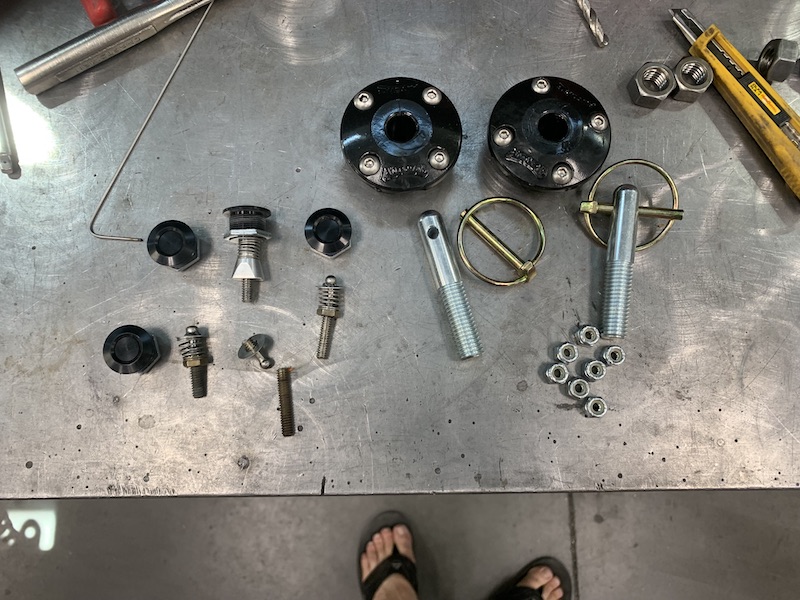
The Quik Latches use a 1/4" (6mm) stud. The Autofab uses a 9/16" (14mm) pin.
Pins installed in the bulkhead. I got really lucky and there's just a squeak of clearance between the nut underneath and the shock. A squeak is good - it's not touching.
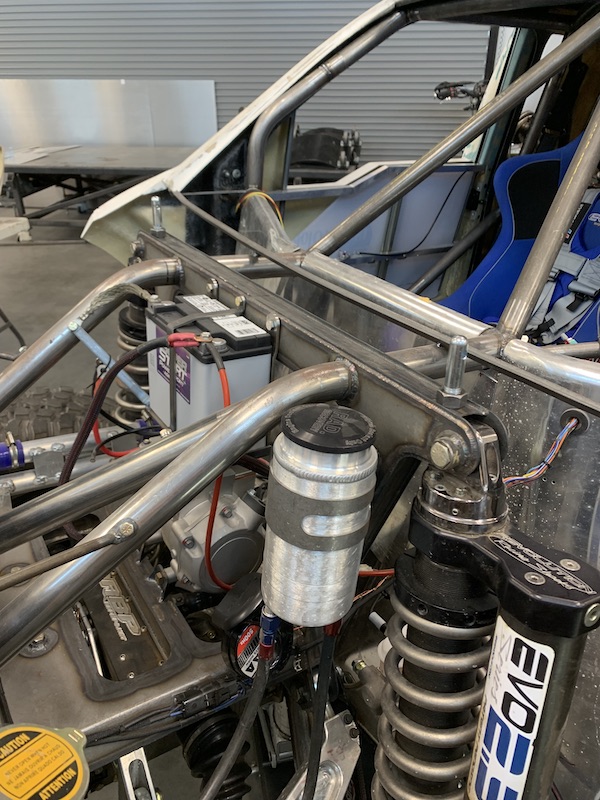
Hood installed - at least on the rear pins.
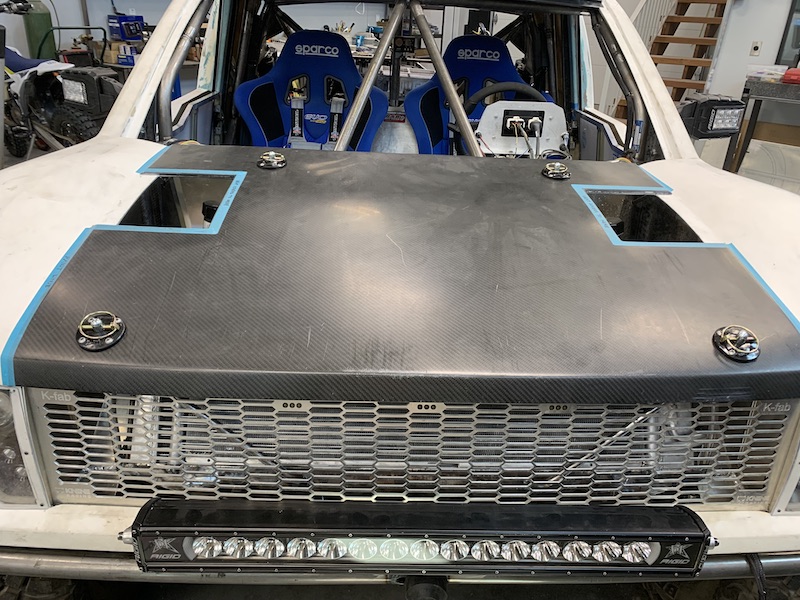
I don't think I'm going to use the lower radiator mount for the hood mount like I was. I'm thinking it's flexing a bit. Gonna have to head down to the front bumper tube - was going to cut it off so it's not hanging out looking for stuff to bend on. I'm thinking it's gonna get cut about where the Rigid light bar is (there are lower hood lip supports there already) and then I'll come off the ends of the bumper and work up to the studs.
Two down, two to go.
I also played with the shock settings a bit. I had everything open 4 to 5 turns. I now have everything at 1.5 turns out.
It's a big difference in setting, hopefully I'll feel the difference. It definitely needed rebound damping in just the little rough run I tried a while back.
Sep 7, 2021
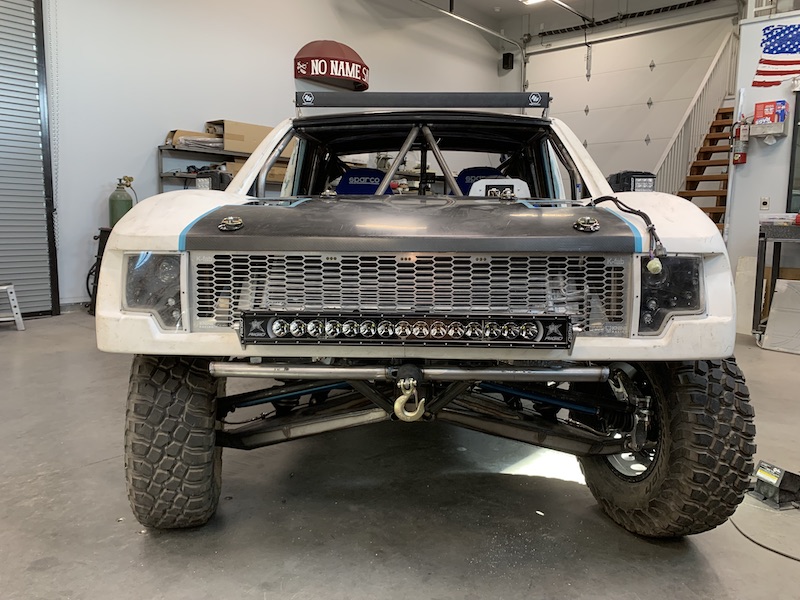
The bonnet is mounted.
Modded nuts: added washers for support, thinned out the rears.
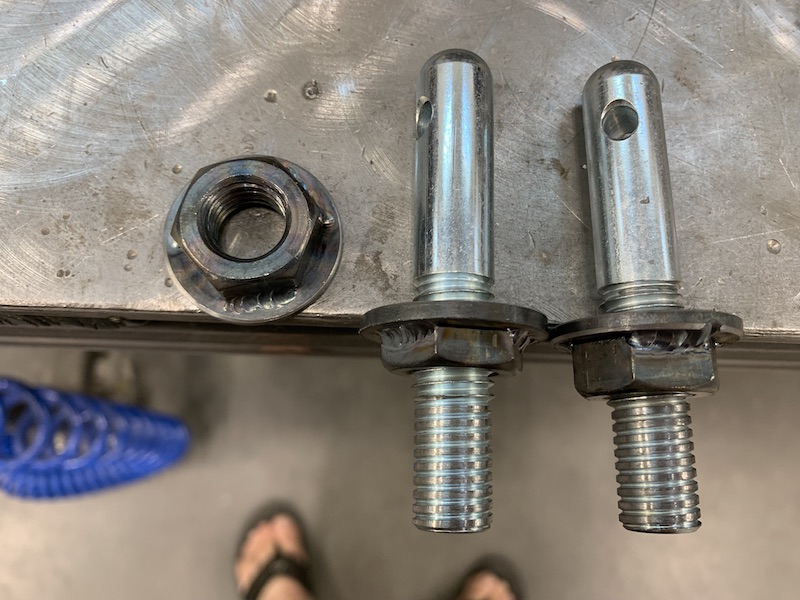
Pins installed in the bulkhead.

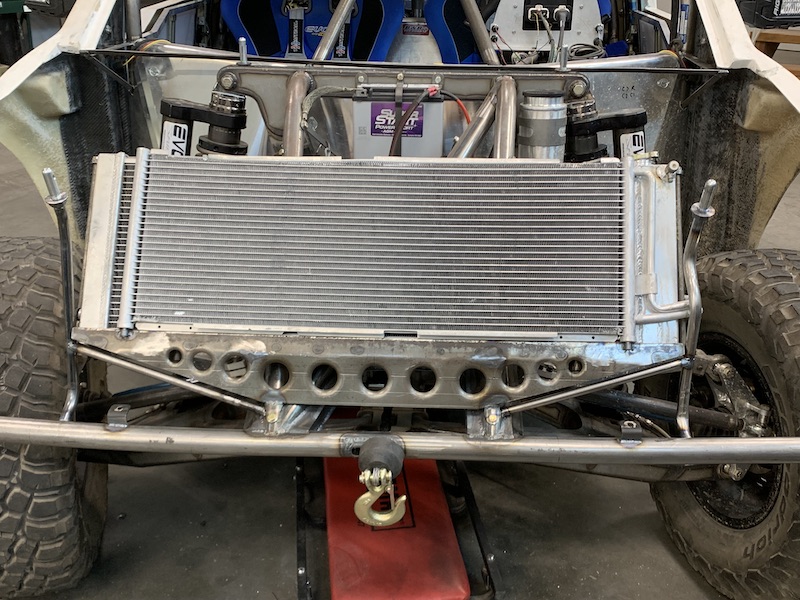
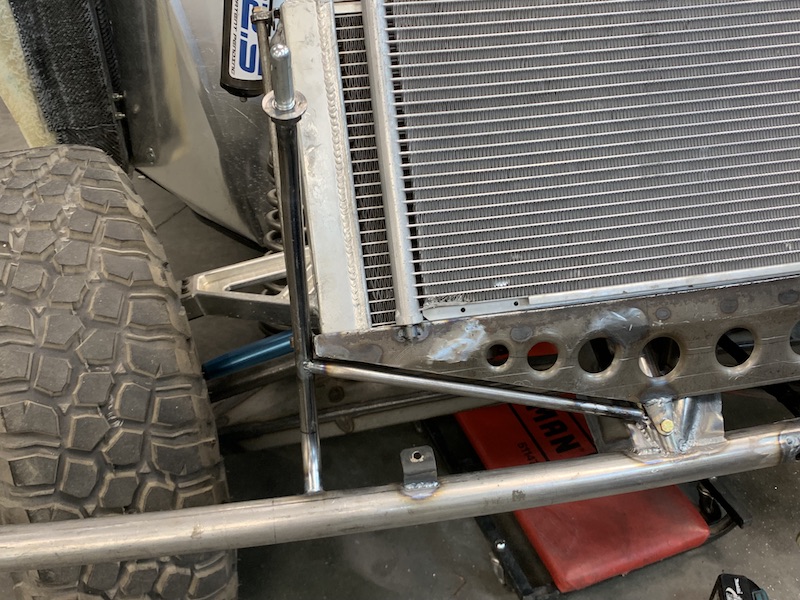
Front mounts done. Low on the triangulation but there's no room to come over the front lower edge of the radiator.
I moved the mounts off of the radiator brace/mount and down to the bumper. There was flex happening on the radiator mount.
Close ups of the diagonals:

Took the Texas Longhorn front bumper and cut it down. No more hooks that grab my leg.
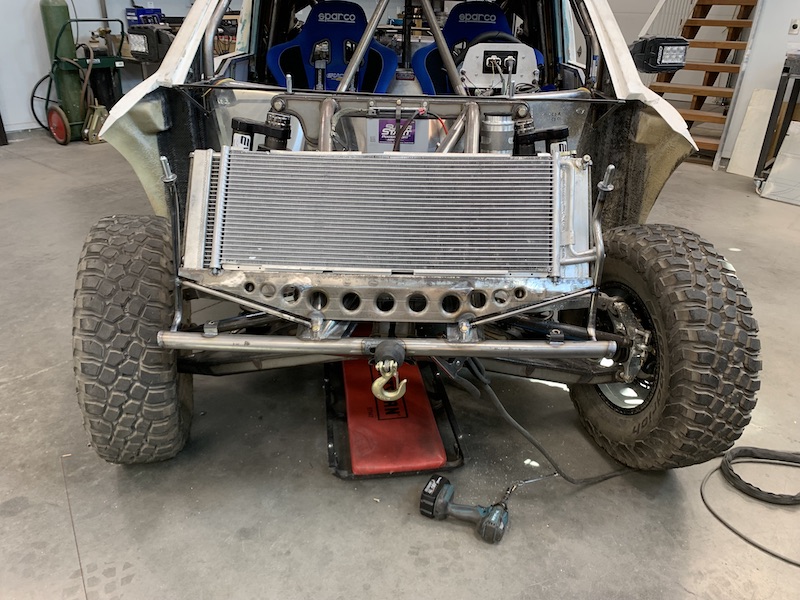
Front end installed. The thing seems solid. Let's hope so. If it comes loose I'm gonna break out the hotdogs, marshmallows, a stick and light the sucker up.
Sep 8, 2021
jimmyg
Must be getting close to pulling it all apart again?
Me
Nah, nowhere near.
Waiting on A/C components from Australia. Still have to finish the dash, interior and the bed panels and then get out and put some hours on it - it is ready to go out and do more testing & tuning.
Summer heat is hanging around for a couple of weeks so I'm not getting out and about yet. We're 40-43C here this week. Normal is upper 30s this time of year.
Sep 15, 2021I admit it - PBO (project burn out) is a major factor in my lack of attention to the Mini-Raptor.
I'll dick around with something for a bit and then walk away. Presently on a walk about it would seem.
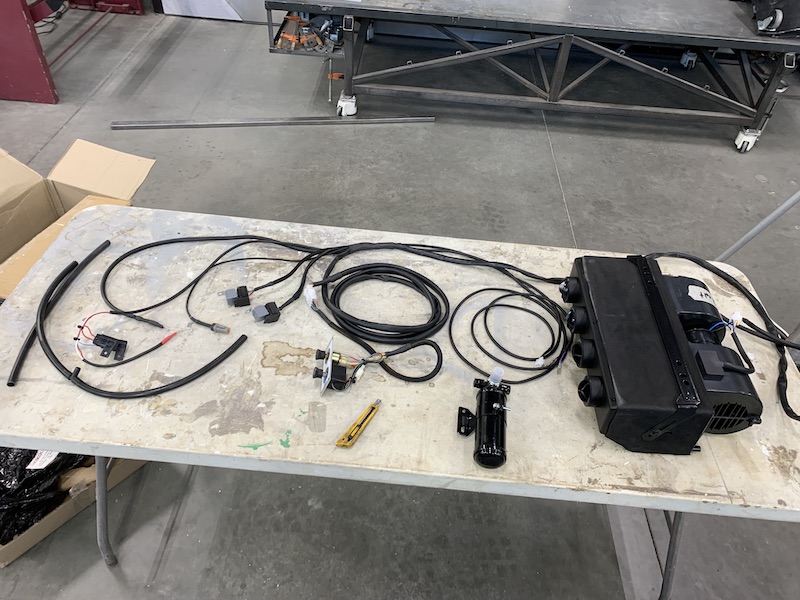
Got the rest of the air conditioning components in hand yesterday - was gonna show pictures but I can't get my Mac to download them. As soon as this slow-assed computer decides to get them outta my phone I'll get them displayed in this endlessly long tale of an idiot's build.
Sep 16, 2021
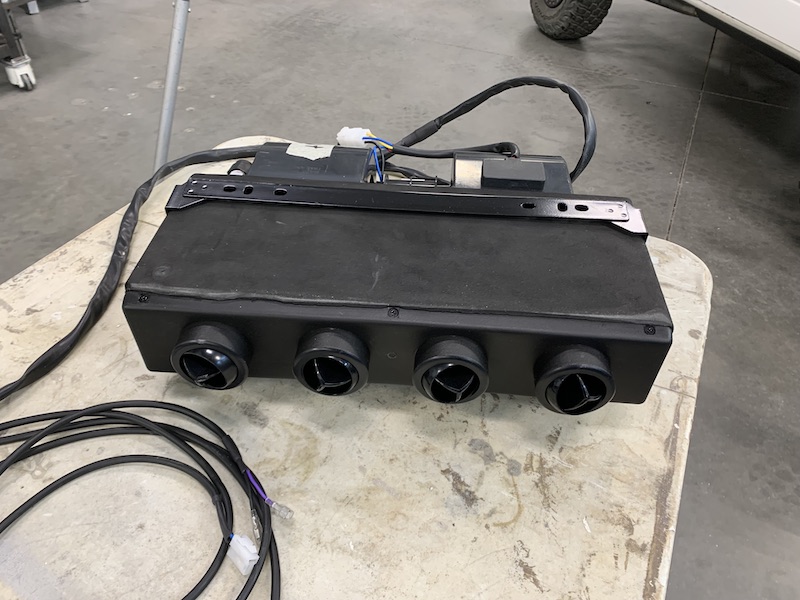
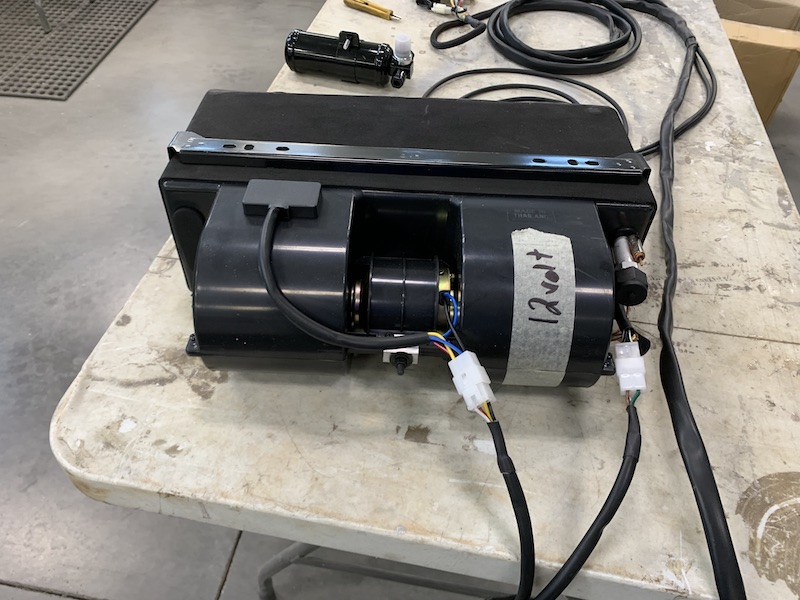
Stuff:
Wire harness and the head unit.
Thinking that the head is gonna get stuffed up over the co-driver's knees and then ducted from there. I've not even test fitted/held & looked/contemplated anything yet, just unboxed, spread about on the table, plugged things in and took pix.
Sep 27, 2021
PBO has been high, I've had a couple other smaller projects keeping me busy and Robyn and I have a wedding coming up on Oct 23 - been happily heckling each other for ten years so we decided to make it legit on the tenth anniversary of our first date.
I'm giving it (marriage) a go for a second time after a LONG trial run.
jimmyg
And do you Robyn take whats left of Richard in broken bones, stitches, bandages, butterfly clips?
Well done.
TheDoc
Congrats on doing the paperwork, nobody ever said you were quick Kfab.
Sep 28, 2021
Bullnerd (after quoting the two paragraphs above in the build thread)
I like these guys!
Me
Me too!
Thanks guys.
Nov 6, 2021
Brief update.
Buckled in (what a pain!), pulled out onto the street, kept it at 25 mph (40kph) watching the temp gauge come up.
Turn right, planning to head out into the desert for a play.
Something tells me to just go run the power line road by the house (the drop of something wet when we are bone dry?).
I hit the power line and get on the fun pedal - new suspension settings are sweet - much better, still room for improvement. Rebound needs to be slowed down.
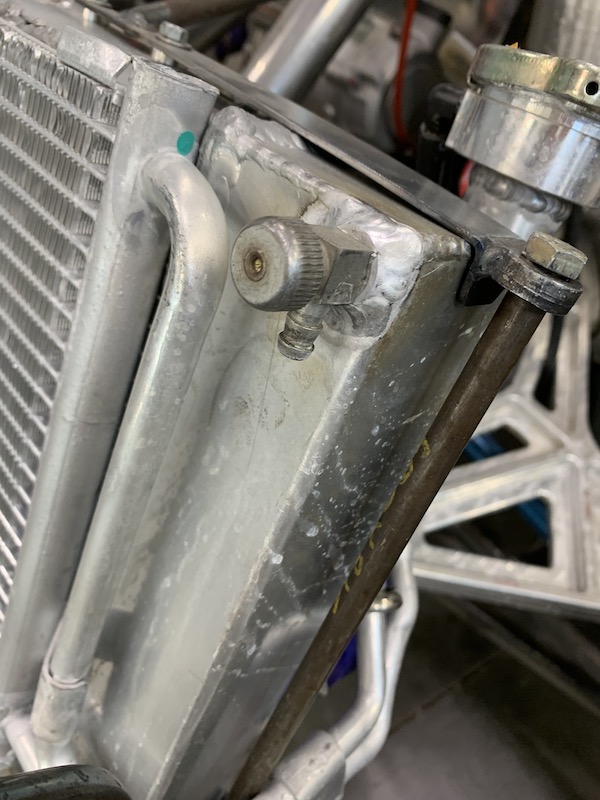
Huh, another few drops of water. Time to unbuckle (shit, took me forever to buckle into the 5 point). Get out, walk to front, see water dripping down front of rad.
Ah fu&$. I did clip the radiator when I was redoing the hood mounts. Cut off wheel hooked and then hit rad but I was hoping it didn't compromise it.
I was wrong. It didn't look like it cut thru.
Not upset. Been working on the RZR as a distraction. Now that it's finished, focus is back on the MR. My TIG welding has made huge steps, I'm not scared of fixing the rad now.
Nov 10, 2021
I absolutely despise working with fluids. They run everywhere, usually stain, taste bad (come on, every one of us has accidentally stuck a shop finger in their mouth at one time or another), generally make a mess.
The radiator is leaking. It's full of fluid. Let's work on the rear of the Mini-Raptor instead. That sounds like a good plan. Keeps me away from fluids...
The jack mount that flyerrider directed me to for the RZR and it's Baja trip is sweet. The Mini-Raptor needs one too.
Places were tested, things were envisioned, a spot was decided upon. It gets put to the left of the spare, above/forward of the exhaust outlet and behind the cycling suspension.
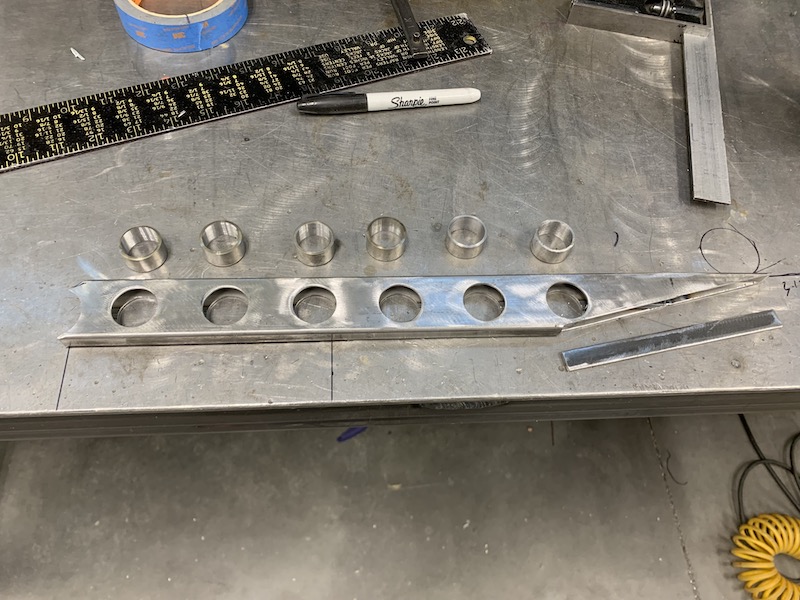
Had to make the arm that holds the front more than just a tube or a brace. It needed speed holes! They make you faster, after all. - or not... Turns out that the weight of the metal I removed is exactly what the weight of the spacer tubes in the holes they fit in is. Everything's .065 mild.
All da parts for da support arm:
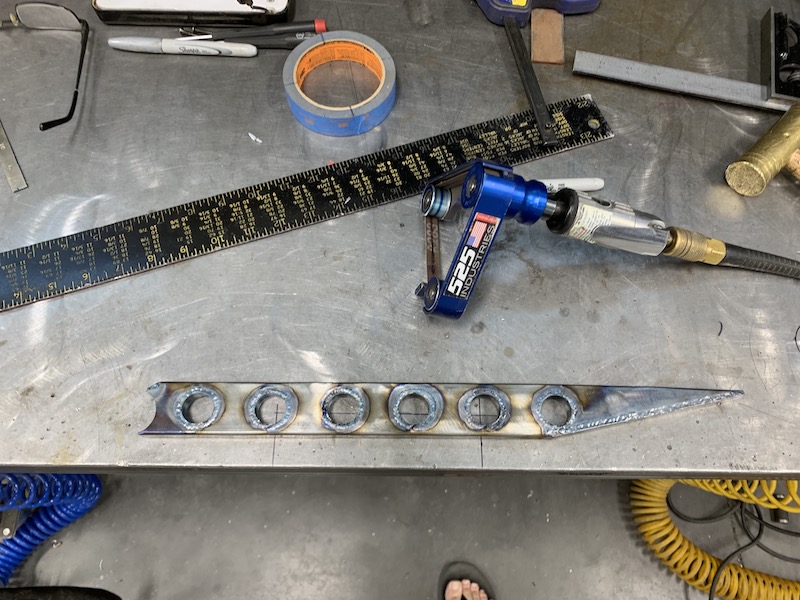
Add da parts is now one part:
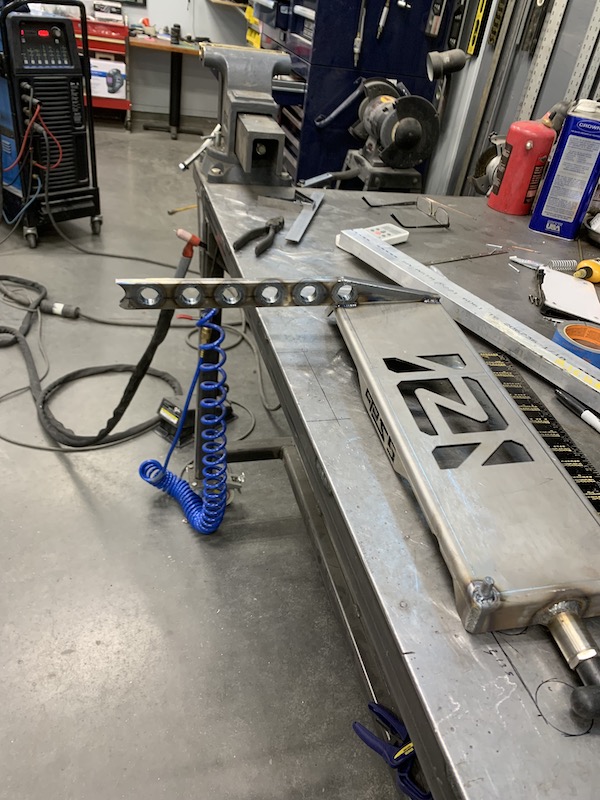
And it grows. Support arm attached to the jack mounting plate:
Mount in place.
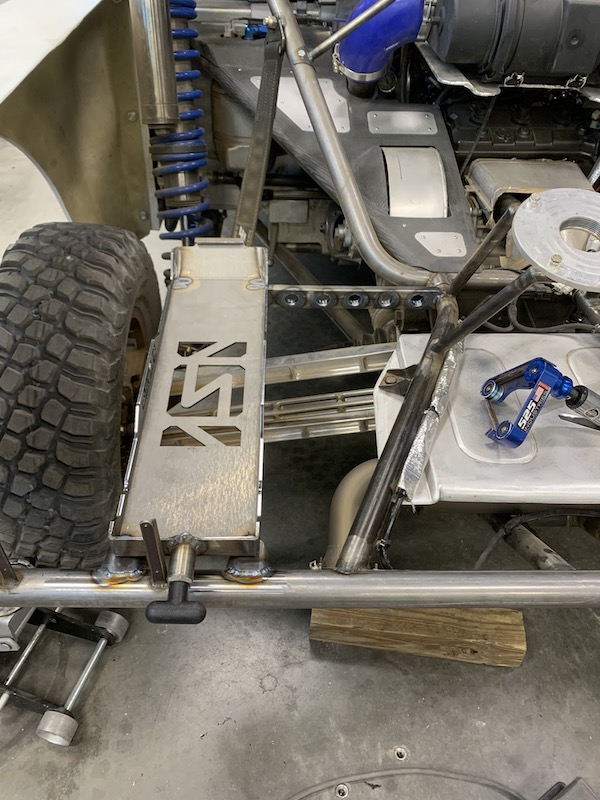
Jack in place. Still need to make handle mounts.
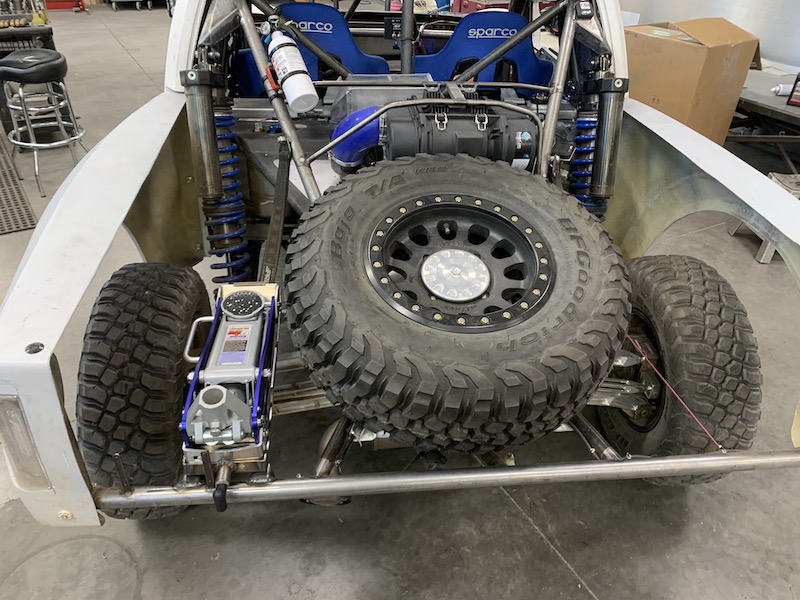
Nov 15, 2021
kustomfab2003
I will come over an play welder repair person where the fluid leaks
* kustomfab is a Miller welding process specialists.
He came over, played with settings, went into menus on my machines that I had no clue were there and got the MIG & TIG welders working PERFECTLY - now if I could just weld appropriately I'd be good.
Nov 17, 2021
Me
You're hired!
Well... That's if you're around when I get to the front end. Plus I'm having fun welding so.
No pix yet (will get them uploaded like normal and then modify this post. I can't get them off of my phone) but I ended up cutting the jack mount off and moving it inward about .75" (18ish mm). When I tried to put the license plate back on, of course it had fitment interference.
I swore a bit, pulled out the Sawzall and freed it from the rear bumper clip. Little bit of mill time and the long, holy arm was shortened.
So, while the assembly was sitting on the bench I had a vision of where to put the jack handle. A bit of lathe and mill work later and I have spring loaded catches on the underside of the mount. I did have to take about 4" (100mm) off each of the jack handle pieces but the MR is relatively light and loosing a bit of handle leverage won't be an issue.
Need to go get another spring for the handle capture and then weld the whole assembly back in place, which now fits w/o fighting for space.
I'm still avoiding the front end and fluids.
Nov 18, 2021
Pix as promised.
The parts for the handle captures:
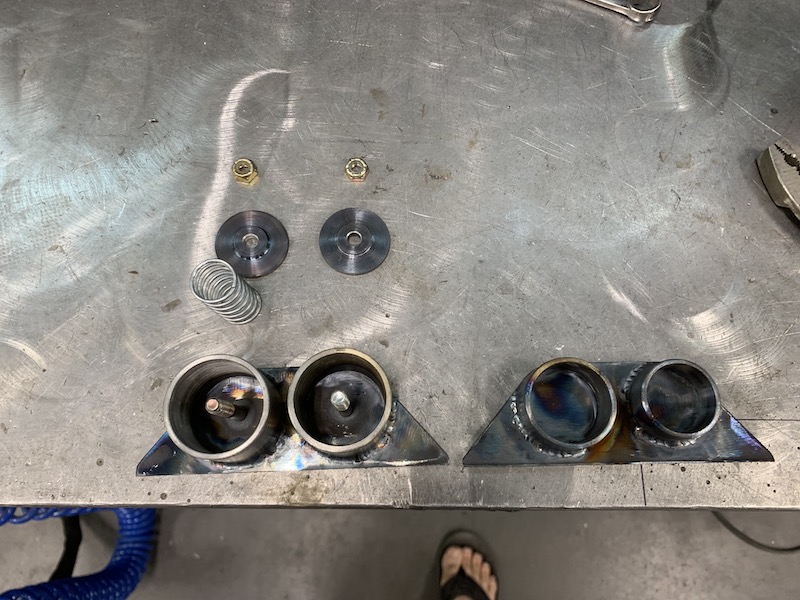
The assembled setup. Tucks the handles under and out of the way.
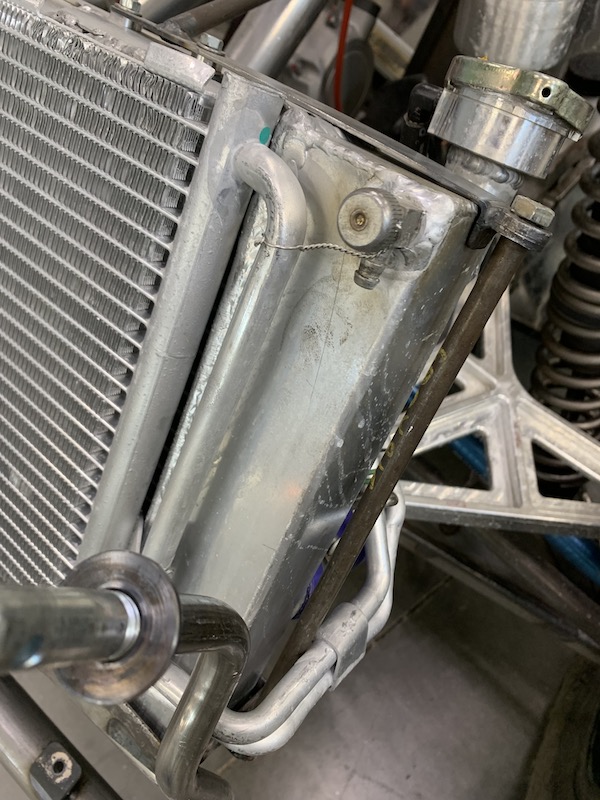
Found my radiator leak - took about 1/4 turn clockwise and it seated. WOO HOO!!!
And it's insured:
Dec 17, 2021
Actually working on her again.
Time for the rear bed panels.
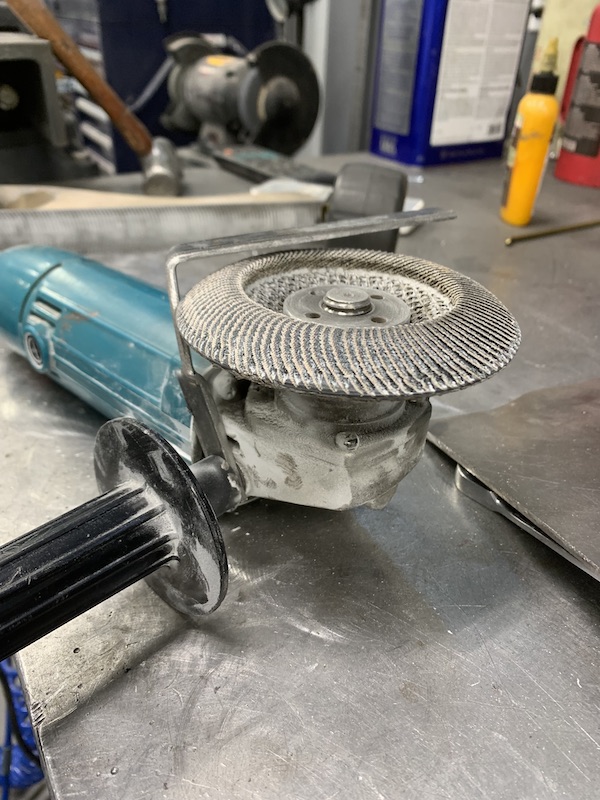
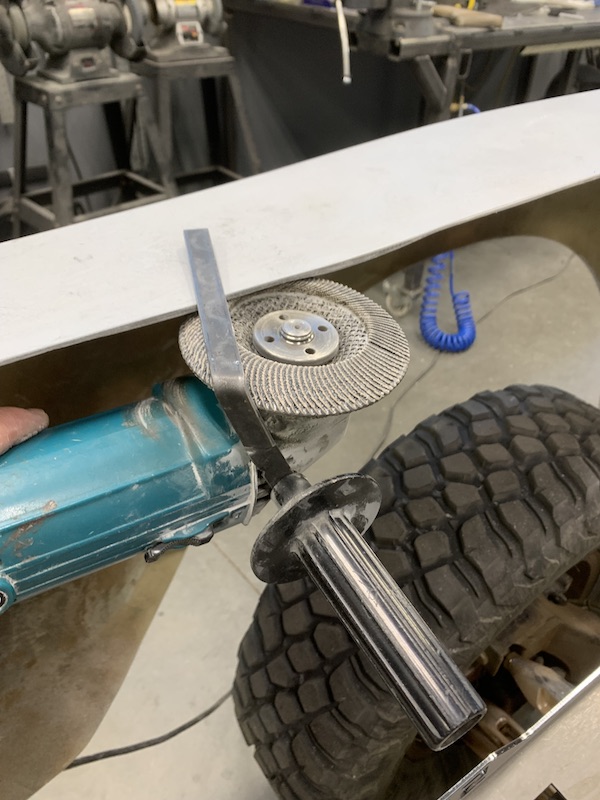
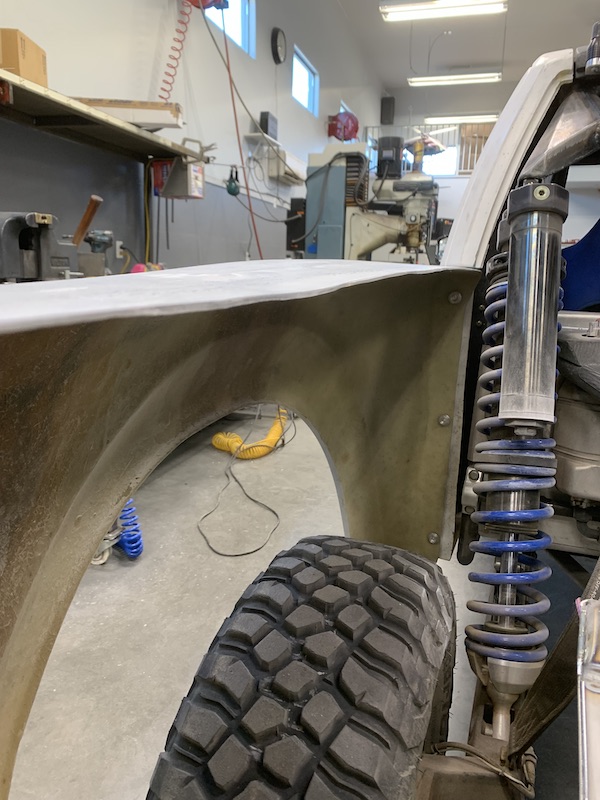
Since I had the fenders lengthened, they weren't flat on the underside. That needed to be.
Got creative with the grinder and a piece of flat steel - made a fence that held the flap wheel just off the bottom of the fender and tada, parallel (kinda at least) sides.
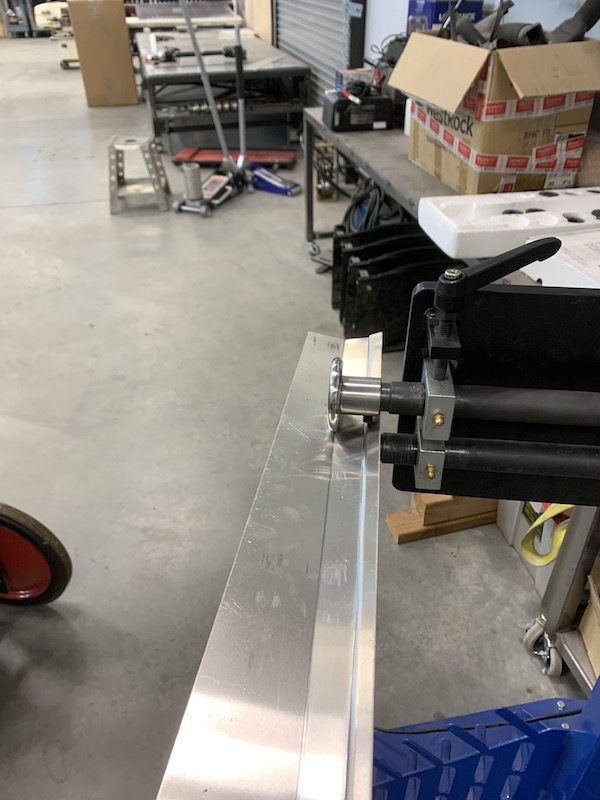
Then I went after the panel with the roller that I've been harboring for Joshua (Kustomfab) and stepped the edge that butts against the fender.

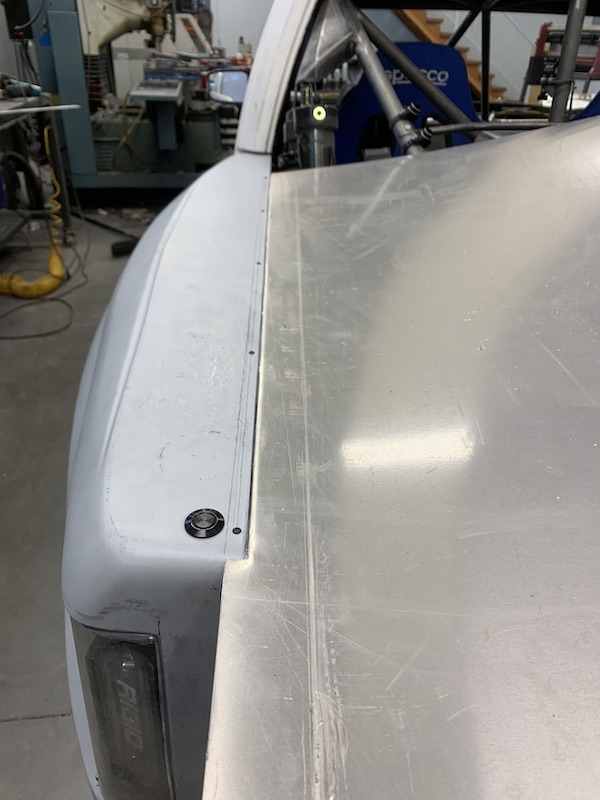
The roller also bends nicely and isn't sharp at the break (thinking about making these into carbon molds). There's been a few test pieces and pieces that locate - only wanna do this once!
I thought I took another pic of the kinda finished to fit (not finally done - that's still in process) but it's not in my photos... Hmmm... iPhone gremlins.
December 23, 2021 It's my birthday (insert happy dance that I've made it to 57 years old)
As per the usual M.O. I'm making a second panel. Where I folded the panel to go from bedside to floor isn't parallel with the top of the fenders so I now have a pattern and know where to fold.
Yeah, I know, post pix, you guys want mooooaaaaar! - have some, will get uploaded here in the next few days. It's kinda busy now and I'll probably not get much shop time for a few either.
I did get one thing done - got in my last 56 year old ride yesterday. Figured it was a good way to cap off an interesting year.
Highs - got married and love it, have done some pretty cool traveling.
Lows - I forget... Damn concussion is still an issue (getting MRI of me brain early January to see what I knocked loose and see if anything is still loose), owning a two stroke, getting my ass kicked by it twice.
New Year's resolution: NO TWO STROKES!!!!! EVER!!!!
Dec 28, 2021
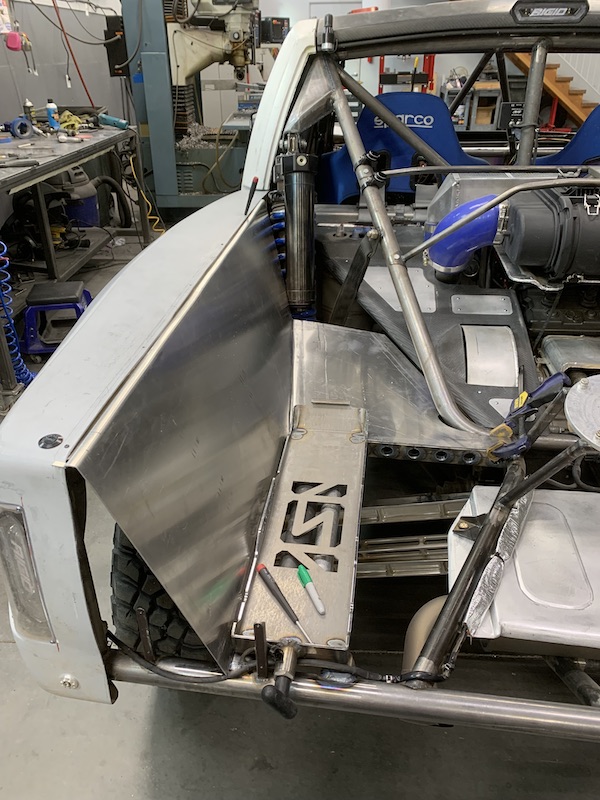
Been futzing around with the rear bed panels on and off.
As per the usual, I've made two of the first panel. There was an angling of the bed bottom that I missed until I put the first piece in place.
Here, this is the first shot at it. It's too short - needs to get up more around the shock. The blending area around the rear down tube is incorrect - made the right one and taped it in place to make the new one.
Here's the first "template".
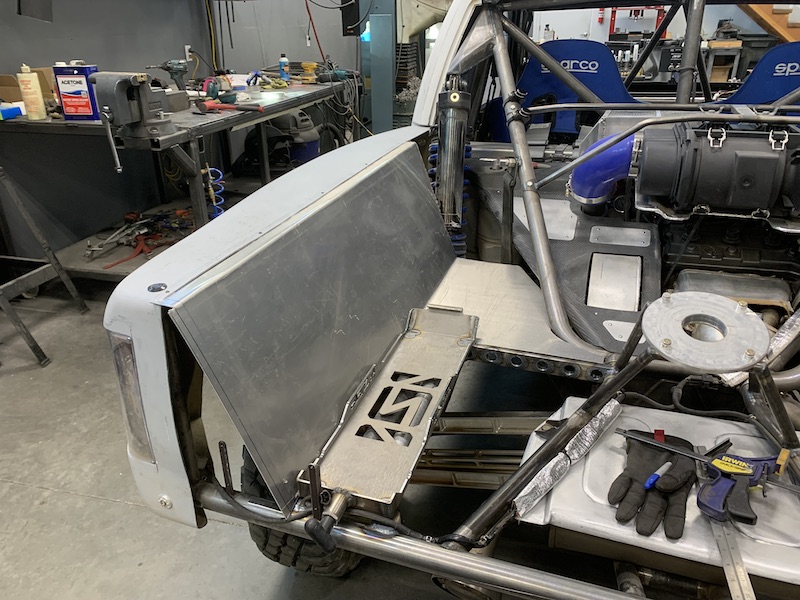
Look where the bed bottom is in relation to the reservoir bottom.
This is what it's supposed to look like. Fits much better - still needs some tweaking.
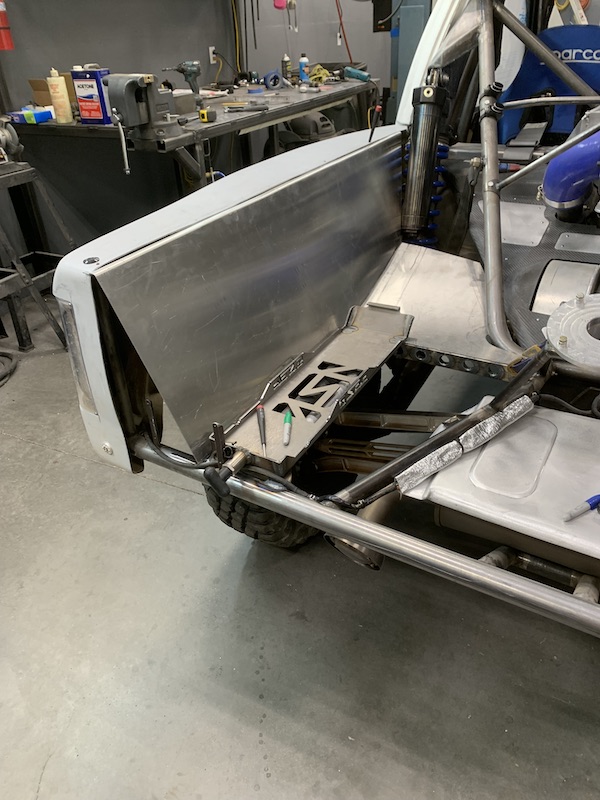
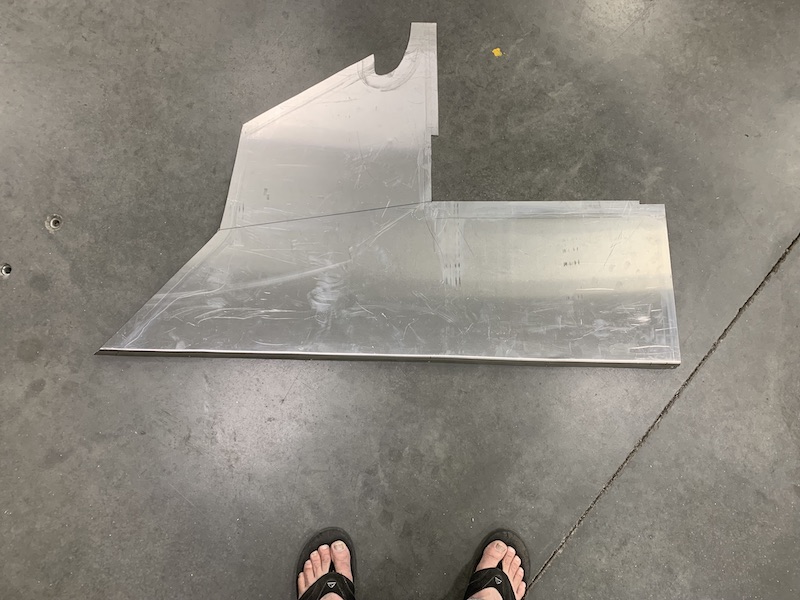
This is the second one, made from the first template, before bending:
Dec 29, 2021
Back at it again today. Since it was a double take on the first bed panel I used some of it and figured out the right side so it was a one shot deal.
Had to make another holy support bar - getting good at this shit.

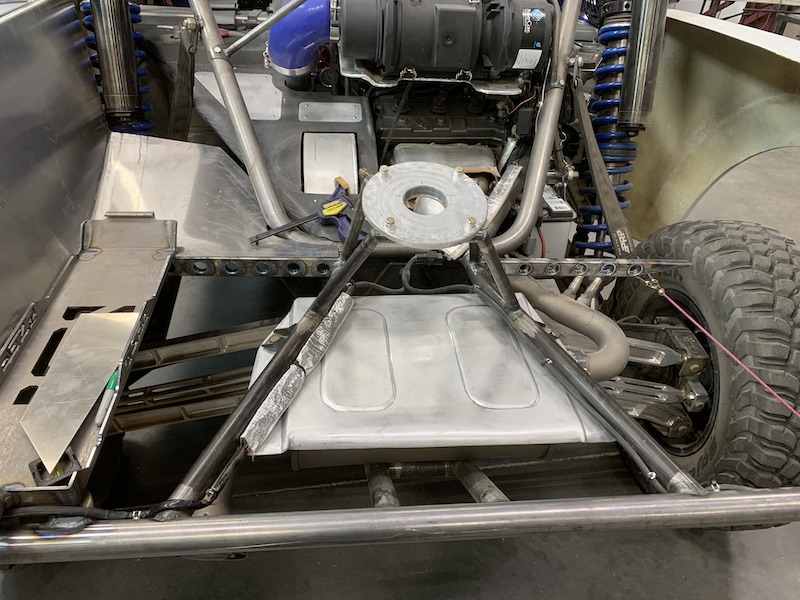
Then I took the left side bottom panel, cut it off, did a bit of mods, copied it to a spare piece and got the little nuances dialed in.
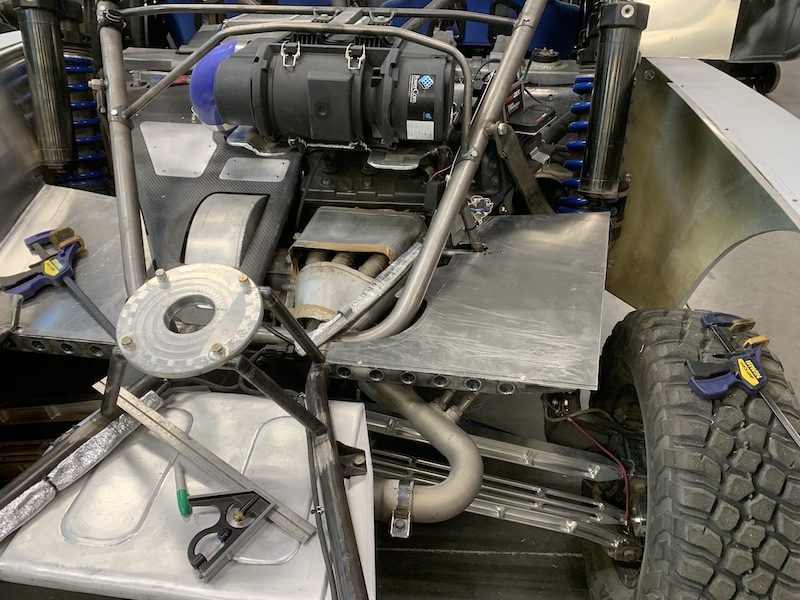
The I took measurements off the Mini-Raptor's back side, put them to aluminum, took the bed piece, laid it in place and don't ya know, I have a single bed panel that folds the correct way and stuff all fits.

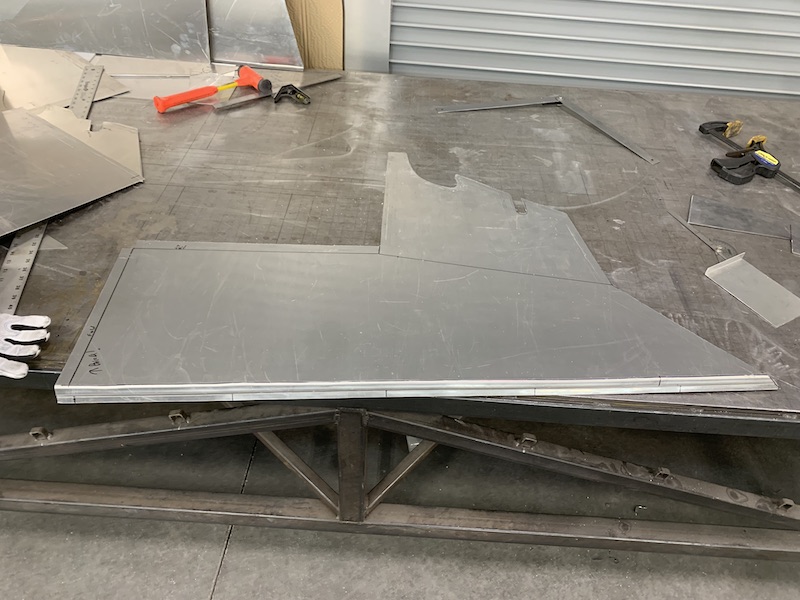
It needs a little massaging but it fits in place just about perfectly. A little bend here and there will make it drop right in.
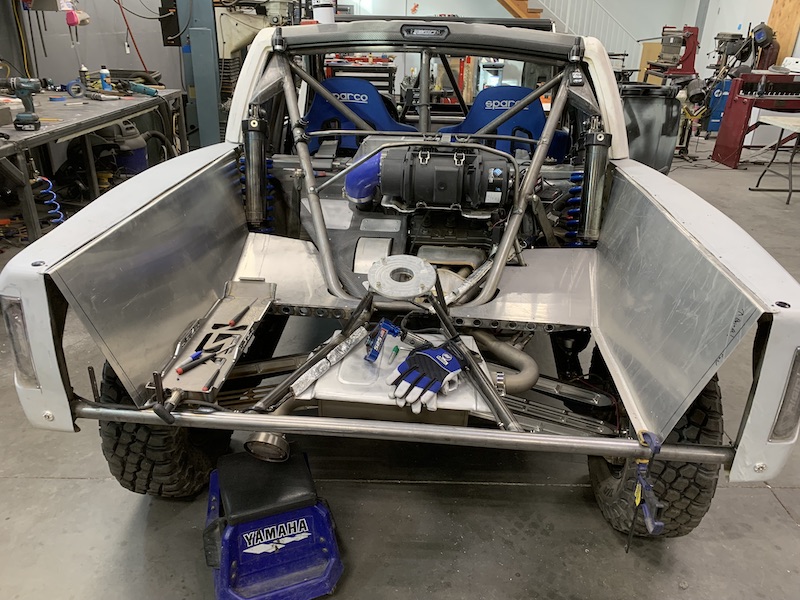
This tool is bad ass!
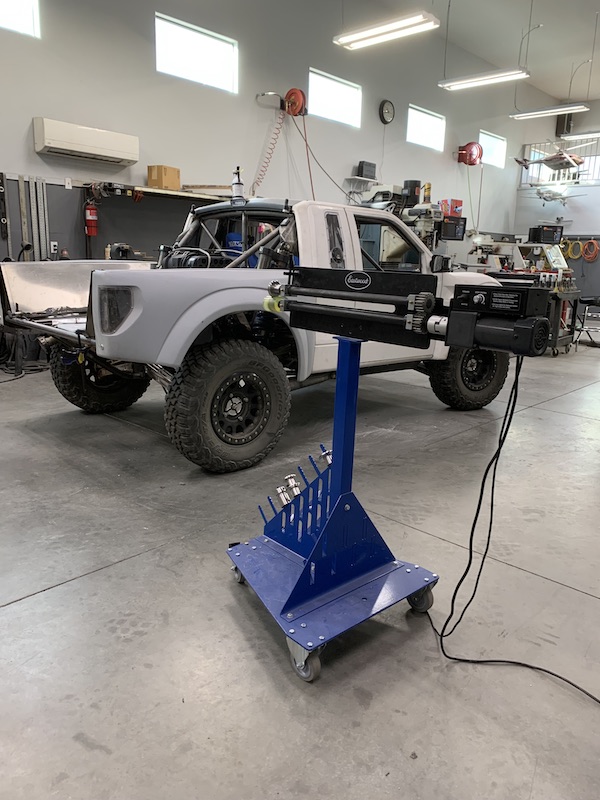
This concludes the building that happened up through the end of 2021. Click on the link below to be taken to what happens in 2022.
5/1/23