

Home of K-fab

|
|
|
|
The New R&R Tour Bus
4/15/23
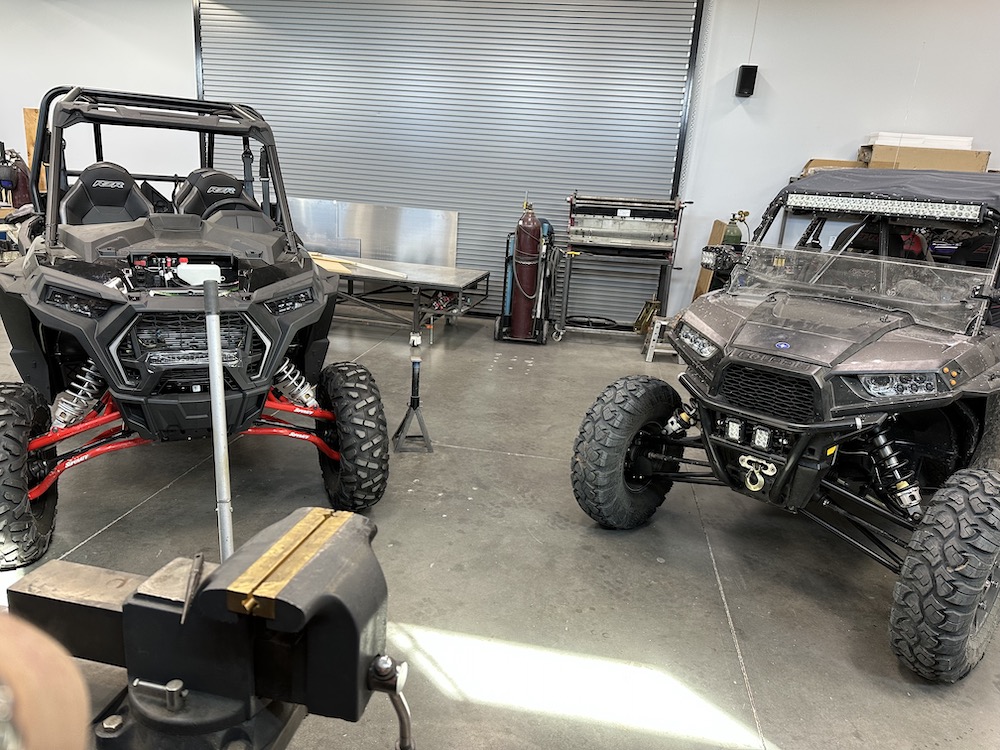
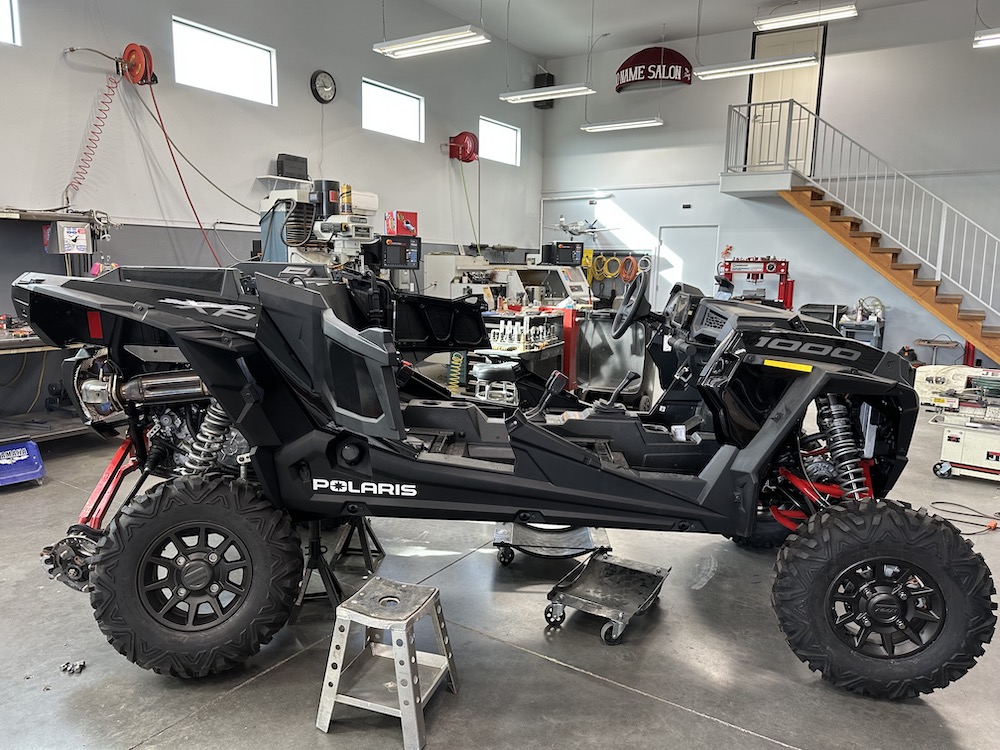
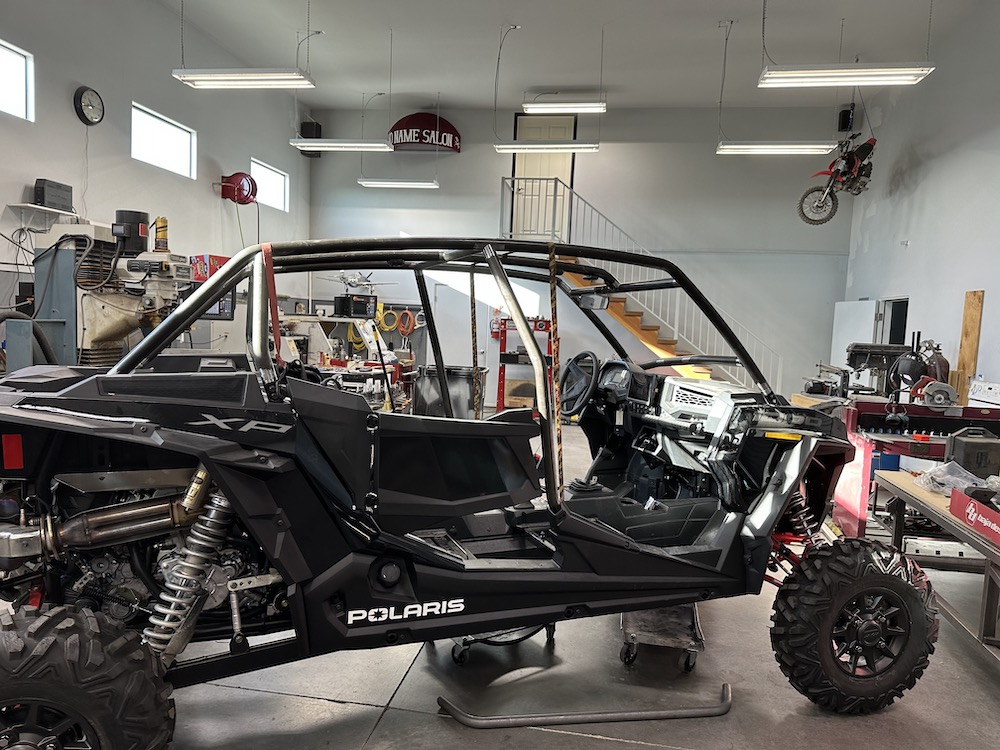
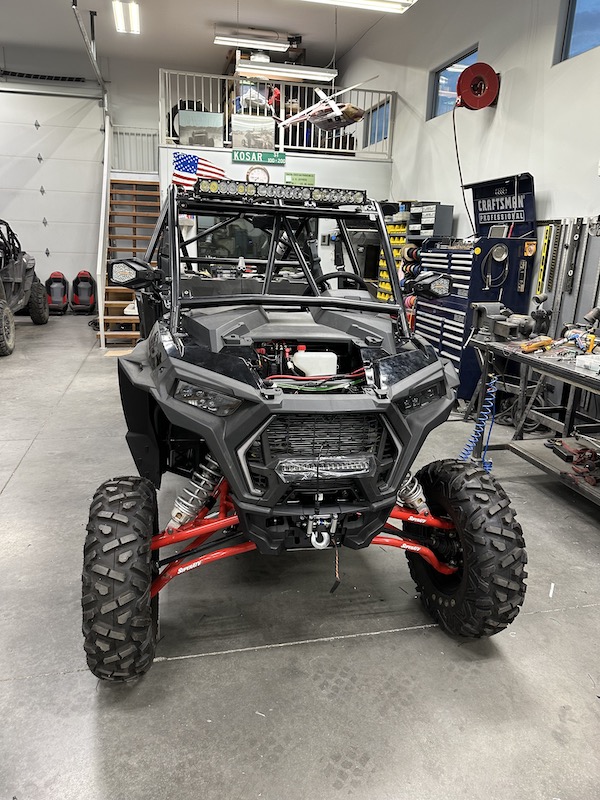
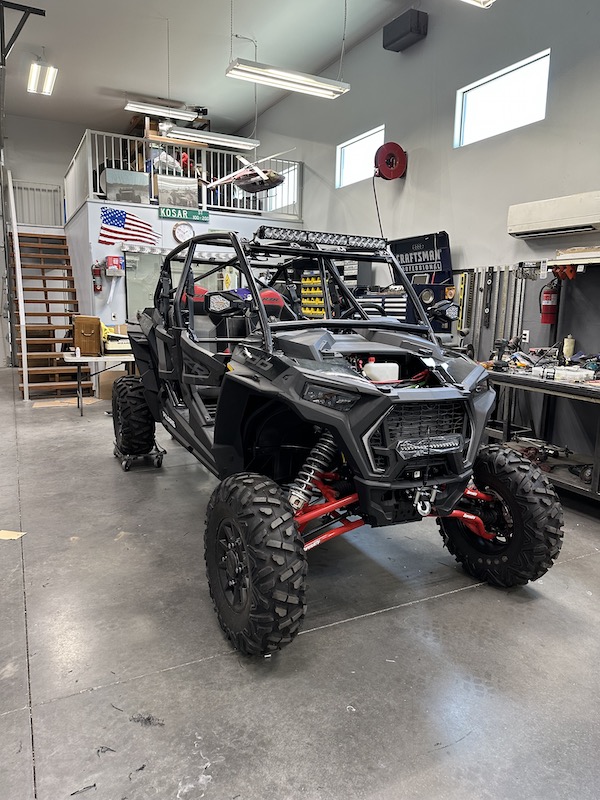
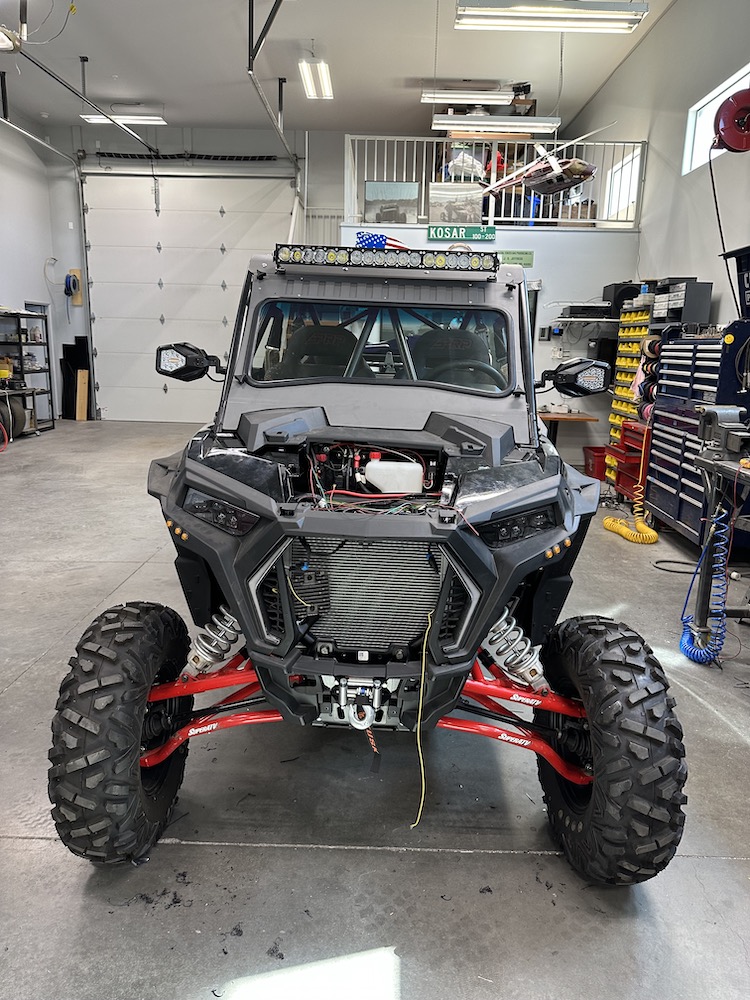
We've had a Polaris RZR XP4 1000 for about five and half years now. Sold the two old XP900s and snagged a 1000 four seater. We call it the R&R Desert Tour Bus because we're always taking friends, guests and such out into our beloved desert.
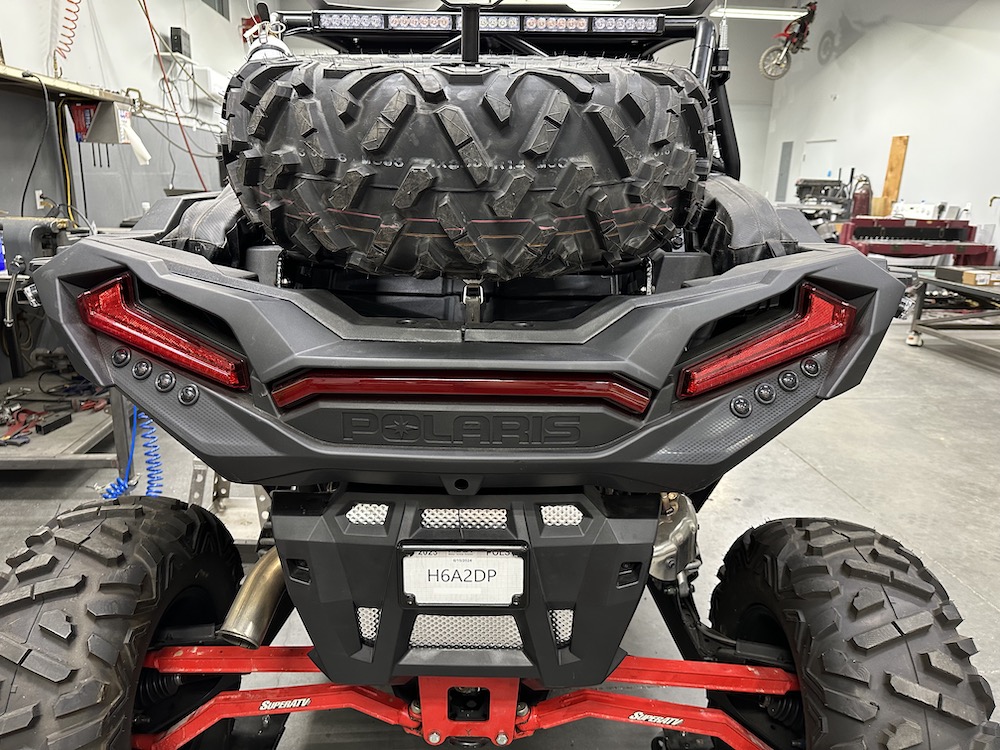
When we got it, the very first thing that had to be done was a cage and shock mods. I don't trust the stocker at all. Seen too many fold up. We also added a few desert requirements (stowage box, spare tire, winch) and then as we used it other parts got replaced (suspension arms).
The old gal's seen almost 11,000 miles of use, a new engine (it died January 1st, 2022 about a mile from the exit of Tonto. Never have I heard an engine go from 4,500 rpm to 0 rpm so quickly), it's had transmission issues and, well, it's tired. Polaris's stuff is pretty good for about 10K and then they wear out. Bummer.
The last few times we've been out in it, I've worried about making it back home. This is not an option out here - the desert kills people all the time and I don't wanna make the news. So we picked up a 23 XP4 1000. Same machine as last time. Why not switch brands? I'd LOVE to have a Canned Ham X3 four seater or maybe take a look at the new Kawasaki Terex four seater. Great machines. Well, there's a problem and an answer as to why not one of them.
Space. That's the issue. Plain and simple, space.
You see when we purchased our Lance toy hauler a few years back, one of the main reasons we got the Lance was, and it said it right there on the brochure, IT FITS A FOUR SEAT RZR! We really liked the Lance truck bed camper we had when we started deciding if we wanted to go camping or not, so why not replace that with the same brand that FITS A FOUR SEAT RZR!
Stock tire size on the XP4 is 29" in diameter. Back the RZR right in, touch the two wall spots, strap the machine down, close the ramp and be off to play. Put 31" tall tires on because they work better, have more ground clearance and it DOESN'T FIT IN THE TRAILER!!!
It FITS A FOUR SEAT RZR! - as long as you don't do squat to it. I'd love a Canned Ham but I don't want a new toy hauler. I like our Lance a lot. So, XP4 it is again. I'm not upsizing tyrahs this time.
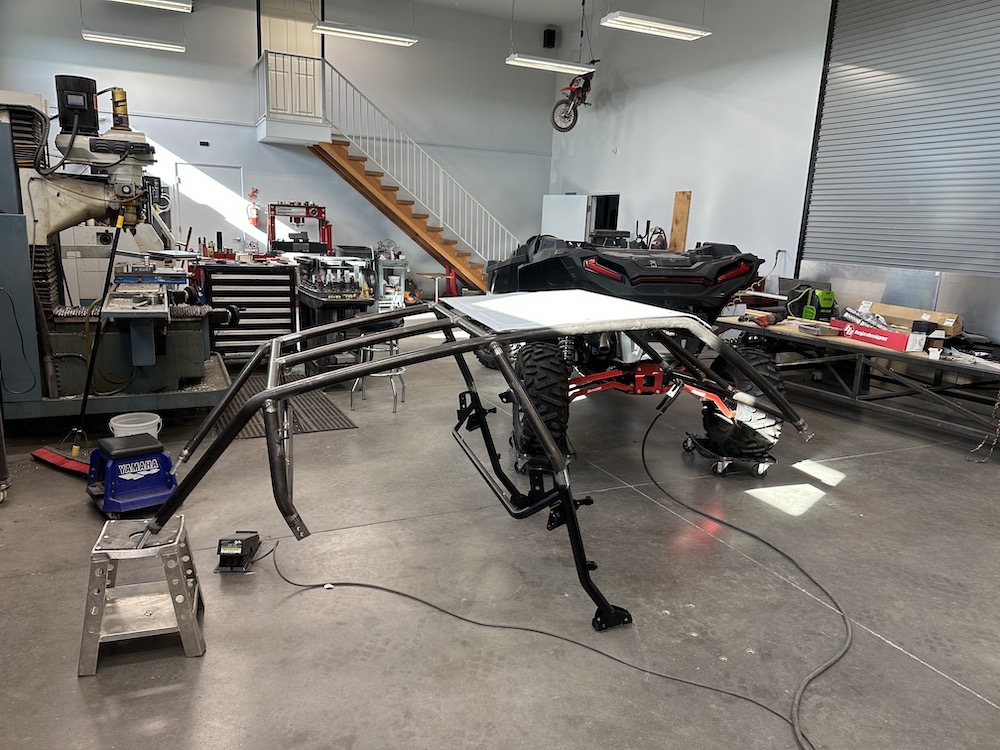
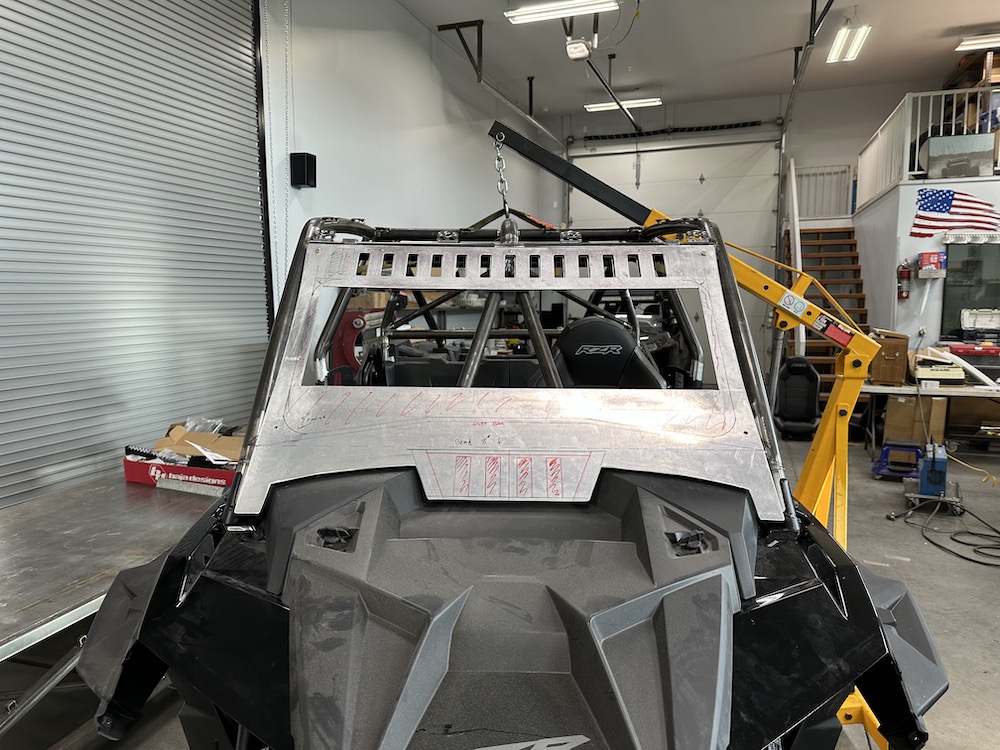
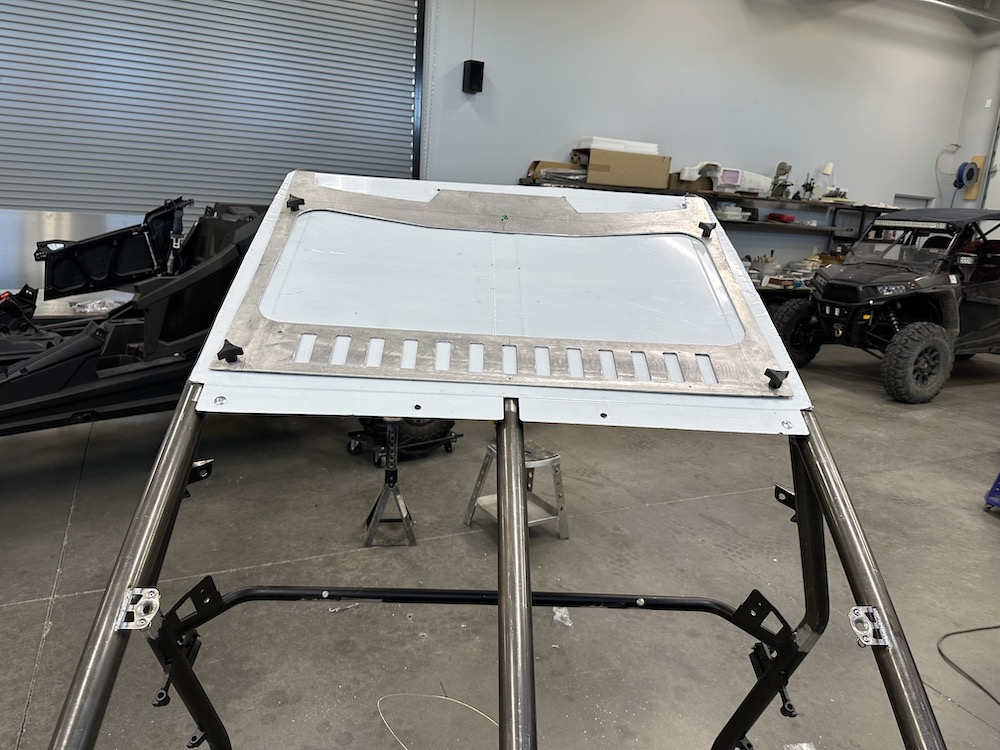
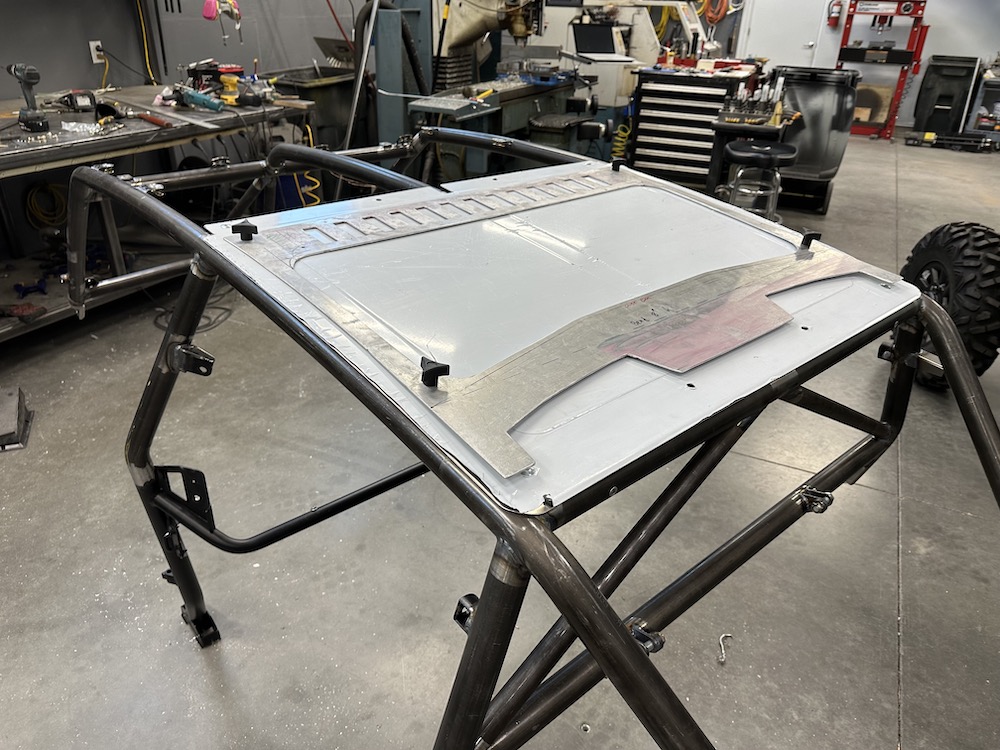
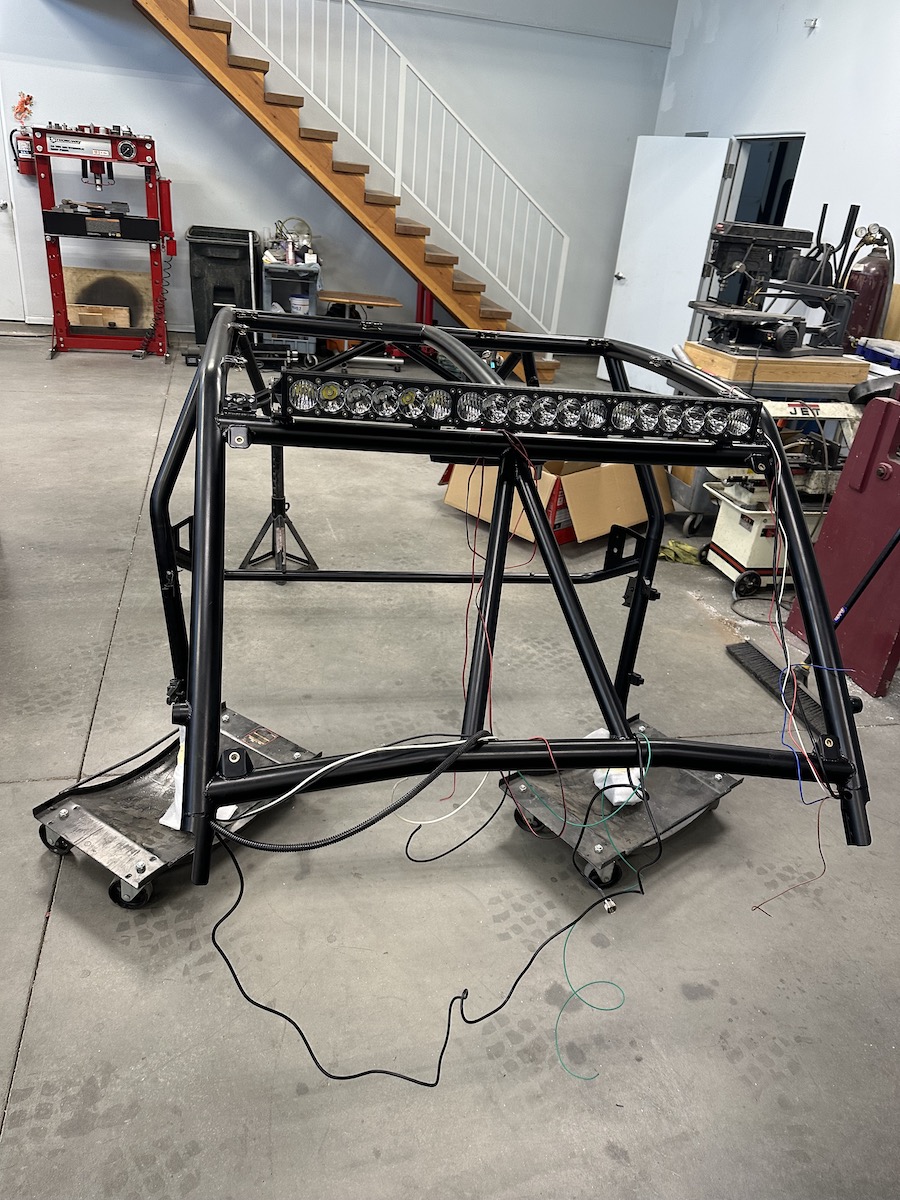
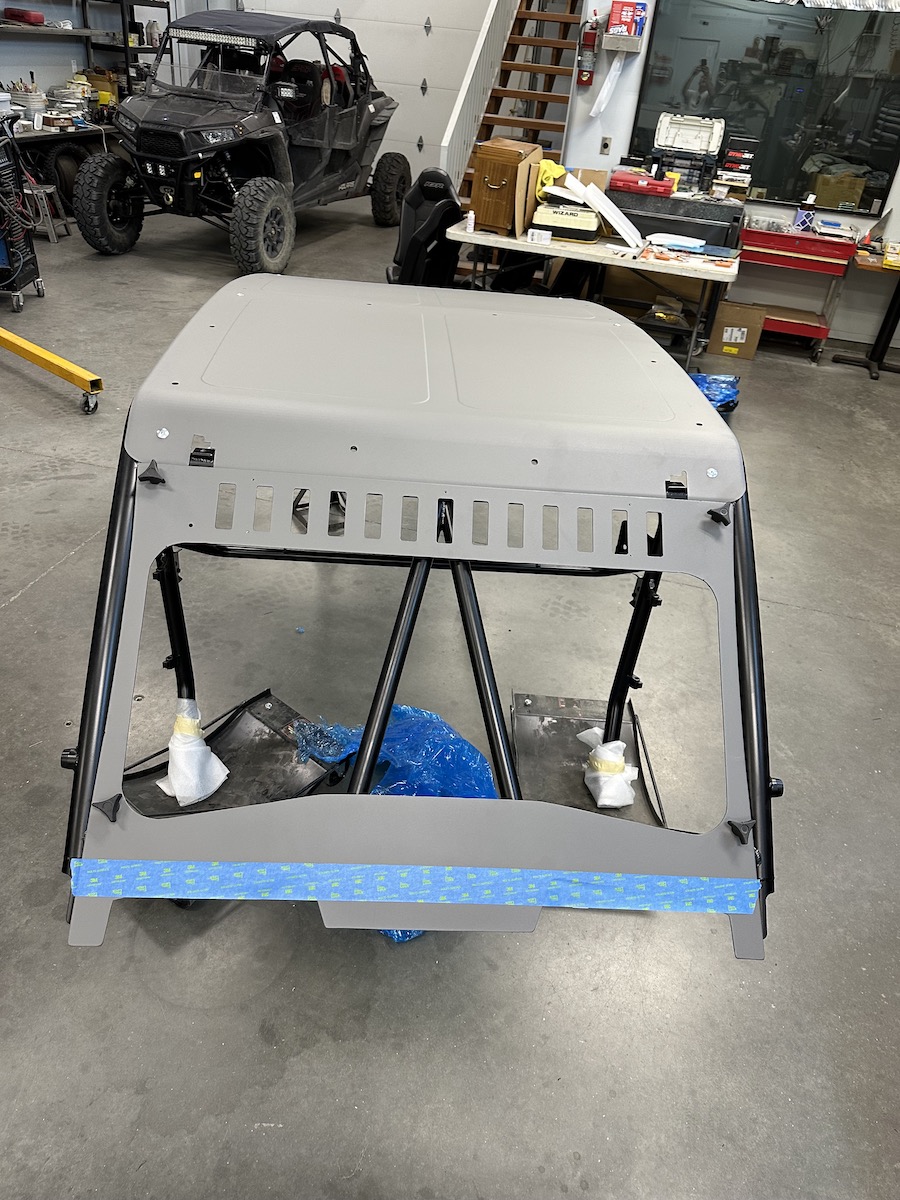
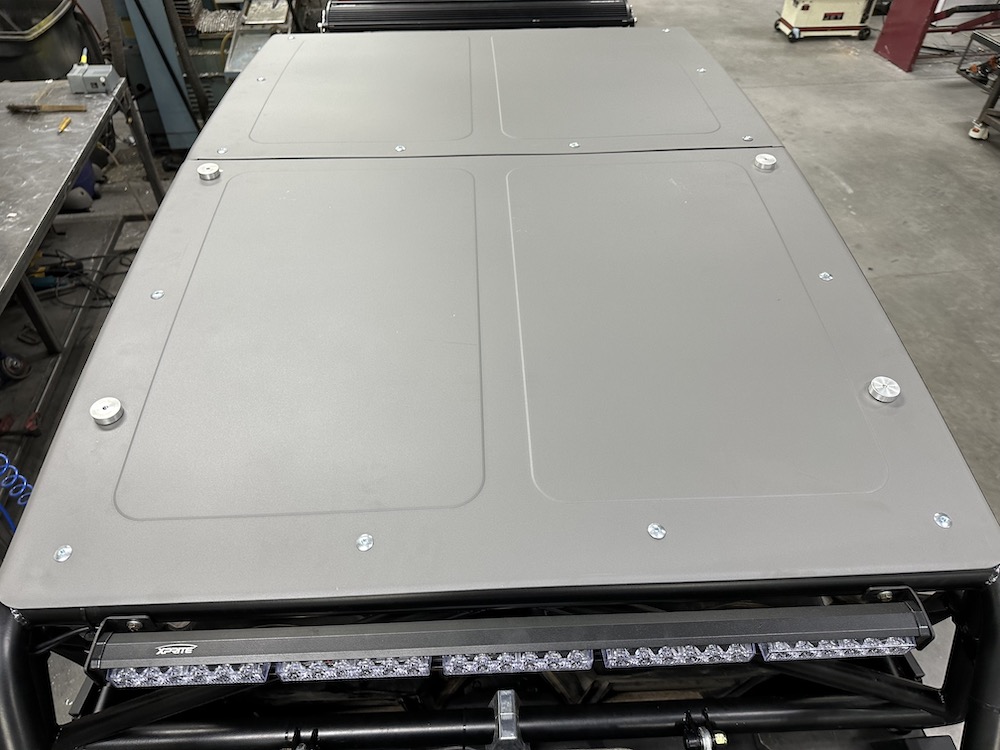
Once again, cage is a must. A Cagewrx Desert Shorty kit was chosen. We have this on the old one. It fits perfectly, is really easy assemble and comes as a kit. I also ordered roof panels this time instead of the old cloth setup.
Started looking at doing the needed upgrades. Wow, that gets pricy really quickly. You don't realize it when you add here and there. Hmmm.... upgrades. Well, I do have Shock Therapy shocks on the old one and they're KILLER. It has their sway bar on it, it has Super ATV arms up front and high clearance stuff in the back and the new heated PRP seats will drop right in.
Looks like I have some parts to pull and parts to exchange.
The front end was bolt on. All the same hardware, it was a straight up easy exchange.
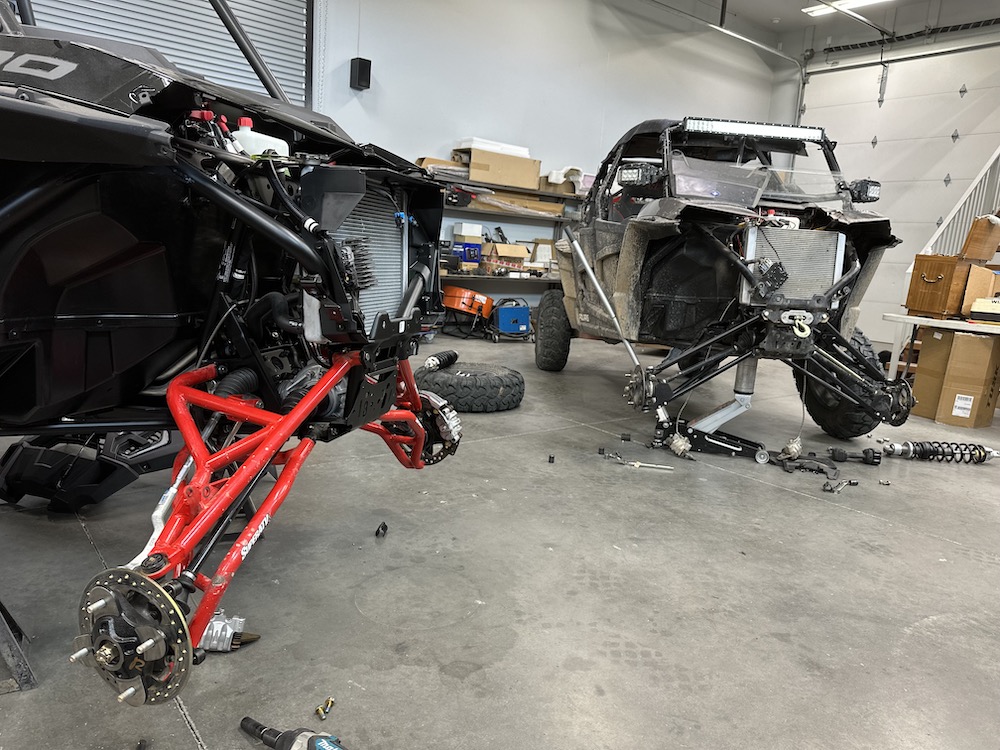
Who ever gets the old XP4 is getting brand new shocks and suspension arms.
Rear suspension had to play ugly. The 2017 had 10mm diameter hardware. The 2023 has 12mm diameter hardware. That meant to put the 23's stuff on the 17 I was going to have to drill out all the bolt holes. No big deal, especially on the inner mounting points as they're just holes in a couple of plates. The rear carriers, on the other hand, took a bit of careful work making sure that I got the drill aligned correctly. They were about 3" of hole to enlarge. It all went well, though.
I had to drill out all the spacers on the SuperATV suspension and then order new hardware that fit. Wasn't a bad job, just a job.
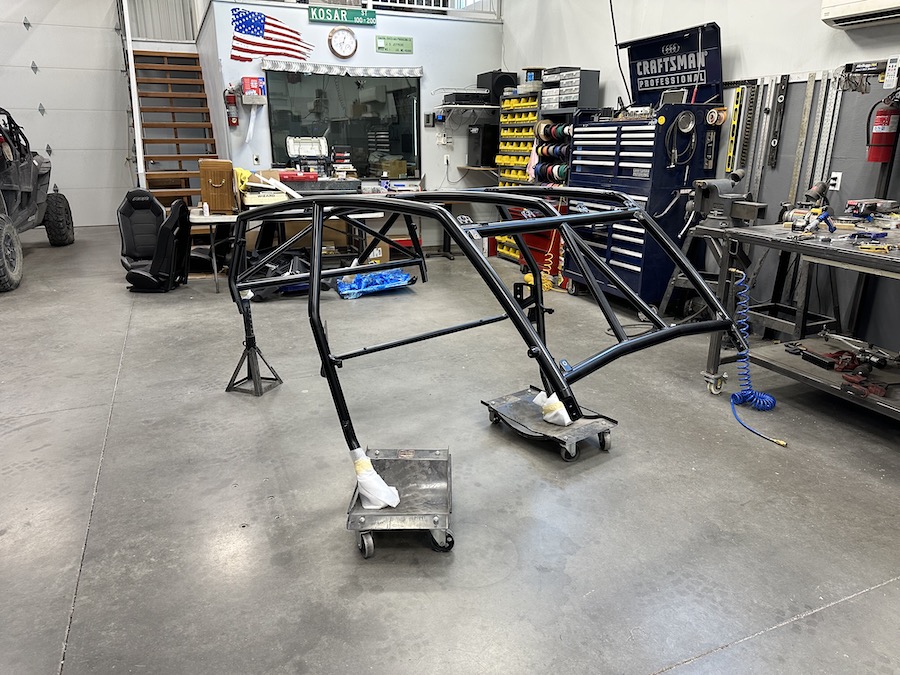
Cage was next so off came the stocker. Discovered that a friend of mine is a Cagewrx dealer so I gave him a call. Really appreciated the pricing.
The Cagewrks kit darn near snaps together. The tubes are keyed and notched and it just takes a tie down to hold the whole thing in place. Took an afternoon assembling it and tacking it in place.
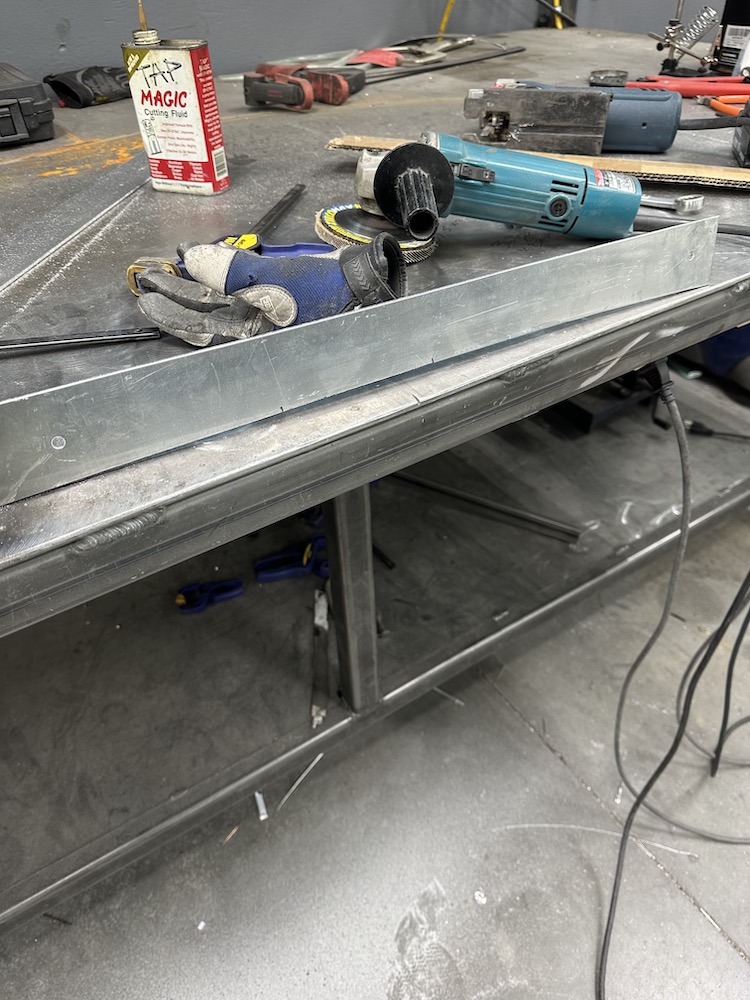
I used my 525 Industries 360 degree tubing sander to clean up all the weld points. There, shameless plug for ya Mike.

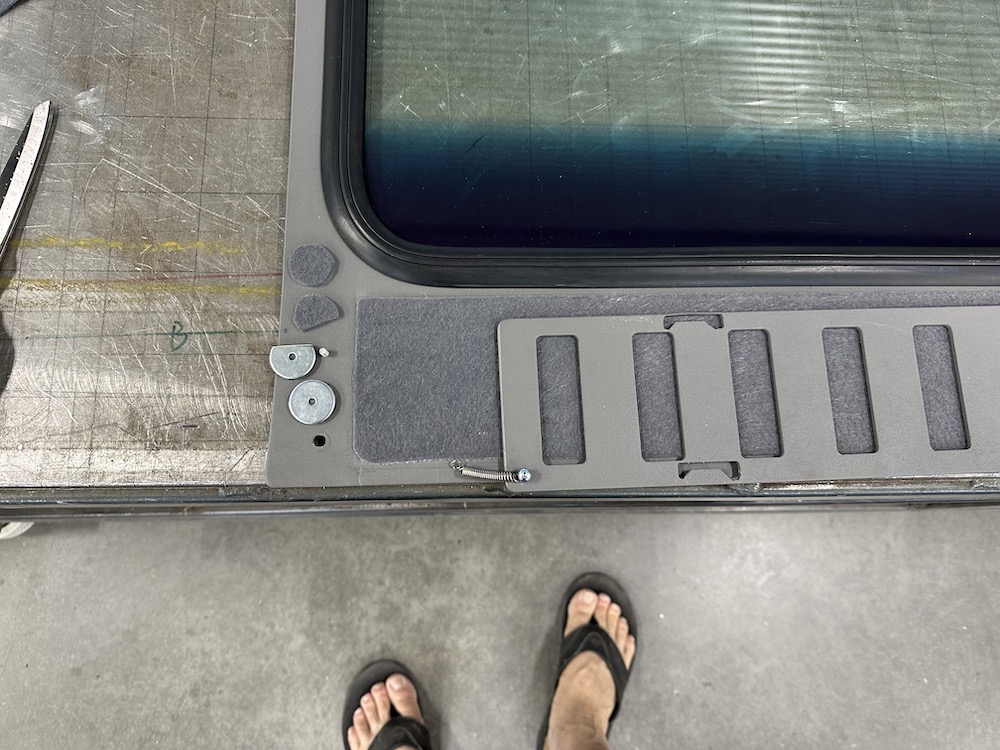
I think the only thing I don't like about the Cagewrx kit is that they want you to use the stock RZR door hardware. It requires cutting the hinges out of the stock cage and moving it over to single vertical bar. I did it on the 17's cage but it was a total pain in the ass. The rear grab bar is also located up high and not really comfy for passengers to hang onto.
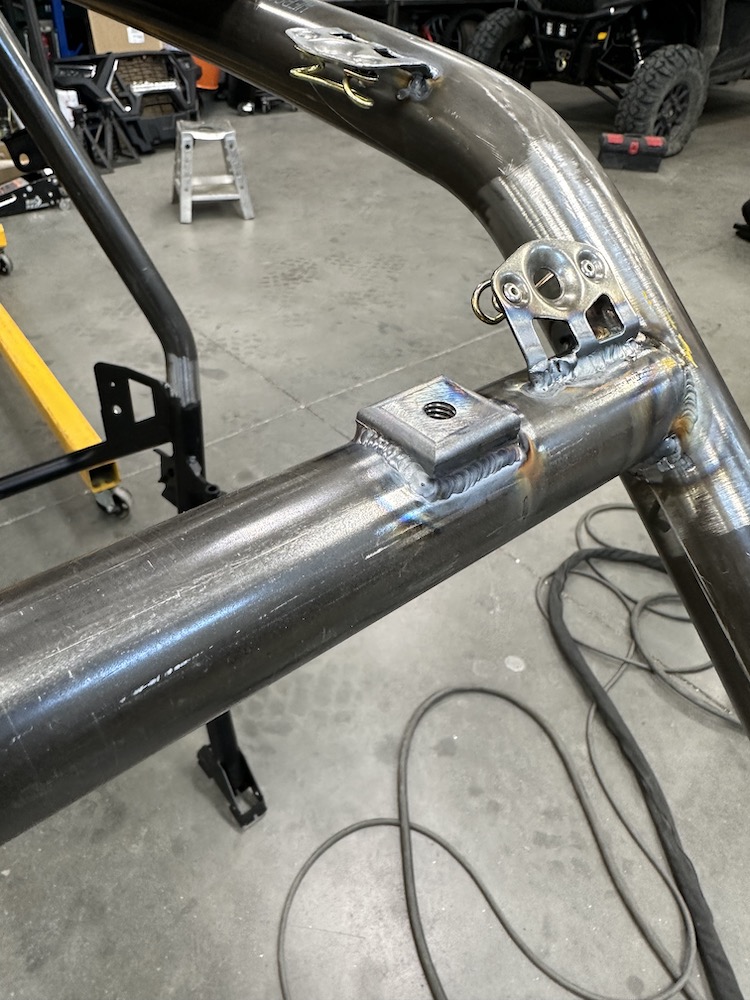
This time I cheated. I used the OME lower section of the B-pillar. It fits perfectly, the doors fit, the seat belts fit - pretty much everything is right there because it's the stock stuff. No brainer... I made a couple of sleeves to stub the lower section of the B-hoop to the upper ends of the Cagewrx B-pillar.
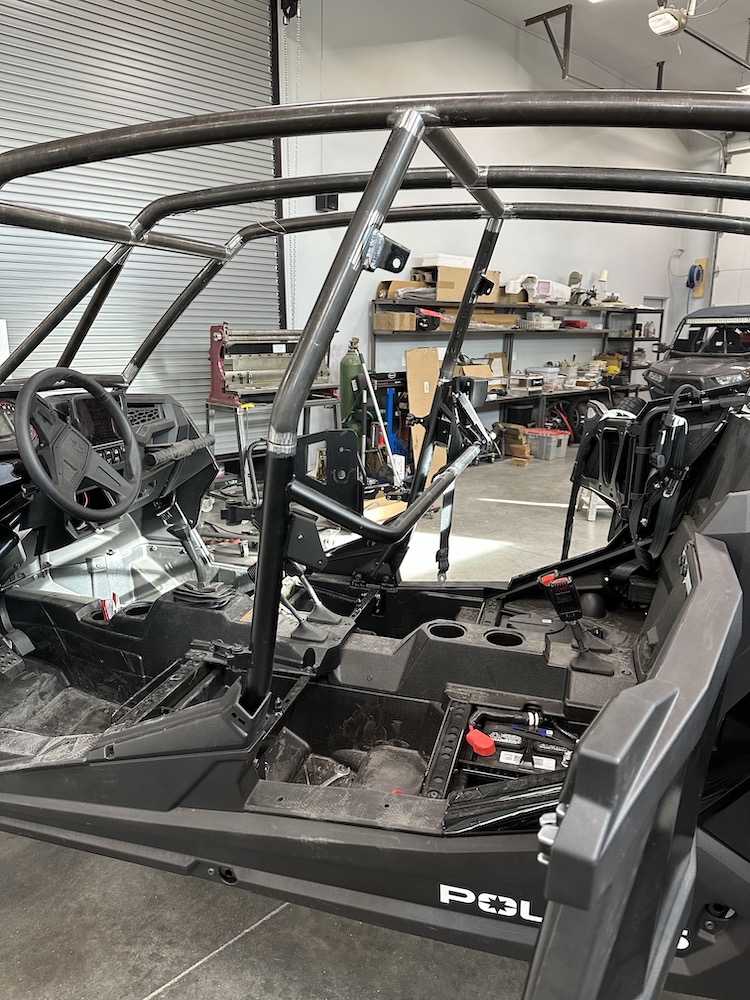
Another thing I kept was the upper seat belt mount. I got them wrong on the 17 (too low so they bind in the ring). This time I just copied the location, cut the mount out of the cage and welded it in place on the new cage. It fit like a glove.

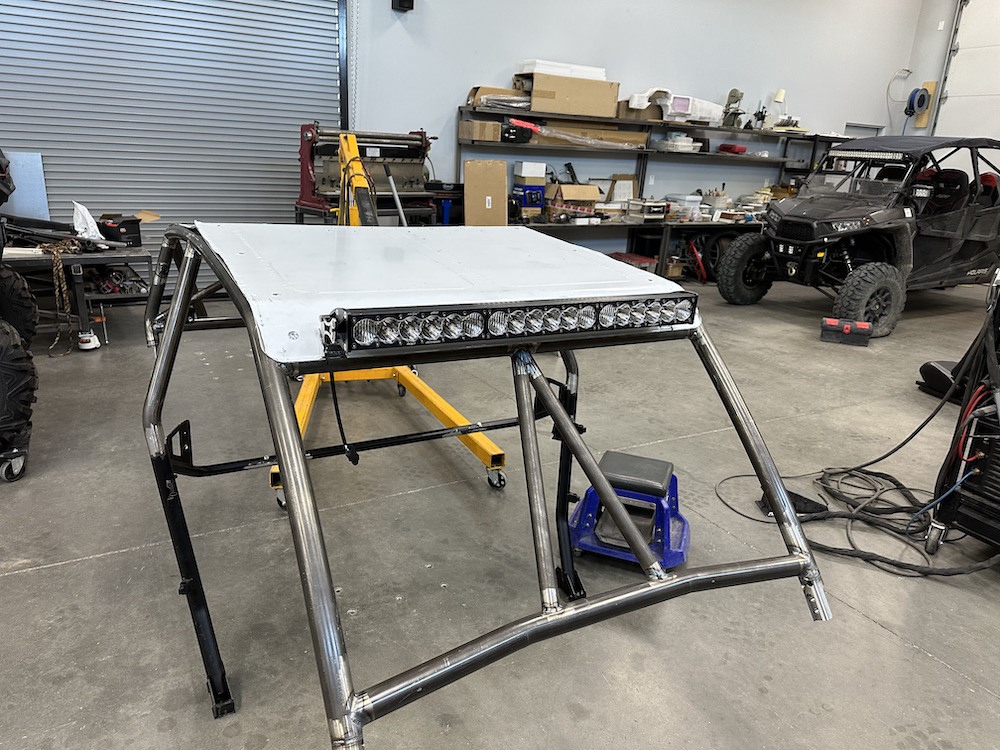
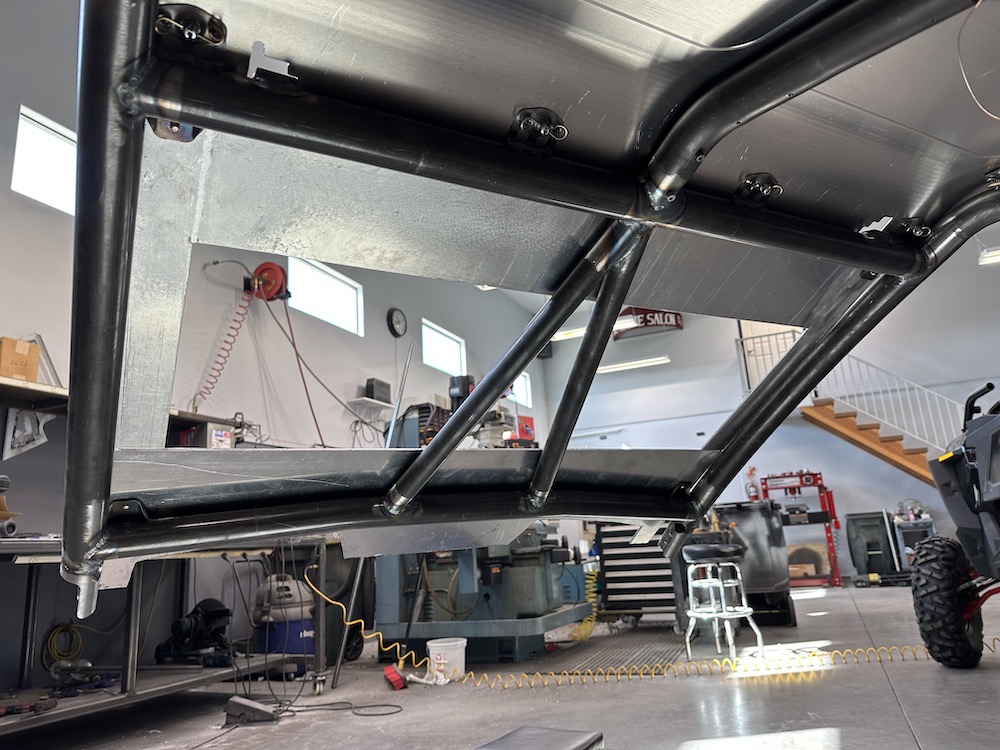
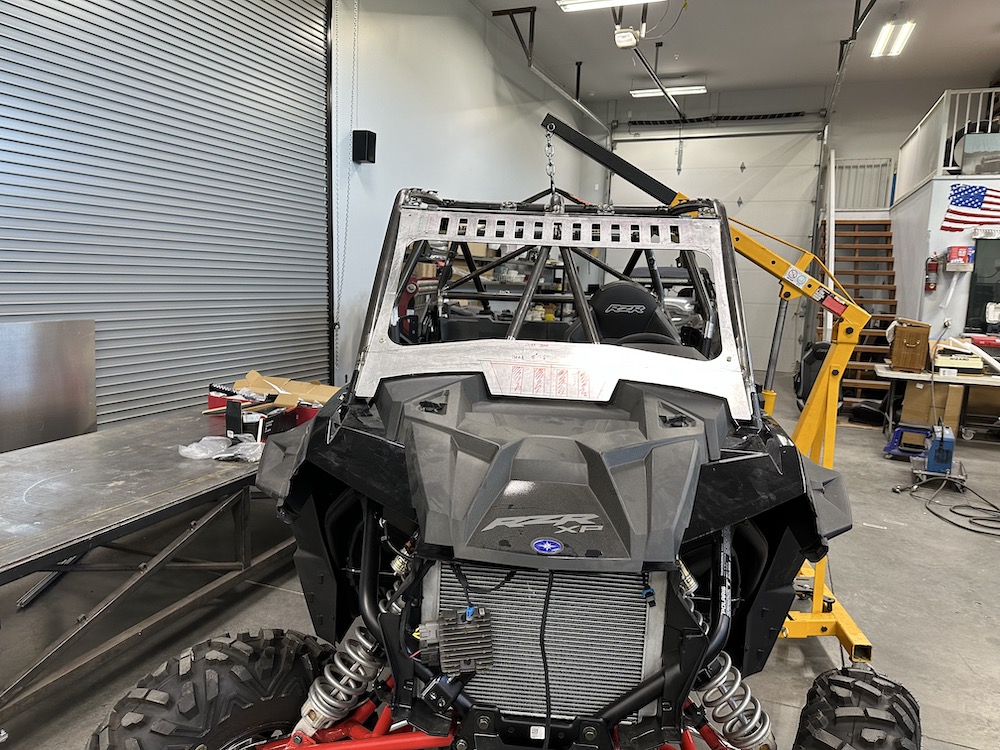
Got the cage welded as well as I could while it was still on the chassis then pulled it and finish welded the entire thing. Added an antenna mount, put the roof on and got the light bar mounts installed.
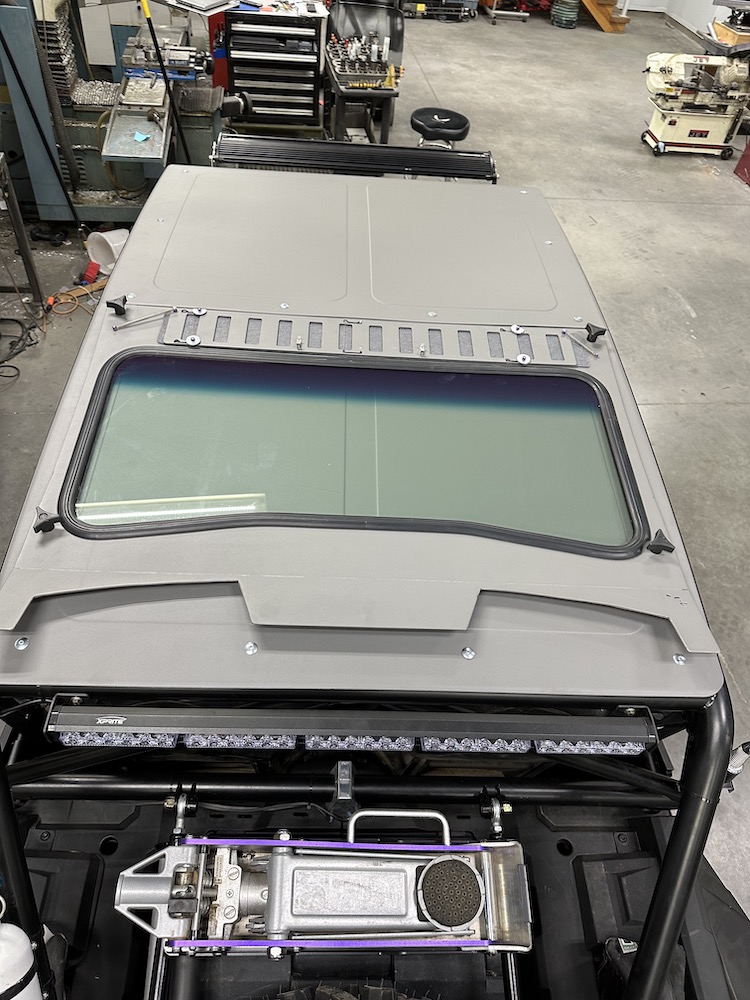
Originally I wanted a tilting glass windshield. I'm sick of the Lexan half windshield on the 17. It scratches, it's statically charged so it attracts dust, it has a fold right in my line of sight - it's a pain. We mainly use it for road driving - it keeps bugs out of your teeth pretty well. I've got it set up so that it takes two knobs to hold it in place and it stores on the back roll cage. Less than a minute from pull over, get out, move windshield, get in, go.
There are a couple aftermarket glass windshields that fold down and sit on stays in the front of the hood. But none of them fit the Cagewrx cage except the one they make and it doesn't fold or remove easily. Time to make my own. I've been told there's a guy who will cut the glass and fit it to a frame so I'm making a frame.
Blending the frame edge to the a-pillar:
Mark with sharpie
Grind to mark
Test fit
Repeat
The nice thing is it fits the other side very closely so I have a template.
Lots of aluminum dust.

Got the frame welded up and almost done grinding. I've purposely made the window area too small - it'll get opened up and the corners will be radiused.
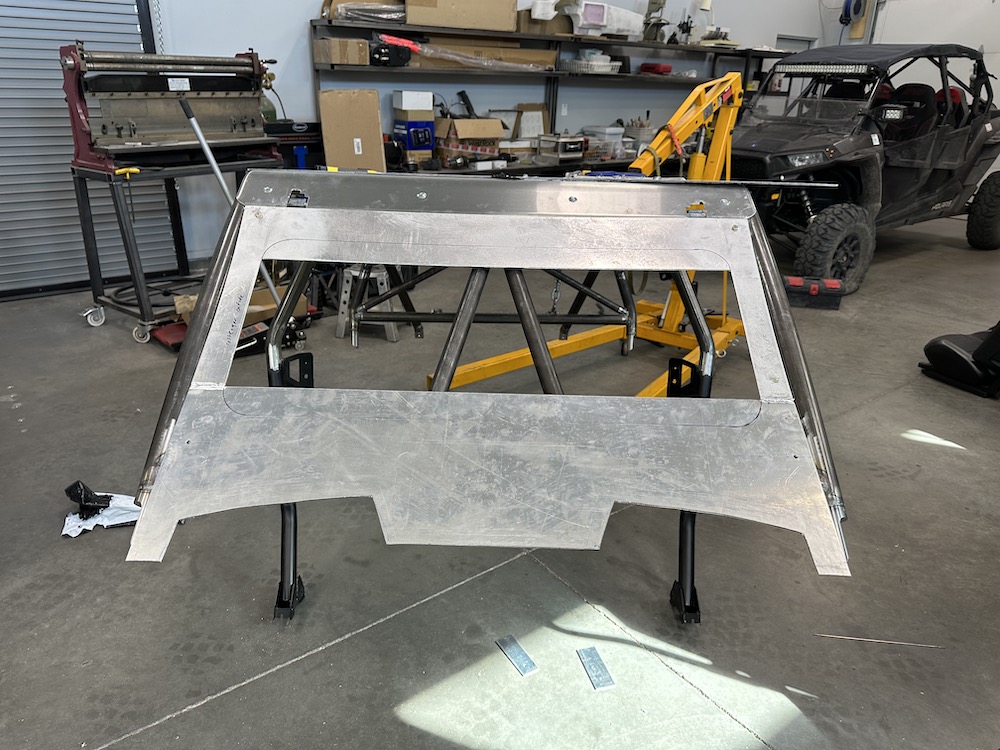
I may keep the upper edge of the opening low and along the line that's there. It acts as a sun visor.
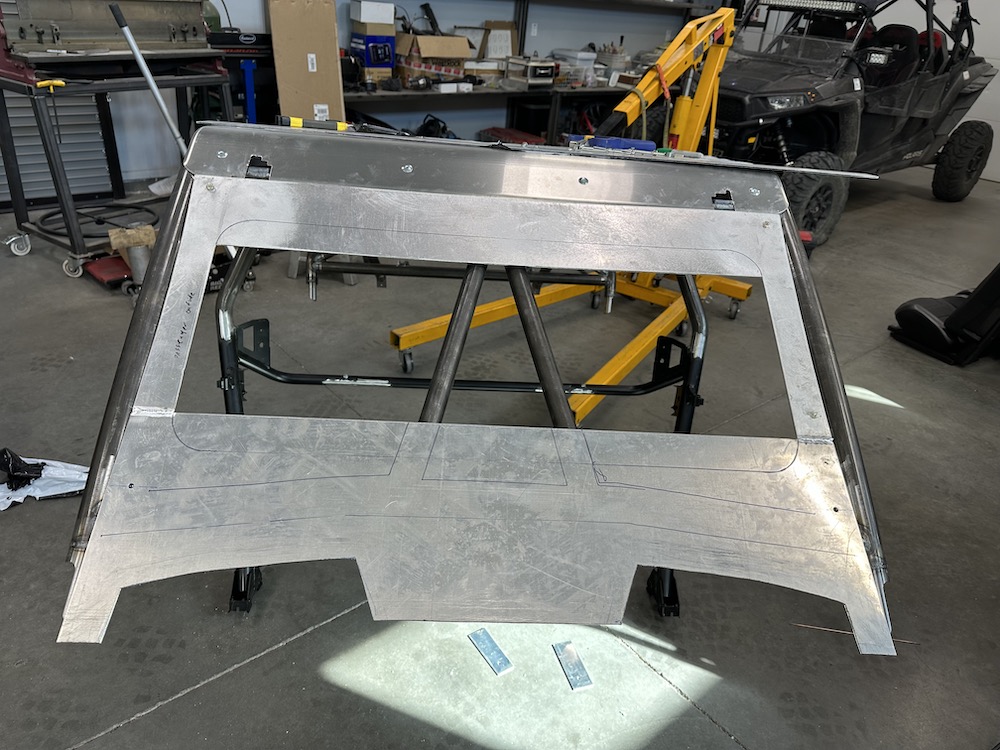
I've also seen a couple of interesting vents and have an idea for a couple of sliders that would be under the window. I have quite a bit of space - especially right there in the middle. The plan is to remove all the red stuff.
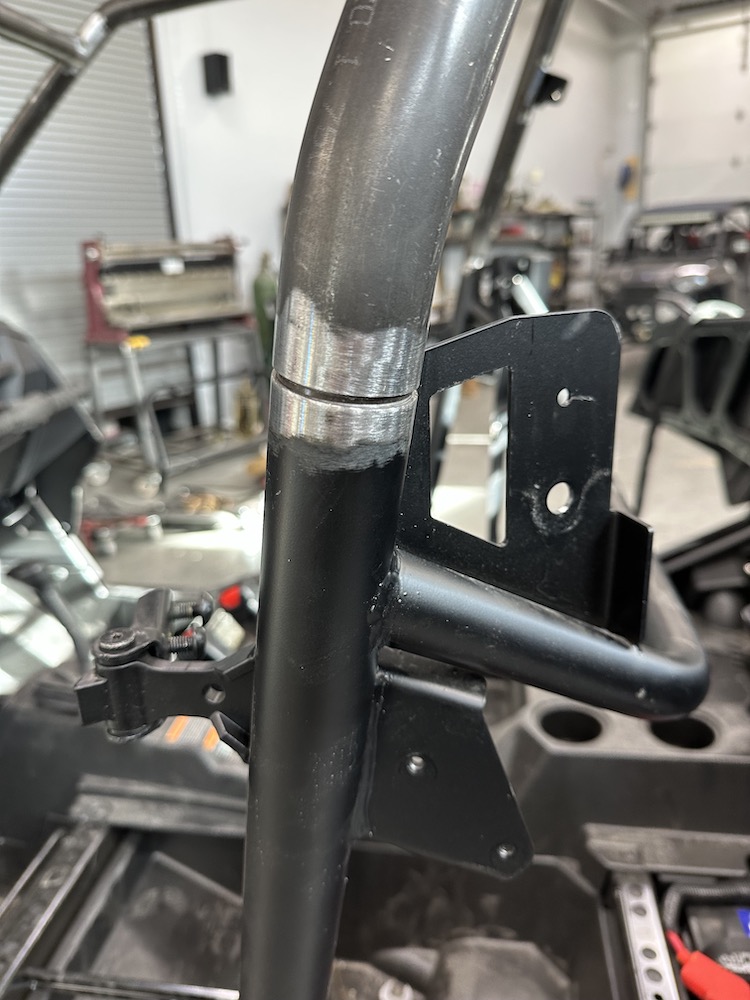
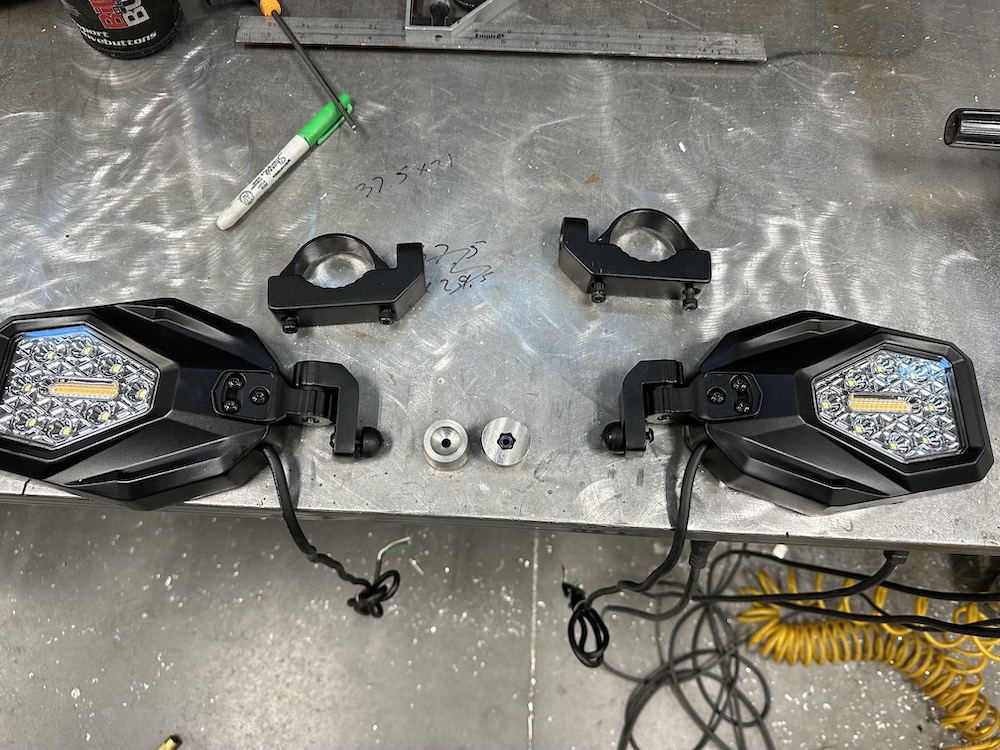
One of the things I didn't like about the mirrors is that they're held on with band clamps. That's fine for universal mounting but my cage isn't universal and I'm capable of making mounts that get rid of the band clamp aspect. Off to the lathe and I have two bungs (with nuuuuuuut pockets, of course) that get welded onto the A-pillars

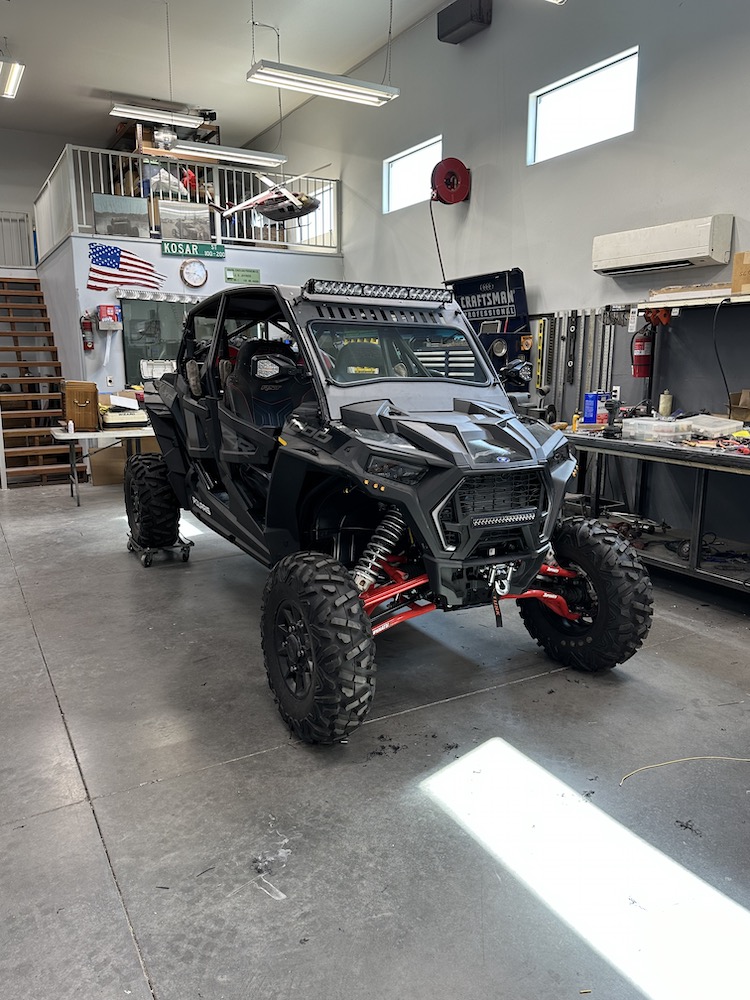
The finished (from my end) product. A cage, a windshield and mounted mirrors.

One of the things we like about our old R&R Tour Bus is the removable front windshield. It makes it nice to be able to take it off and get the desert breeze through our hair and bugs in our teeth (you smile a lot whilst out in the desert - it's a happy place.)
The windshield will be held onto the front of the cage with four knobs so it was easy to find a place on the roof where the windshield would fit.
As you can see, the frame won't sit flat on the roof. I'll make a couple of stand offs that will hold the windshield and it's frame just a tad above the roof.
I got the cage and other stuff off to powder coating about two weeks ago. I was told turn around would be around three weeks so hopefully I'll see the stuff next week and reassembly will begin.
I'll quote a fairly famous phrase to close this out for now: "I'll be back."
I'm back and the cage and accessories have returned from powder coating.
I must say that I'm impressed with Affordable Powder Coating here in Phoenix. I've used them for years and this time really paid off. I got a quote of $1,800 here in Snottsdale (local for me). I choked, loaded the stuff into the van and headed across the city to the industrial side of town and left everything at Affordable.
I asked for a quote and he looked at the stuff. "Not sure, but not much."
"Less than $1,800?"
"Oh definitely. Drop the first number."
They charged me $657.
I removed all the Dzus hardware before getting it powdered. When I see the retaining springs and rivets the same color as the cage I see lack of attention to detail. I like the color contrast so the first thing I did once it was back was get Dzus hardware reinstalled.
The next step was to get the front windshield frame venting installed. It uses springs and recesses in the cut outs to pull it down and lock it in either open or closed position.
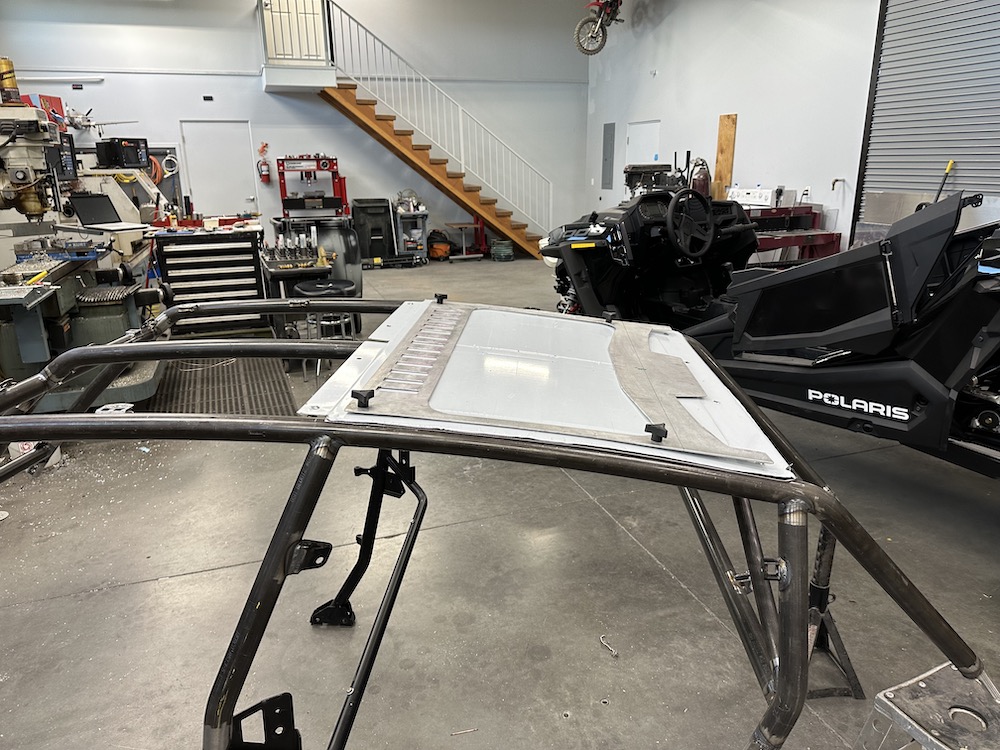
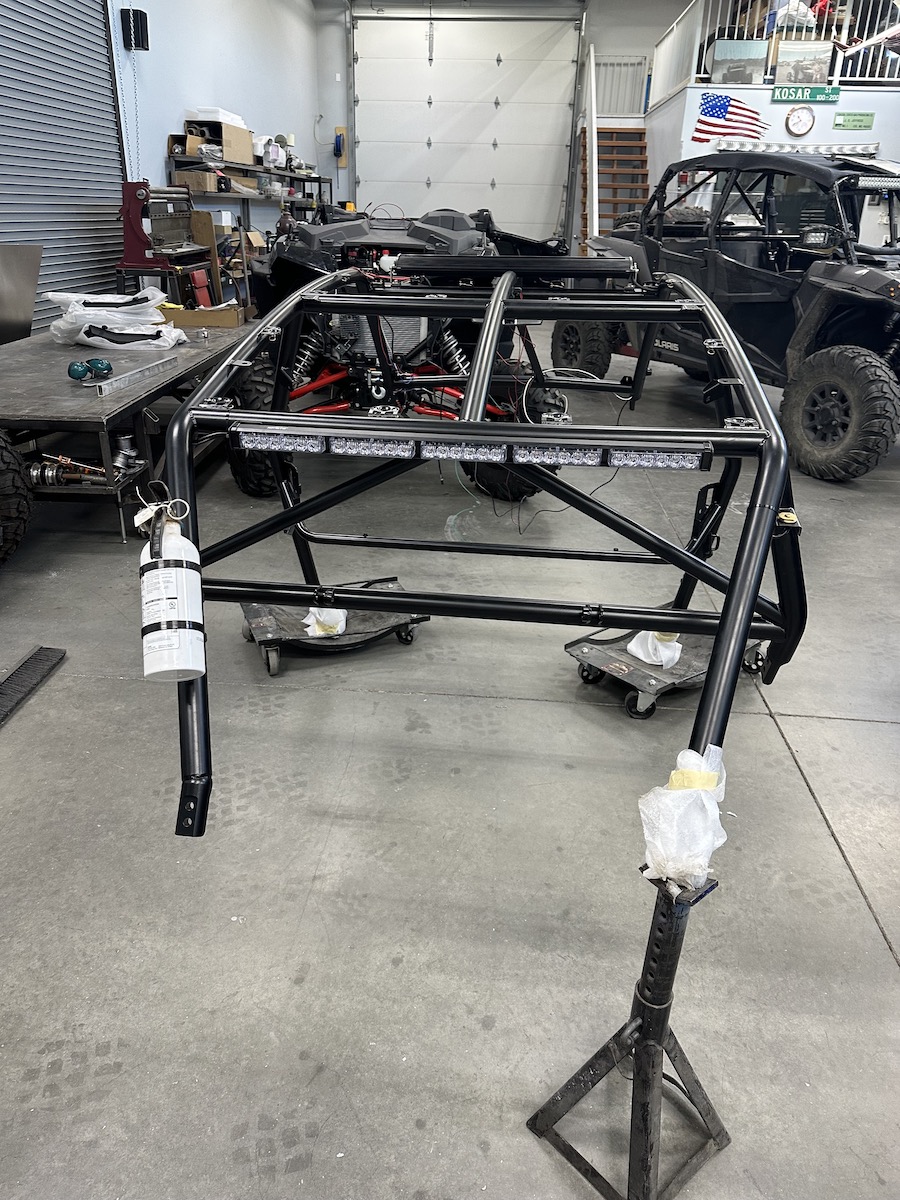
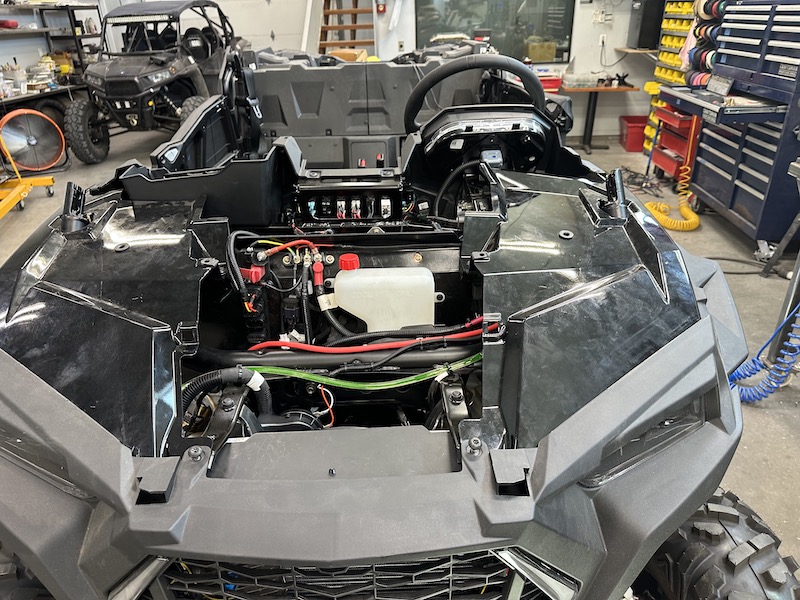
After getting the windshield frame louvers dialed in I got the roof panels, garage door opener, rear view mirror and all the electrical stuff installed. Baja Designs light bar (I splurged on lighting), dome lights (Baja Design snagged from the '17), rear light bar (running, brake, signal & bed) and two way radio antenna wire run.
I ran pieces of MIG wire through holes I drilled at a couple of the tooooobing junctions to pull wires through the inside of the cage before assembling.
Light bar, radio antenna and dome lights come out of the right side a-pillar (left side in the pic), tail light bar out of the left one.
Rear light bar has running, brake, signal and a white one that I'll use for bed lighting.
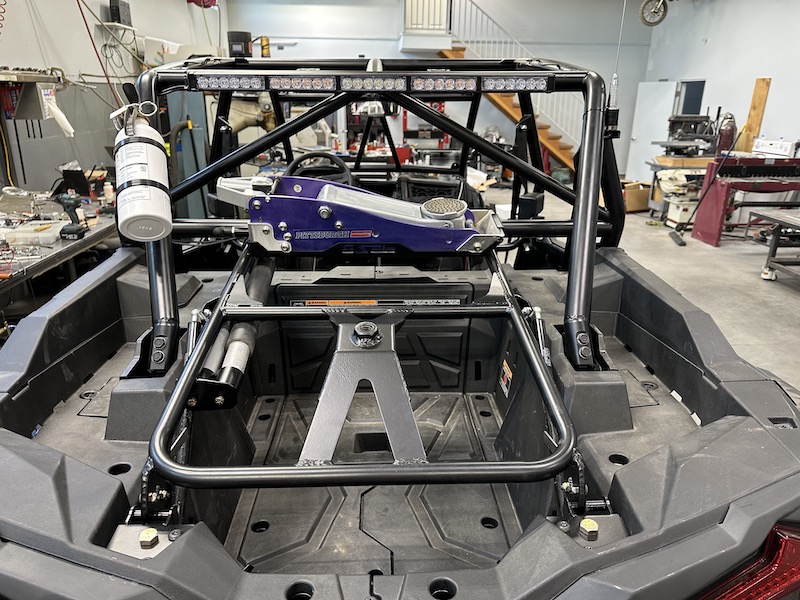
Fire bad. Been there, done that on the Mini-Raptor. Extinguisher ready to go.
Windshield guy is coming next week to cut the glass and install it in the frame. Does it on site.
I'm impressed.
Or hope to be...
The mirrors & their wiring will be installed after I put the cage on the chassis. No reason to break shit if it can be avoided.
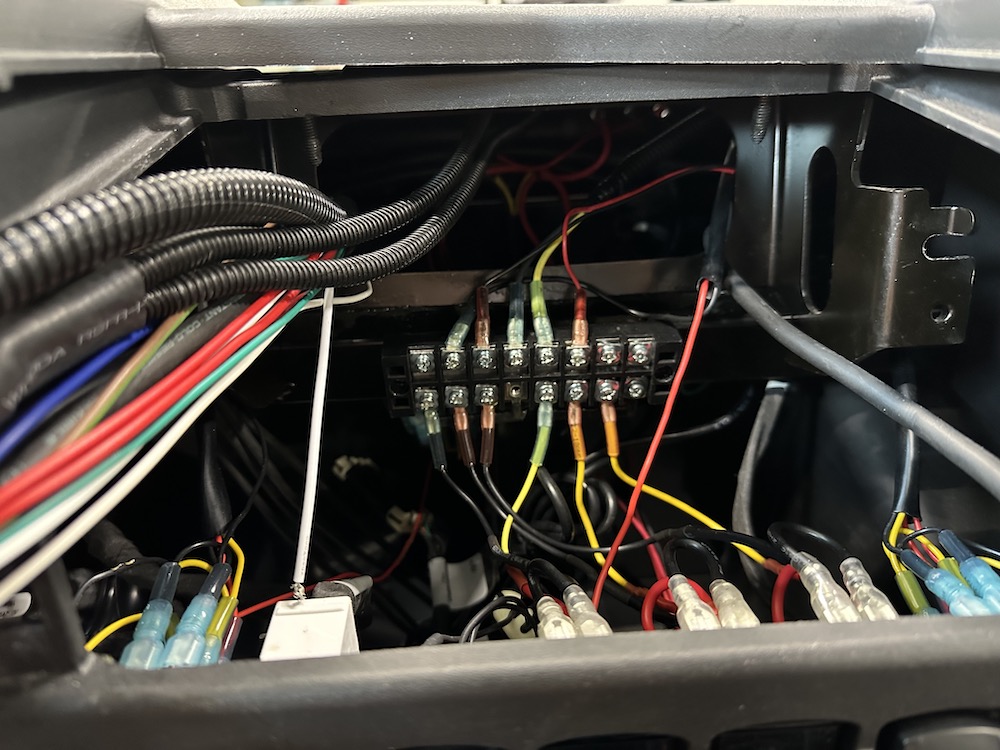
Found a trick Polaris power bus strip (on Amazon, of course) that has six ports that have ground and both a switched and live plug in lead (pix later). It should make for a really clean wire install.
The number of switches on the dash is ridiculous.
I strive to make them look as OEM as possible. You know, the kind that people look at and go "nice work!" or not realize it's been added on.
Gonna get the radio/intercom lines, seat heater wiring (splitting the PRP control so we can have either all the seat or just the seat base warming. This makes the world good in the winter - and a happy wife which makes a happy life) and turn signal wiring installed before I put the cage on.
More room to work and less bonka-my-haid moments w/o it.
I need to make stands for the windshield stowage over the back roof panel.
The front pair will be about 1/2" (12mm) tall and the rear will probably be about 1.5" (75mm) tall.
I'm still trying to conceptualize exactly how they'll look/work. Being that the frame is going to lay flat I need to make sure it's well supported. The glass will stiffen the frame a bunch but I don't want it flexing and shattering.
Got the old XP4 stripped of the gear that gets transferred (storage stuff & radio/intercom) and it's ready for a service, detail and to be put on the market for sale.
Wiring... There's a bunch of it and believe it or not, I actually know what they all do.
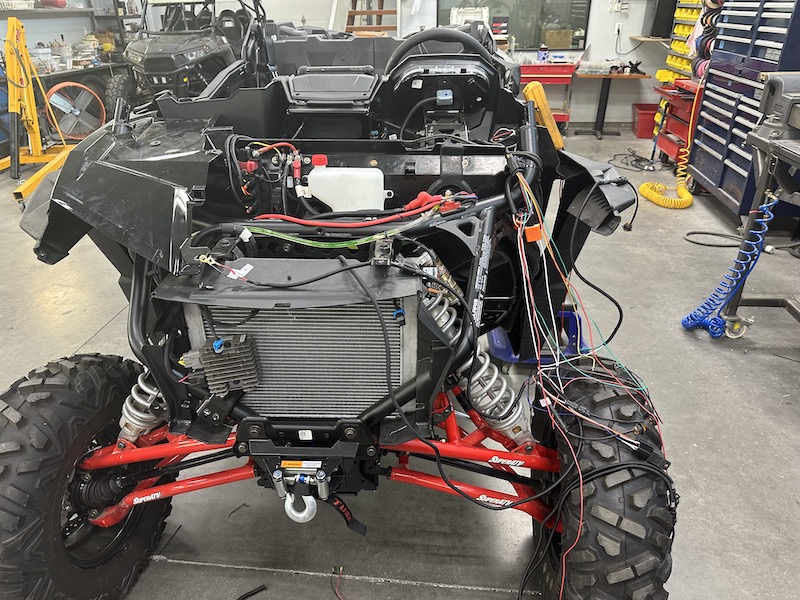
Finishing up the last of the wiring before the cage gets installed. I plan on getting it finished up today and then get the cage in place. Most of the wires that have been installed thus far are either in place and tucked away or behind the firewall out of camera shot. The stuff hanging there above the wheel is turn signal wiring.
About 2/3rds of what you see will go away as they get cut to fit and put in the black split looooom tooooobing like the stuff hanging off the tyrah lugs.
I had to get fancy and split the turn signals into both a steady state and a flashing circuit as the side mirrors and rear light bar have built in signal flash (fed by the steady state circuit) while the tail and front signals supplied in the street kit require a blinker.
Turn signal controls generally have the flasher on the input feed to the direction selection switch. The flasher waits on a load to be put on it then does it's little on/off cycle. Fortunately the turn signal stalk/control has both front and rear circuits. This let me remove the flasher from the input line, sending a constant signal through the switch and to both outputs. I put two flashers in the rear circuit's output (one for left, one for right) after the switch and have a thru put (non-flashing) circuit for the mirrors & light bar.
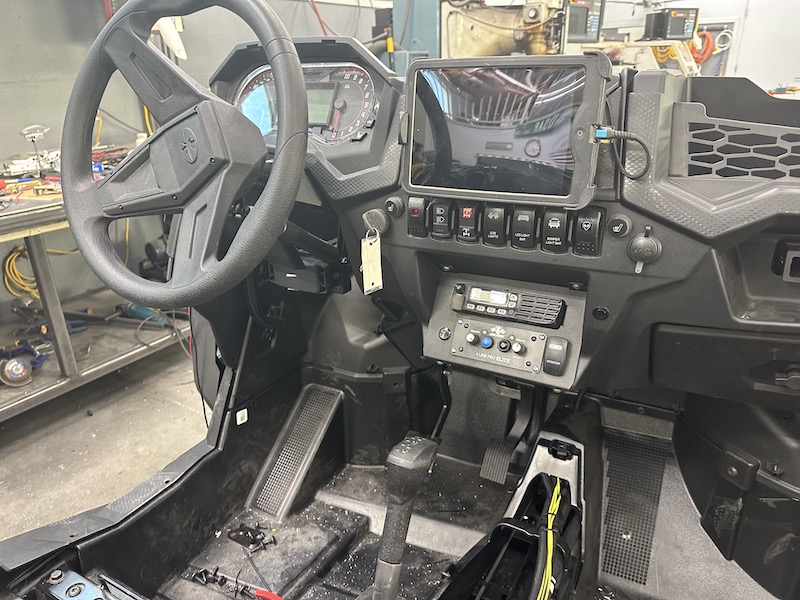
The dash with all the switch locations filled up plus the addition of two seat heater control switches (the round ones on each end of the switches).
PRP seat heaters come set up with a single switch (the round ones) that turns on both the base and back heat pads. They get warm, sometimes too warm, so I split the controls so that you can turn off the back heat and keep the base heat on but you can't turn on the back w/o the base being on. This will give a tad more control over the heat. I've' not researched multi level setting circuits like you'd find in your car - don't think I'll take the time or effort to either. Heated seats in a RZR is already sweet enough.
Update complete. Off to the shop now.
Yesterday I finished up the turn signal wiring other than the front leads. Got the rat's nest of a loom cleaned up and tucked away with a set of (non-flashing) leads for the cage lights and a set of front signal leads left loose. I'll get them and the OEM lighting in the grill plugged in, front turn signals wired in and call it good.
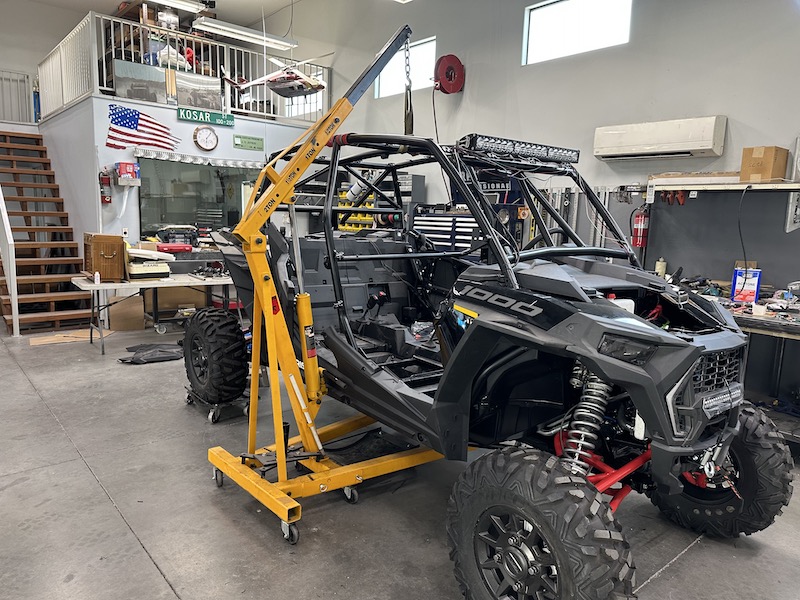
Once the non-cage wiring was installed, it was time to stick the cage back on. I'm impressed with just how well it fits. I lowered it in place, hooked up the A-pillars and the rest of the cage just dropped into place. I had minimal fighting getting all the bolts in place. This makes me really happy - says my welding abilities and tube fitting has just continued to improve.
I'm impressed with how well balanced the cage is. Picked it up with the B-pillar cross bar and it sits almost level. I rolled it in place, lowered the two A-pillars into their mounts, aligning the cage, and then let it lower right into place.
The rest of the cage wiring - two way radio antenna, rear light bar, dome lights and the bad ass Baja Designs light bar - will get finished up and tucked away too.
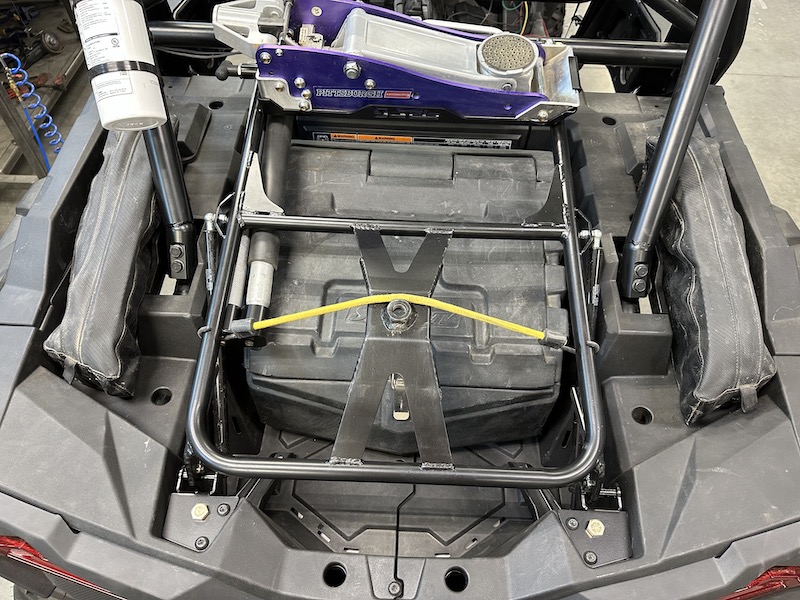
Once that's done I'll move to the cargo area and get the storage box, the two storage bags that I keep belts and changing tools in and the spare tire carrier installed. That will leave the lower door panels, seats and roof panels left for installation.
Still need to get the windshield cut (setting that up right now as I type) and the stand offs made for the its storage on the roof. I'm hoping to get all this done today.
It's so close to being able to take it out.
2:00 p.m.
Cruising along nicely. Rear of the XP is complete.
Spare tyrah rack and jack rack installed. The jack handles are in their home on the left underside.
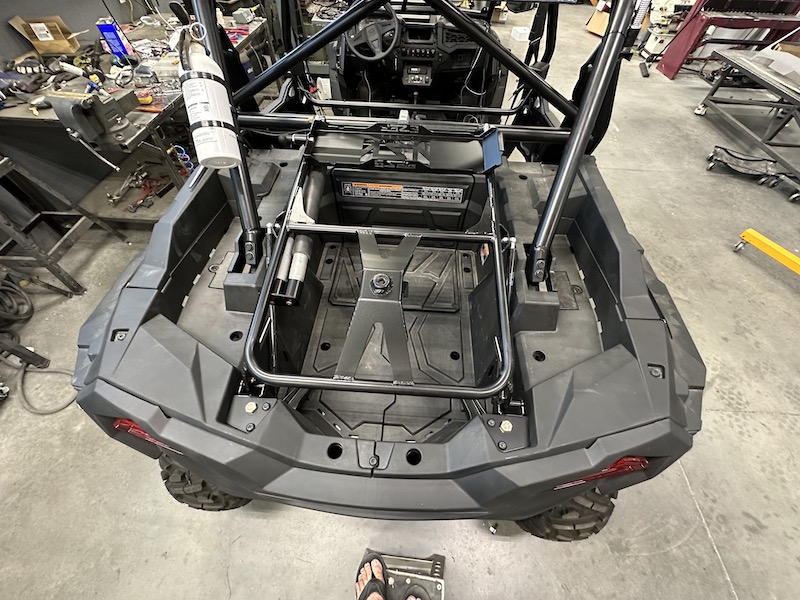
Jack on a rack.
Belts, belt changing tools & tow strap stowage bags on the outsides of the down bars and storage boxen in the bed. Stole all this stuff off of the old one.
All that's left is get the cage wiring installed and the windshield frame roof mounts made. That really shouldn't take very long.
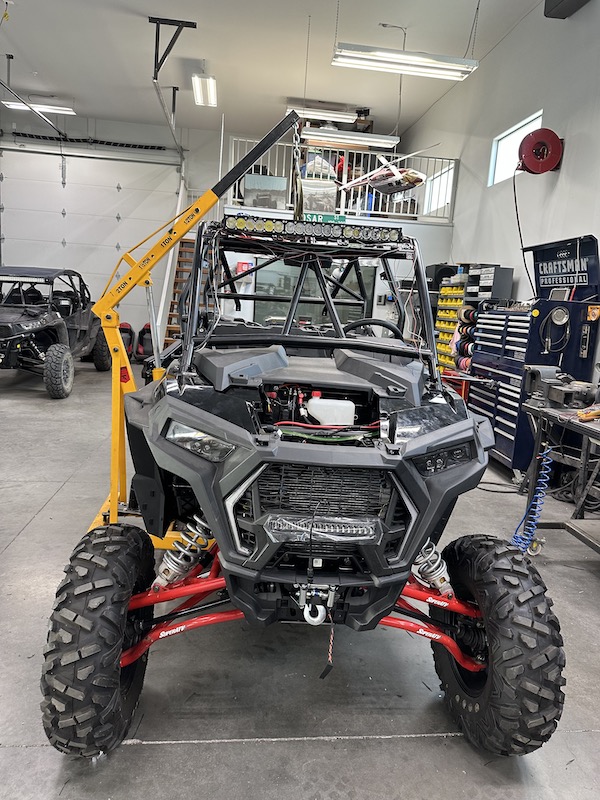
Plastics in place. Is it just me or does it look angry?
Windshield guy is coming over tomorrow at 10:00 a.m. to cut and install the glass.
Yesterday was a busy day. Got side tracked helping a friend with his XP for a couple of hours and then Cesar, the windshield guy, showed up. He's a glass wizard. The day got cut short so I still have a bit of wiring left to finish along with the roof mounts and then I'm done.
Almost ready to go.
Yeah, it does look angry.
Or grumpy?
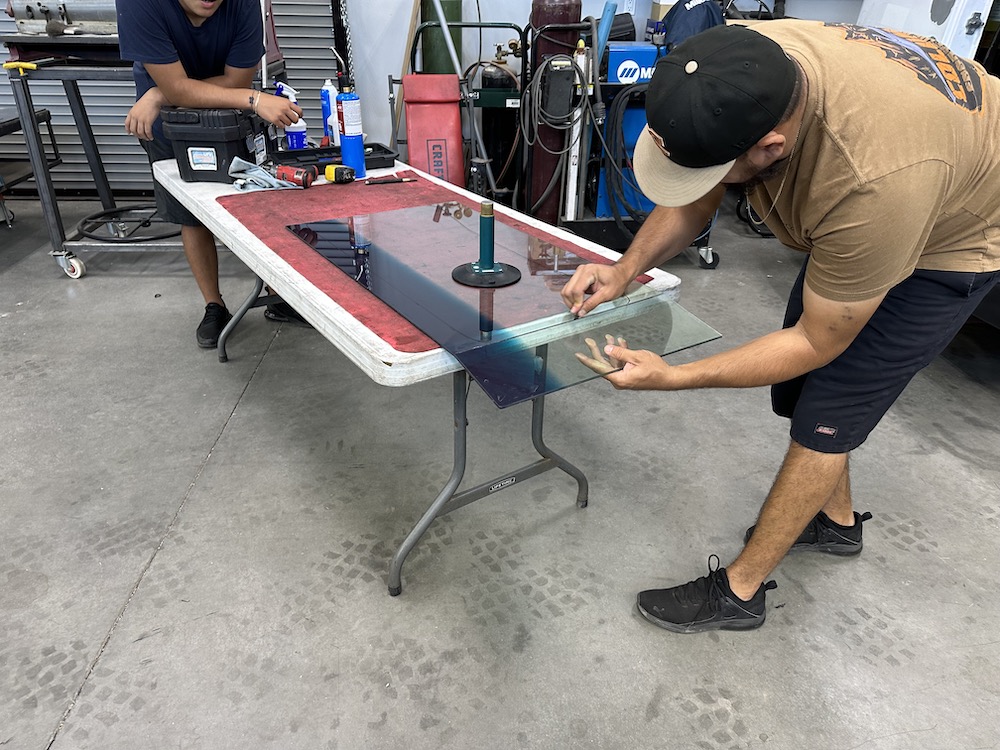
I got really lucky with glass selection. The piece of clear safety glass that he had wasn't quite large enough so he pulls out a piece with upper shading and says "We can use this if you want."
"Uh, YEAH!"
I sat in the seat and we adjusted the shade lever for two short folks (Me and my wife).
First side cut. He put the frame over the glass, free hand drew the outline and then started cutting (free hand again).

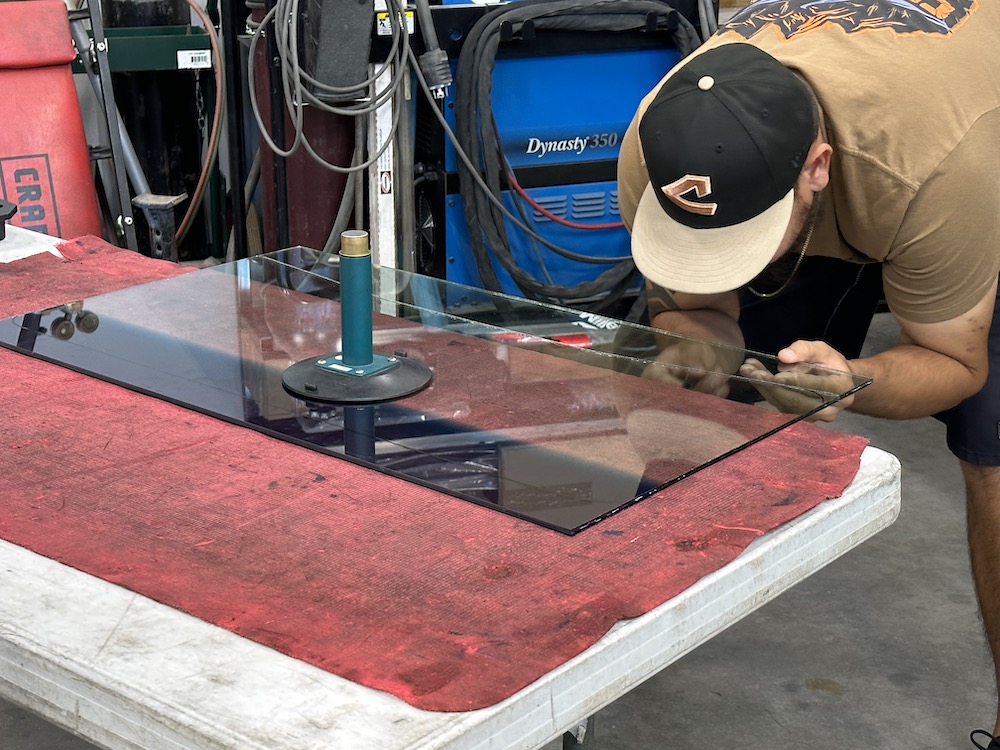
Cutting the laminate layer sandwiched between the two pieces of tempered glass. All car windshields are set up this way. Keeps them from shattering everywhere when broken.
Glass sorcery. It was cool watching the fracture move along where he tapped the score line.
Bolt on windshield. Woo hoo!
Ooooooooo, aaaaaaahhhhh, fancy tinting. Now I'm really curious if I'll end up adding visors or not.

This morning I got a layer of felt installed on the main frame and now the louver slides silently, smoothly and doesn't buzz at all.
I have to brag...
The moving louver is trick. It works really well. I still need to install a couple of small handles to make moving it easier.
The distribution bus strip made life nice and neat.
Just have to route these wires and tie the correct groups together and I'll have the turn signals finished up and the R&R Tour Bus will be ready for an alignment and off road use.
I'm hoping to get that done this evening.
Been a few days since I've had a chance get the final touches done. Finished it up last night just before midnight (except for the roof panel lining with sound damping, wiring in the rear turn signal LEDs and some felt isolation washers - an hours work after lunch today).
The new R&R Tour Bus is ready to ride and headed out tonight.
Got all the turn signal controls cleaned up, put together and tucked away. When I put the storage boxen back in place, with the iPad attached, it looks like a legit off road dash.
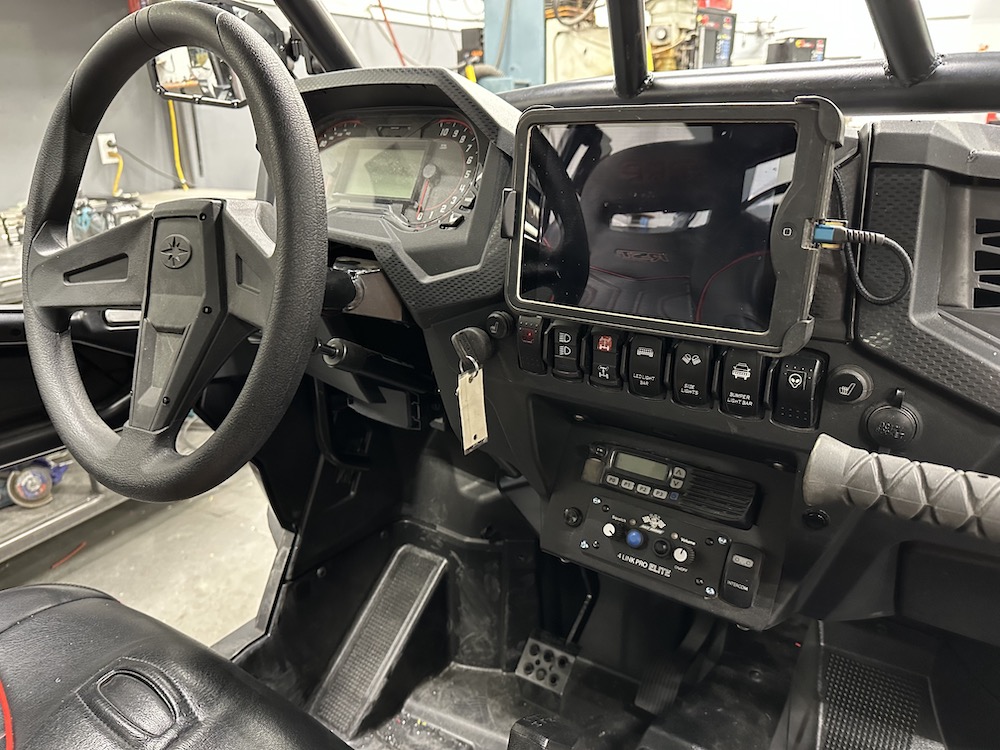
I also got all the lines under the hood tucked away and run neatly. I want someone to look under the dash and either say "Nice work" or even better, not notice that there's additional stuff hidden under the plastic.

I'm not pleased at all with the rear light bar. It's supposed to have blinker ability on the outer red LEDs but only one side wants to work. I was under the impression that you could control the three different groups of lights (red on outside, amber inside of them, white in the middle) separately. Unfortunately it's not the case. The amber are on a switch that sets them up in seven different patterns of flash (racing oriented). The two outer red function like tail lights - running (way too bright, they look like brake lights) and then brake/turn signal lights.
For some reason the left turn signal aspect doesn't work. I have to get in touch with the manufacturer and see what's up.
Since I'm not happy with that setup (it may get removed) I decided to go with a more traditional style of signal lighting and put four bright round red LEDs under each tail light.
I also got my street and OHV plate issued. It came with an OHV plate and I probably could have gotten away with only having that but I'd much rather be fully legal and compliant. It's easier to be legal and not have to talk to the po-po when possible. Plates for the RZR run about $5.00 and the OHV sticker is $25.00. Too funny that it's more expensive to play off road than drive on the street.
AZ has a pretty cool setup for off road stuff. They offer three types of plates:
Strictly OHV (what it came with)
Partial road use which allows for street driving but mainly just for moving between the off road areas. (what I went with)
Full time street use. (more expensive and the partial use lets me traverse on the streets so why not go that route?)
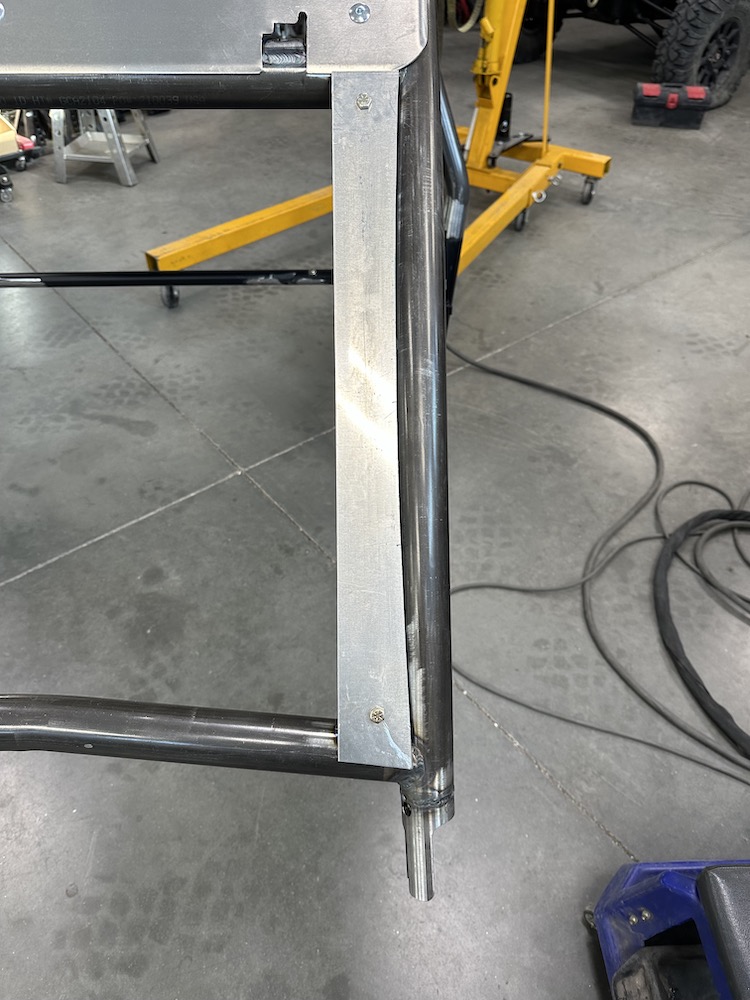
The last part of the project was getting the roof set up to receive the windshield and store it when we're out and about off road.
I made four "pucks" that stand off .400" (10mm) and hold the windshield flat but also let the rubber that holds the glass in sit on the roof. This keeps the whole thing from flexing and well supported. Hopefully there will be no shattering of glass with this setup.
The supports each mount into their own support off of the cage. They don't pinch down on the roof panel as they stand off just a hair. I'm hoping that I got the stand off spacing on them correct for when I add the liner.
Each puck will get a layer of felt stuck on them to combat wear marks on the windshield frame.

Four pucks in place and the windshield mounted to them.
With my old RZR, the windshield was a half height and made of Lexan. It weighs a couple of pounds, maybe. It's held in place both on the front and on the back, in storage, with two knobs and is really easy to move back and forth.
This glass setup weighs quite a bit more and it's stored up on top where short shits like my wife and I will have to figure out how to get it up on top and then get to the mounting knobbies. We'll get it dialed in with a little practice.
That's it for the moment. I'll try to add to this page as we get into stuff that's interesting. Time for another 10K miles!
6/15/23
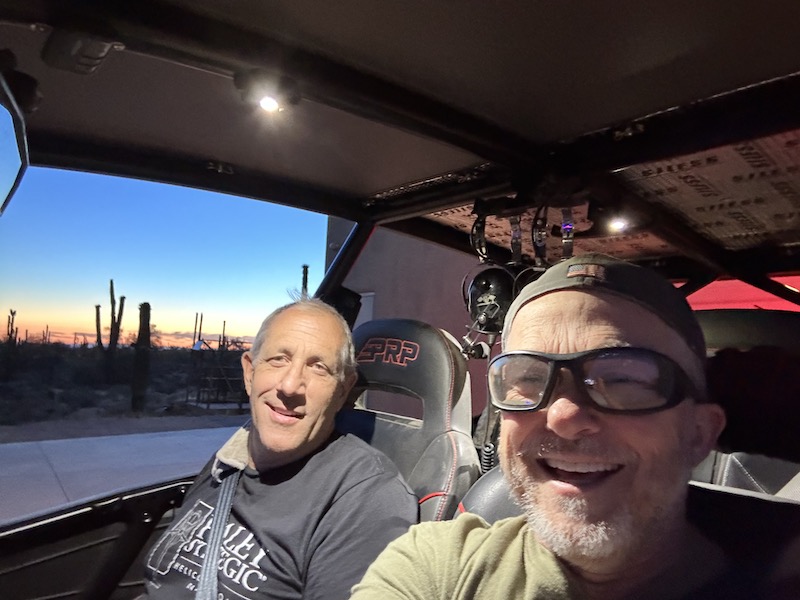
The R&R Tour Bus II took its maiden voyage last night.
Got in 40.2 miles/64.7km with Jay playing passenger. Jay's been riding with me for close to 25 years. He used to navigate in the old Deztaz when we were racing years ago.
Couldn't get over how quiet and tight the chassis feels. No extraneous rattles or squeaks other than the rear suspension's outer heims (the ONE thing I didn't grease when moving - they're good and tight, the balls just swivel really easily).
Windshield is AMAZING!!! No more glasses required when moving at 60 mph (96 kph) and it didn't come home covered in a layer of dust like the Lexan plank does. We didn't try stowing it on the roof as it was too much fun having it in place. I did notice there's a small lack of visibility that the frame has taken up. Didn't realize how much I looked ahead under the lower A-pillar cross bar. I just have to sit more upright instead of slouching, which is a good thing.
The vent system works really well too - lets in just the right amount of air as we were cruising along off road. Open on the asphalt was just a tad windy right in the middle of our faces. I do have to modify one bolt head - it's catching on the cage when you try to open/close the vent. It's a minimal issue.
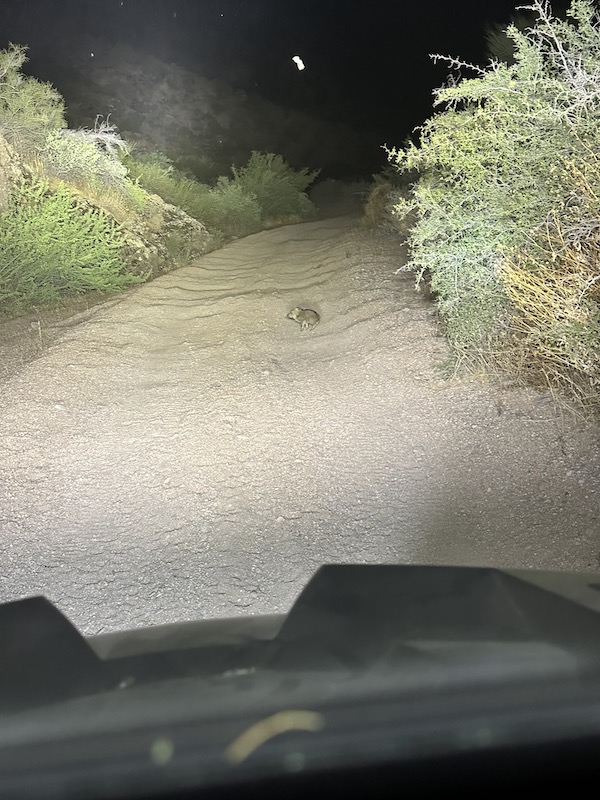
It was an absolutely perfect and beautiful night last night. Saw a few critters too. We came across a pack of Javelina. Jay saw another piglet and an adult a bit farther up the trail. This one came right up to us, sniffed, turned around, walked away, turned back around and checked us out again and then finally moved on into the bush. They're really cute little farts - too bad they grow up.
I don't know why Relive decided we took a couple straight back to and from my house lines. Looks like it lost signal down in the wash, decided we were home, then reconnected and placed us back where we were. First time it's done that.
Return HomeRelive 'Maiden ride of the R&R Tour Bus II'