

Home of K-fab

|
|
|
|
The Toy Hauler Overhaul
Arizona is incredible.
The amount and variety of scenery is just amazing.
It has 16 State Parks, 10 National Monuments, 9 National Forests, 7 National Wildlife Refuges, 4 National Parks, 4 National Recreation Trails, National Memorials, State Recreation Areas, State Historic Sites, a State Fish Hatchery, State Wildlife Areas, National Historic Sites, National Wildlife Areas, a National Recreation Area.
We needed to explore.
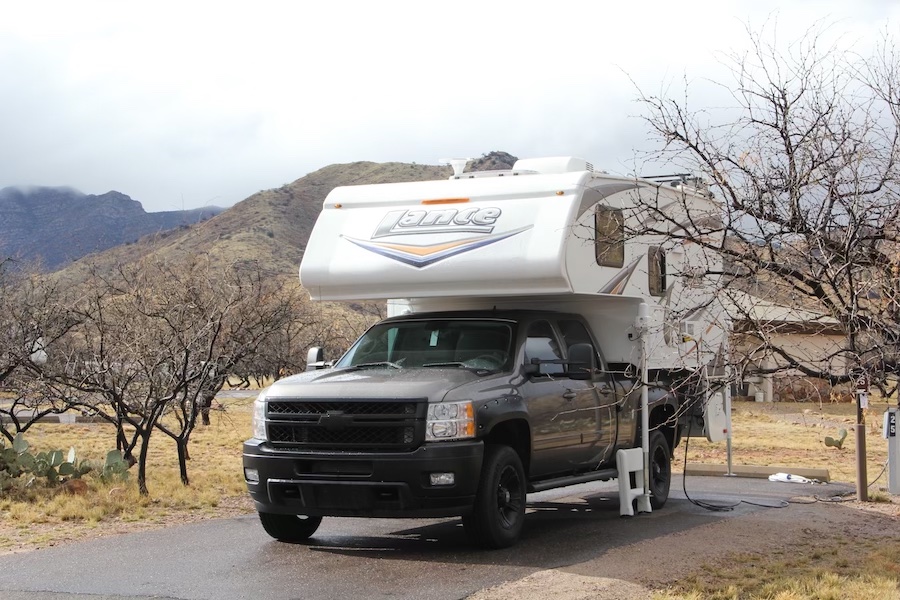
Not long after moving to Arizona, we picked up a Lance truck camper. Seemed like the perfect way to wander around - house on our back, RZR on a trailer behind and the world to see.
We've meandered all over the state checking out quite a few of the State and National Parks. Each place has its own unique scenery, vibe and things to see.
From up in the pine trees and mountains in Williams and the Flagstaff area down to Yuma and the sand dunes, the Grand Canyon to Parker the scenery and experiences are just amazing.
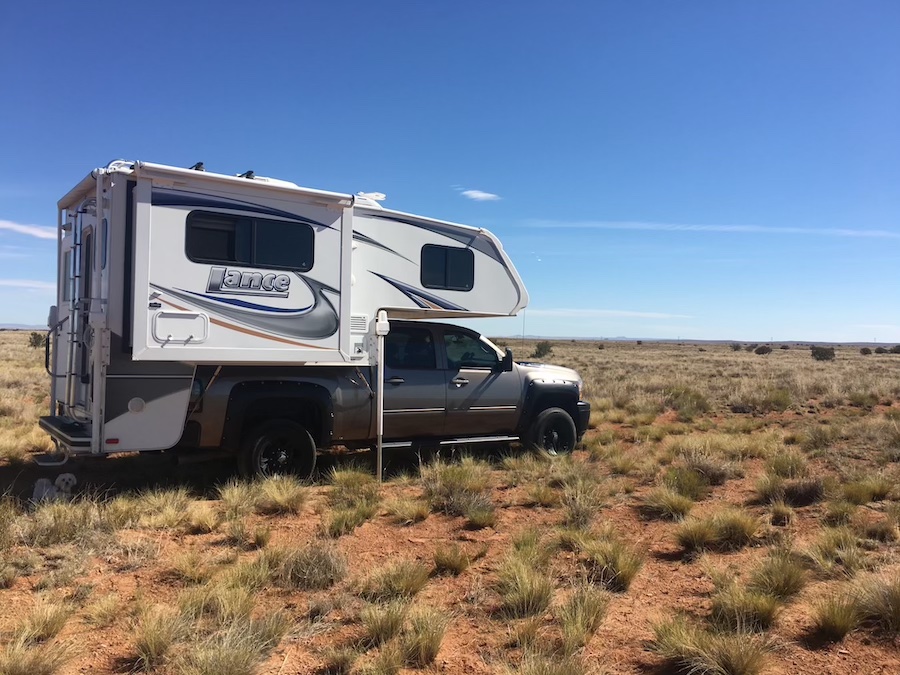
It wasn't long before we realized that, while convenient and comfy, the truck camper wasn't big enough. It gave us the perfect avenue into the world of camping and was a great first step but we wanted a tad more room and the ability to be a little more mobile after setting up where ever it was that we were staying. We had to unload the camper if we wanted to use the pickup for mobility and not to have to deal with a separate trailer for the RZR.
About three years into our traveling and exploring we decided it was time to upgrade. We needed a toy hauler.
This would allow us to bring the RZR with us, eliminate a trailer, have a "loose" vehicle for moving around as needed. We liked our Lance camper so let's see if they offer a toy hauler.
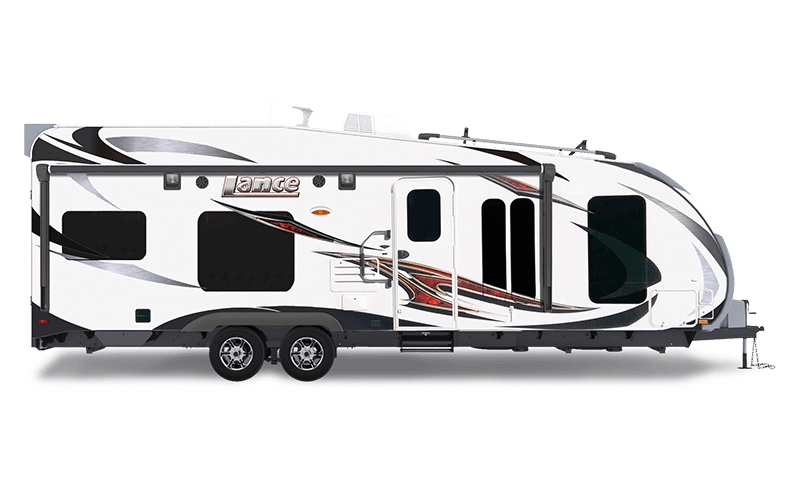
It turns out that Lance made a toy hauler. WOO HOO!!! The 2612 was PERFECT.
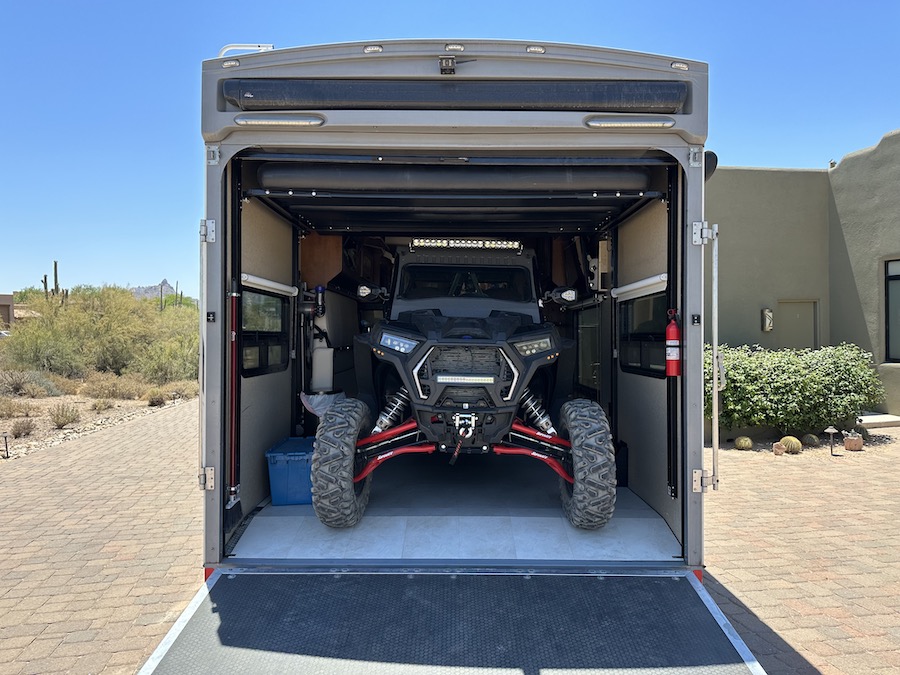
Right there in the description was "The 2612 boasts over 12' of unencumbered cargo space, enough to swallow a Polaris RZR XP 4 1000!".
We're sold.
It's a Lance and it fits a four seat RZR!!! (well... until you modify the RZR and put larger sneakers on it. With the 29" stock it fits perfectly. Put 31" sneakers on it and it takes a bit of work to get it in. Gotta back it in, let the air out of the rears and then use the tie downs to pull it in that extra two inches the flats give you.)
March of 2018 I got online and started searching for a 2612. I found two. One in Oregon and one in Texas. Interesting - we may be looking for a Unicorn.
I called Lance directly and talked to a salesman. It didn't take him long to let me know "If you can find one, GET IT." He informed me that at the time we were looking, Lance was in the process of moving its manufacturing facility and they weren't making any products at the moment.
The Oregon unit was an old advertisement and the dealer hadn't removed it from inventory.
The one in Texas was used but had darned near every option and was in "like new" condition. Looks like I'll be talking to the guy in Marble Falls, Texas.
Phone calls were made and a deal was struck. He was asking a very fair price and I did NOT want to drive across Texas (I-10 SUCKS) so I hit him up with the idea of "I'll give you asking price if you'll meet us half way, in El Paso." (the arm pit of Texas) He agreed and plans were made. It was about 7 hours of drive for each of us to get there.
We met in a small neighborhood just off of I-10, made the exchange and off we went.
I'm still not sure how he managed to pull the trailer from Marble Falls to El Paso without any tyrah (Appalachian for tire) issues. We got the trailer hooked up, drove out of the neighborhood and maybe five to seven miles on I-10 (still SUCKS) I hear "POP". Great... Tyrah down. Fortunately there was an exit to a weigh station just after the tyrah let go. Time to pull over and assess the situation.
I've been traveling with trailers for many, many years. I'm used to this sort of stuff. I'm usually well equipped and "race ready" when it comes to flats. I kinda pride myself on how quickly and efficiently I can change a tyrah - think of the father in 'A Christmas Story' kind of pride and readiness.
Nope, not this time. I've got the pickup truck's jack and tools and that's it. The jack doesn't fit under the axles, my tools are on the smaller side for lug nut removal, the sun is high and the heat is coming down from it. Pavement wasn't any fun to lay on whilst figuring out how to get things taken care of.
After about 30 minutes or so I had the tyrah changed (fortunately there's a spare that's holding air) and we headed back to Arizona with our new to us toy hauler.
Six years and thousands of miles of travel later the 2612 is starting to show some use. It's been across country twice, back to Texas a couple of times and pulled all over Arizona.
Our last trip, earlier this year, was the last trip for the toy hauler in present condition.
The vinyl on the furniture decided to shed the colored surface of it's material, Robyn wanted more counter top space, the entertainment center had the TV up too high, the interior was dark, the shades were ugly and bulky. Every time we stayed in an RV park we'd look at the other RVs and talk about what we'd like to have or things that we wished our 2612 had in it or was different.
We spent a lot of time looking at other stuff trying to decide if it was worth it to look into a new unit all together or if I should get a plain old box trailer and build our own toy hauler or should we just upgrade? After a lot of discussion and searching it was decided that it would be MUCH less expensive to do an interior overhaul so that's the direction we went.
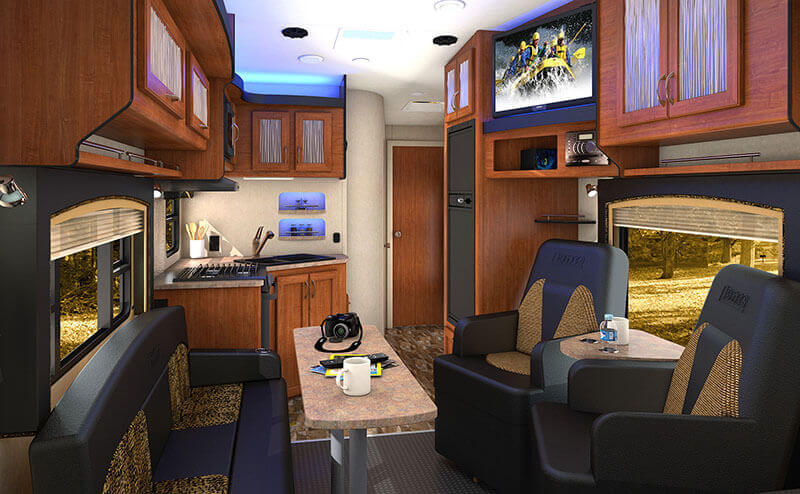
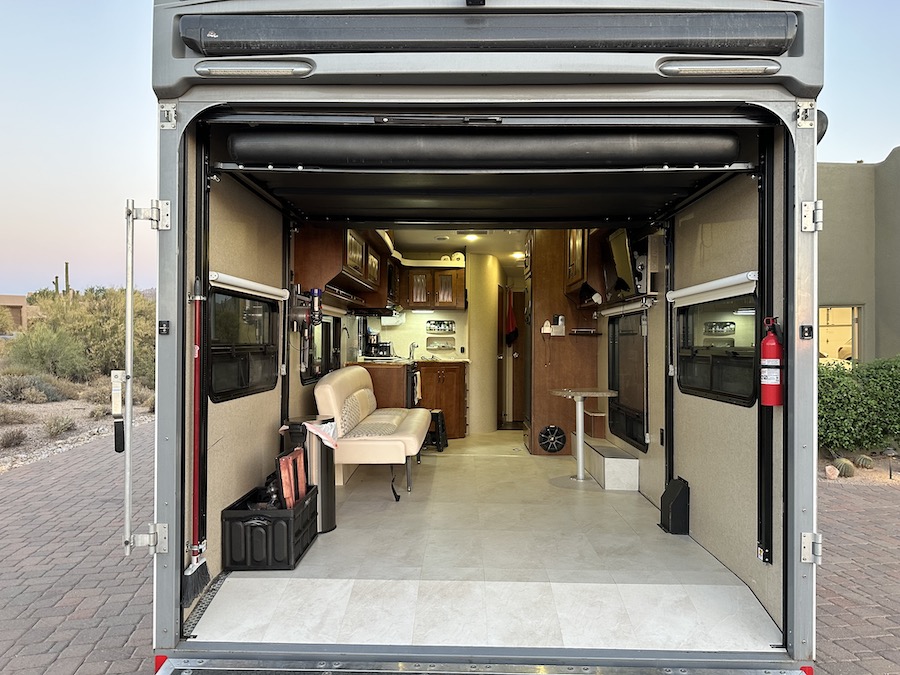
We wanted to change the interior to a lighter scheme. It's a dungeon in stock form. Everything is black, trimmed in black, dim lighting,
As I sit here and write, the overhaul is about 75% done. I finished the entertainment center wiring yesterday, have a bit of TV wiring to attend to and then it's time to focus on finishing out the kitchen counter. After that's done I'll get the flooring down, the recovered couch installed and the new window shades in place.
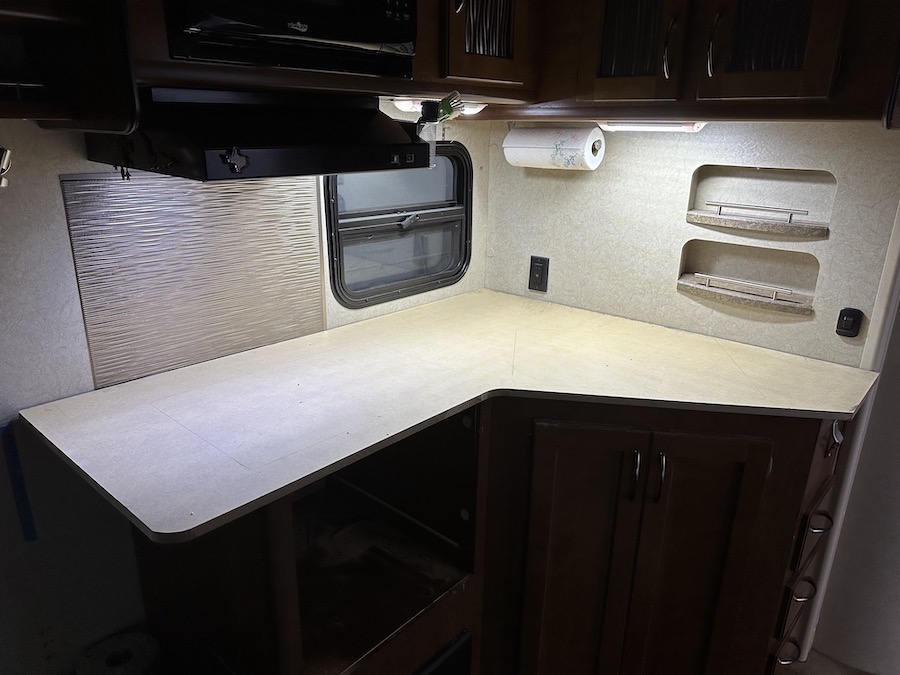
Here's what I started with. (pic borrowed from Lance because I forgot to take one) It looks all bright and airy, sort of. The color scheme is too dark, though.
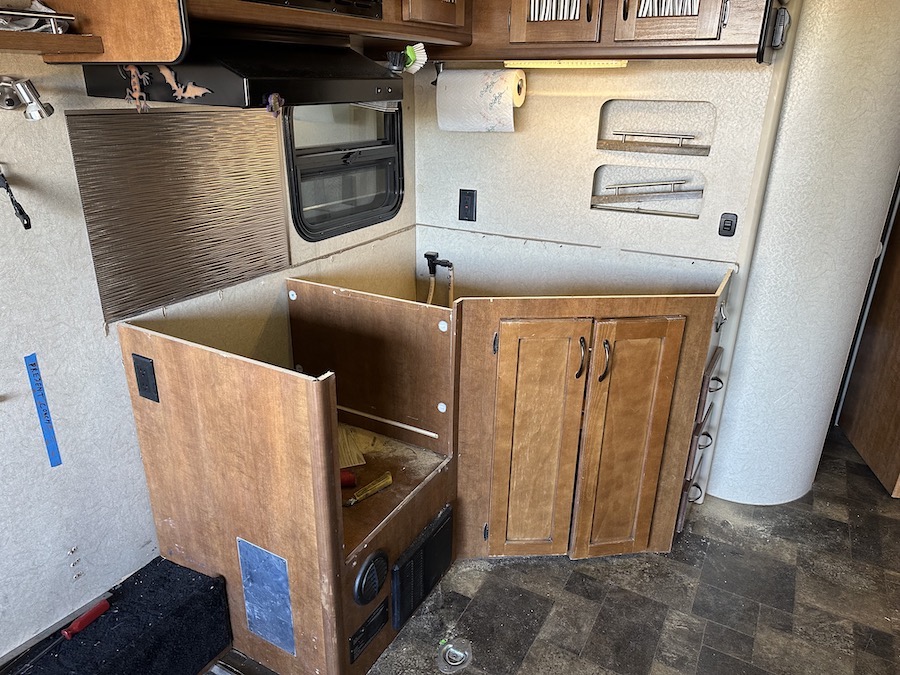
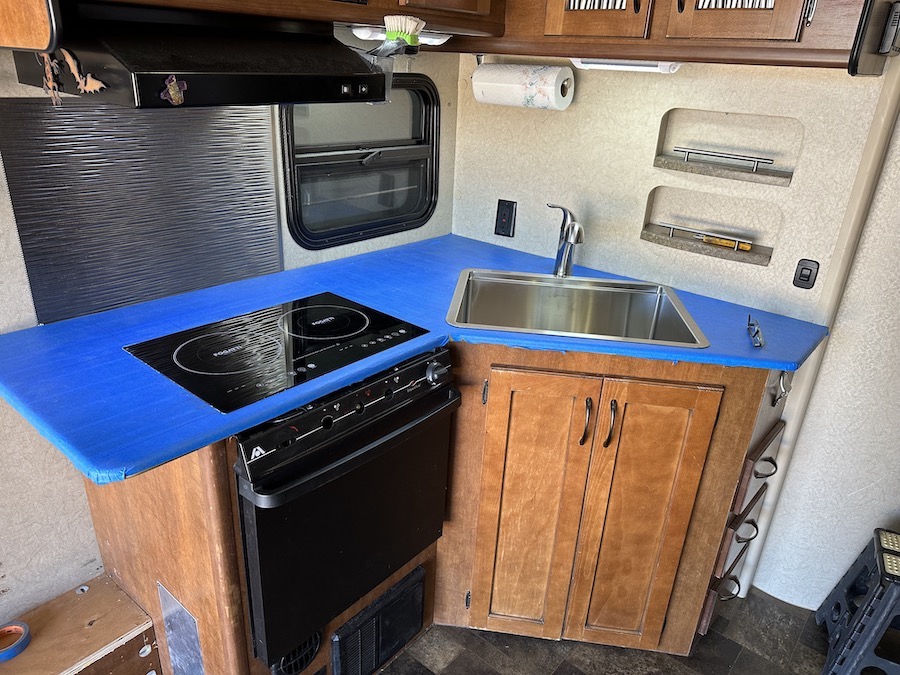
I started out by gutting the kitchen counter. Out with the oven, out with the old sink, test fit of the new sink (It's TIGHT) and see what I'm getting into.
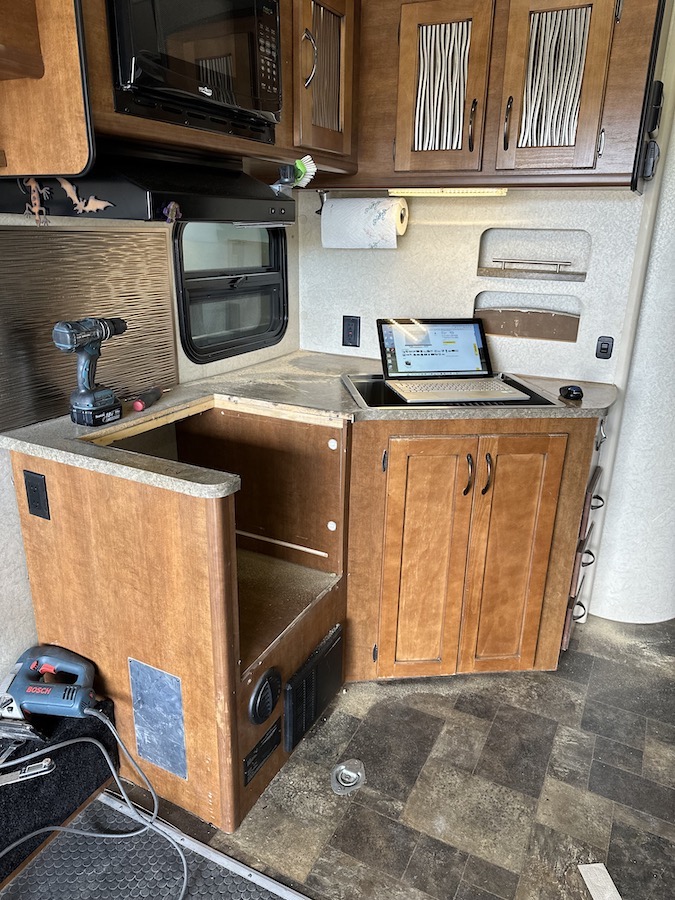
Demo of the kitchen counter complete.
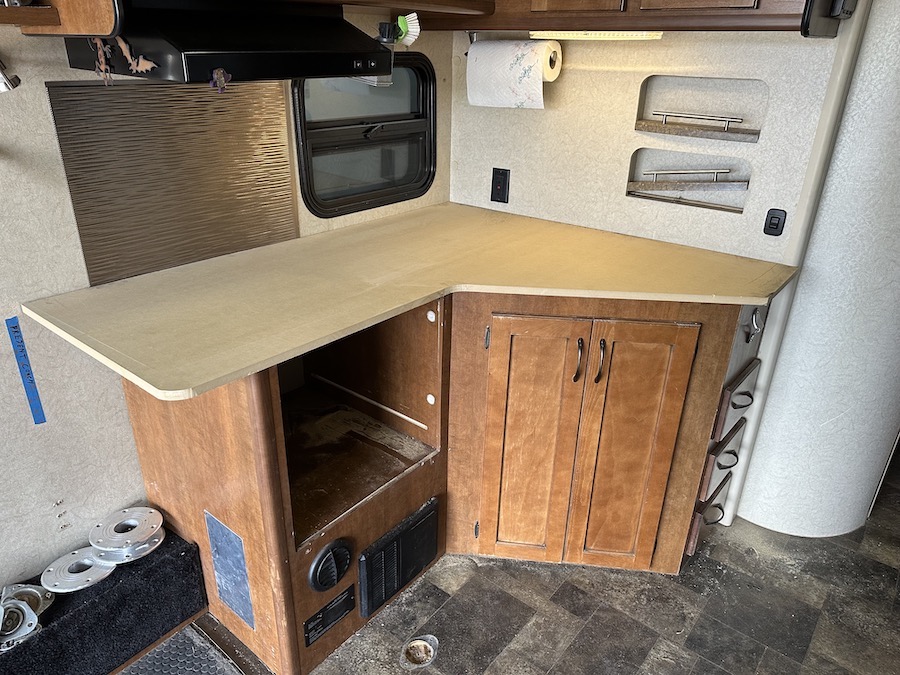
New MDF countertop cut and test fit. I added six inches of space on the end by the oven. This will give a bit of room to set things on when sitting on the couch.

The kitchen area needed a little more lighting too so I got busy and added a couple of LED fixtures.
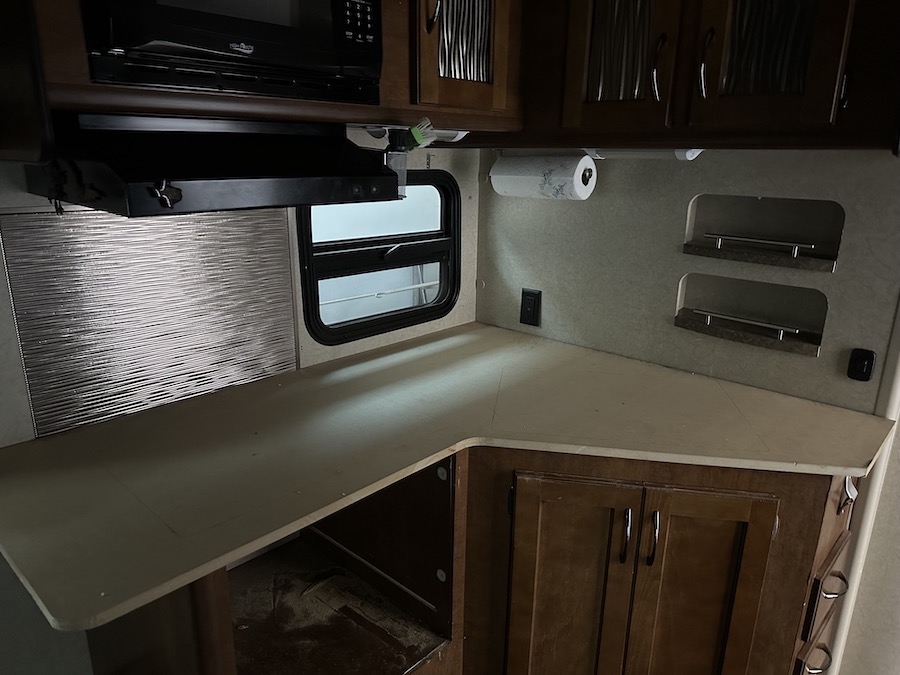
It brightened up the area nicely.
After initial fitment and some massaging, it was time to pour an acrylic top on the MDF. I started out by painting the MDF with a white base coat.
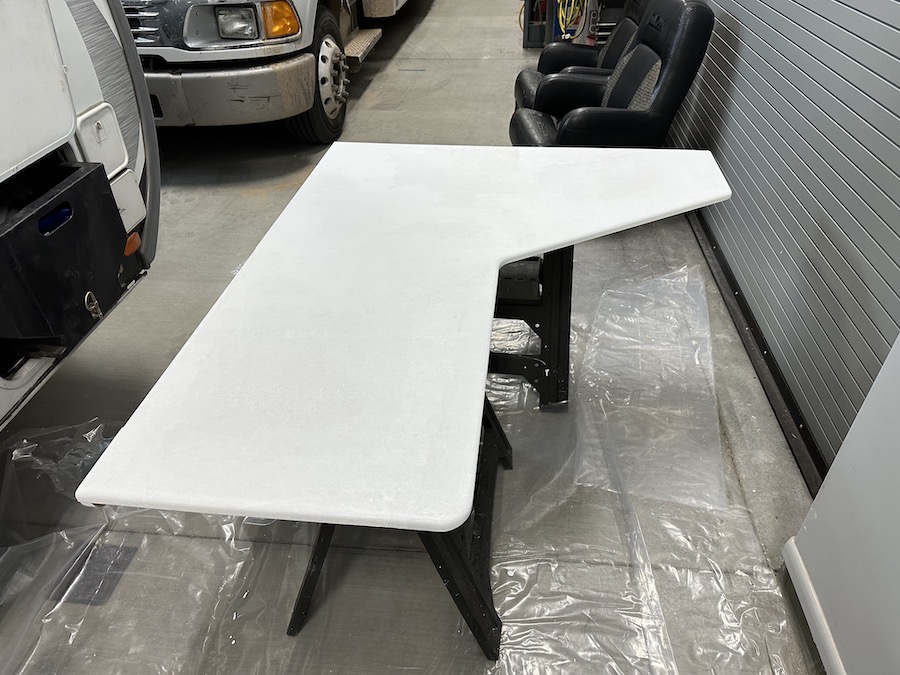
Mixed up some acrylic and poured away.
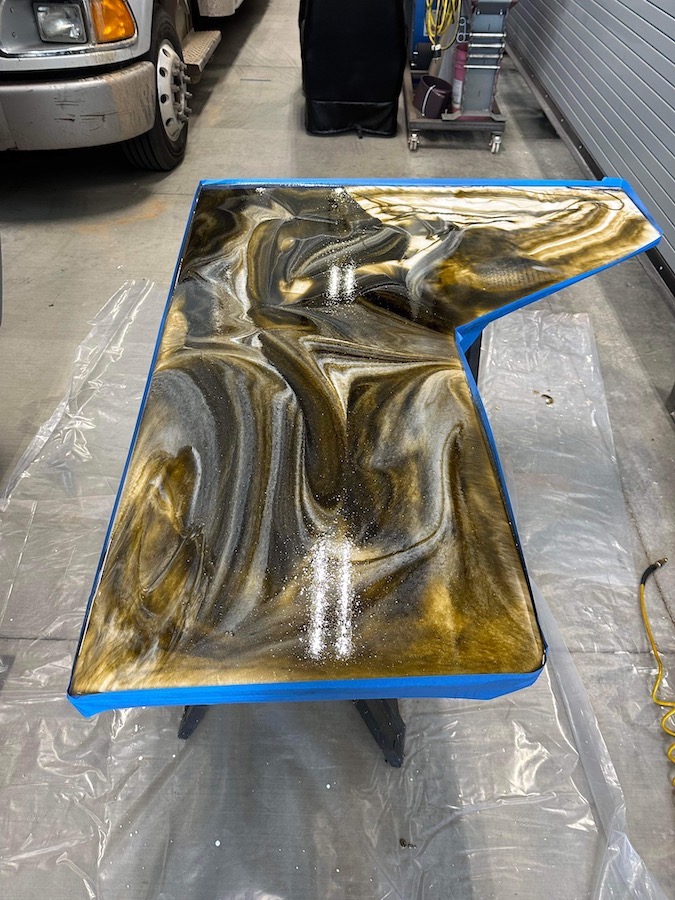
Not bad for my first attempt at pouring an acrylic counter top, eh?
I was a tad crushed when my wife came down to look at the finished pour and says "Nice but it's dark. I wanted it to look more like that section." (as she's pointing to the lighter area)
Damn. "Okay. I'll paint over and repour the top surface again." (grumble, grumble).
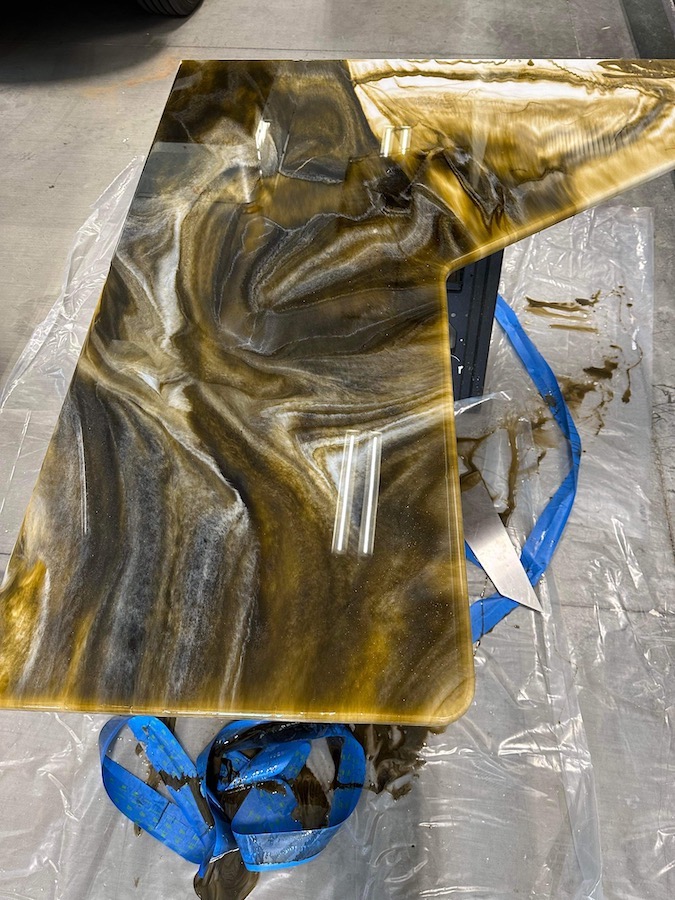
My buddy Jay had come over to do some work. He knew about the project and my first attempt at a counter pour. He looked at it and said "That looks good. What's it look like in place?"
Hmmm... I wonder. We put it in place and it looked REALLY good. Robyn's gotta see it installed.
She came down to take a look and much to my surprise gave it the okee-dokee. Whew! Dodged a big bullet there. I covered it in tape to keep it safe from me as I work in the camper. - you'll just have to wait for the "reveal" once it's in place permanently.
Another aspect that we wanted to address was the heat that the propane stovetop put into the camper when Robyn cooks (she's an amazing cook - I'm spoilt). After a bit of research we decided on an induction setup. We have an induction cooktop in our house and love it. Fast, efficient and minimal heat.
This is the test fit for the stovetop and also for the sink. Look carefully and you'll see that the sink is warped a tad and that the induction top sits a bit proud in the countertop.

With half a dozen attempts and over bends I finally got the sink flat. I also sunk the cooktop so that it's flush with the countertop.
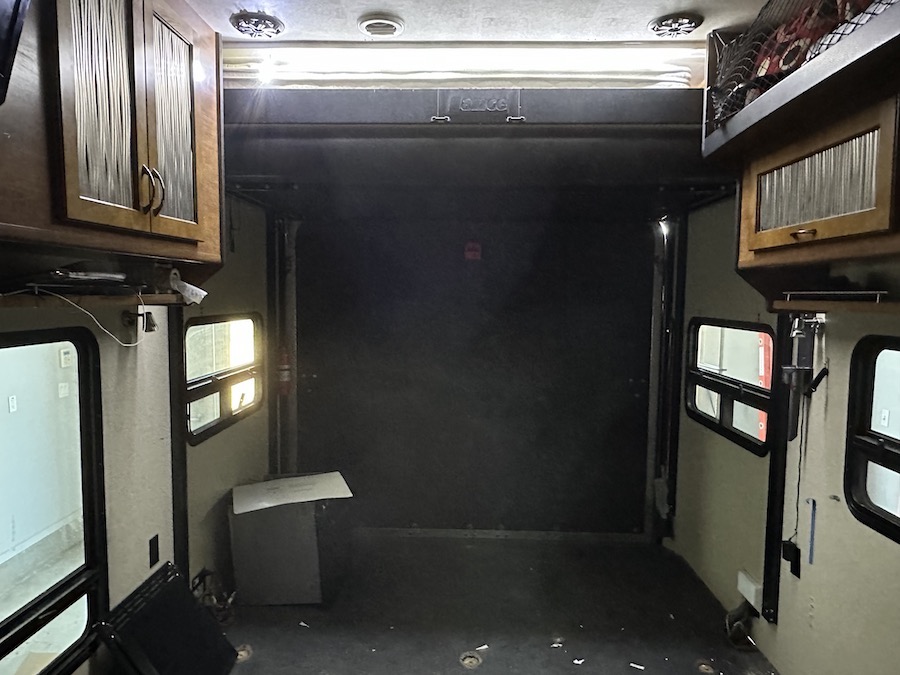
Darkness in the back.

Let there be light! An LED strip made a HUGE difference in the back half. The lower bunk (black of course) gets removed.
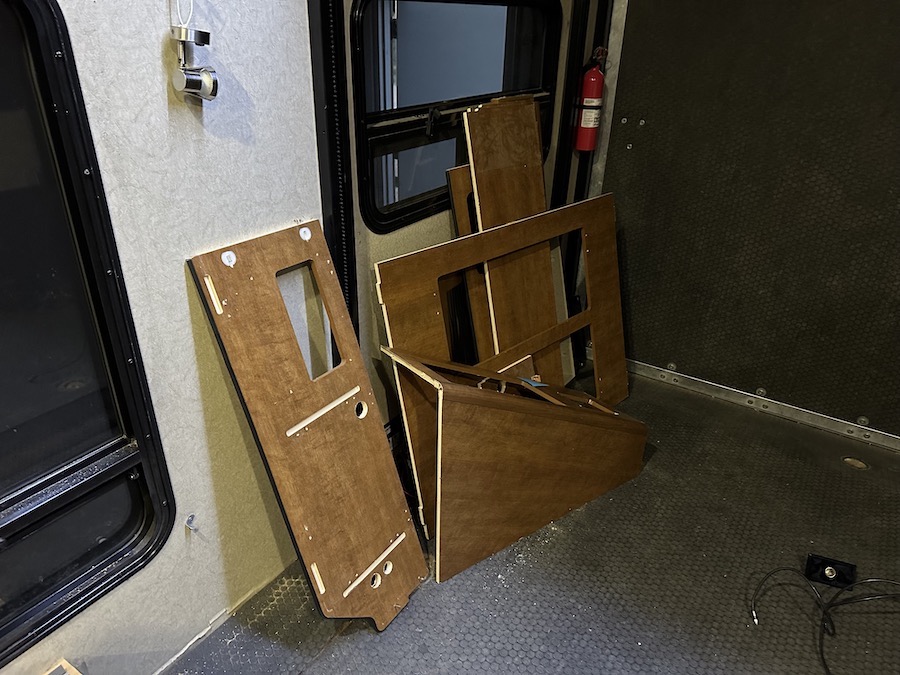
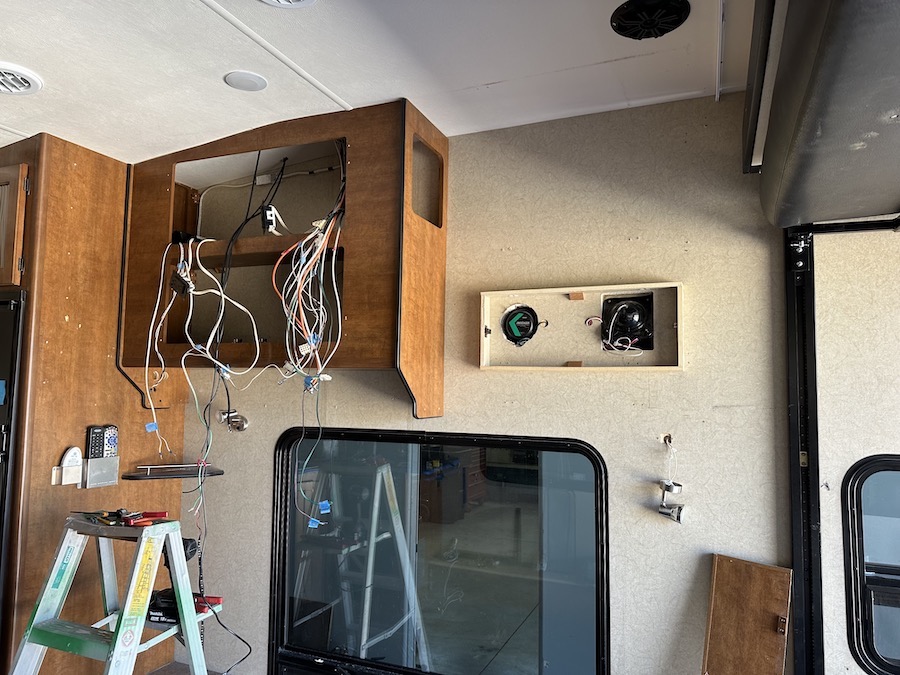
Let's remove the entertainment shelving.
The cabinet area removed, the outside speaker and light exposed and the rat's nest of wires now hanging.
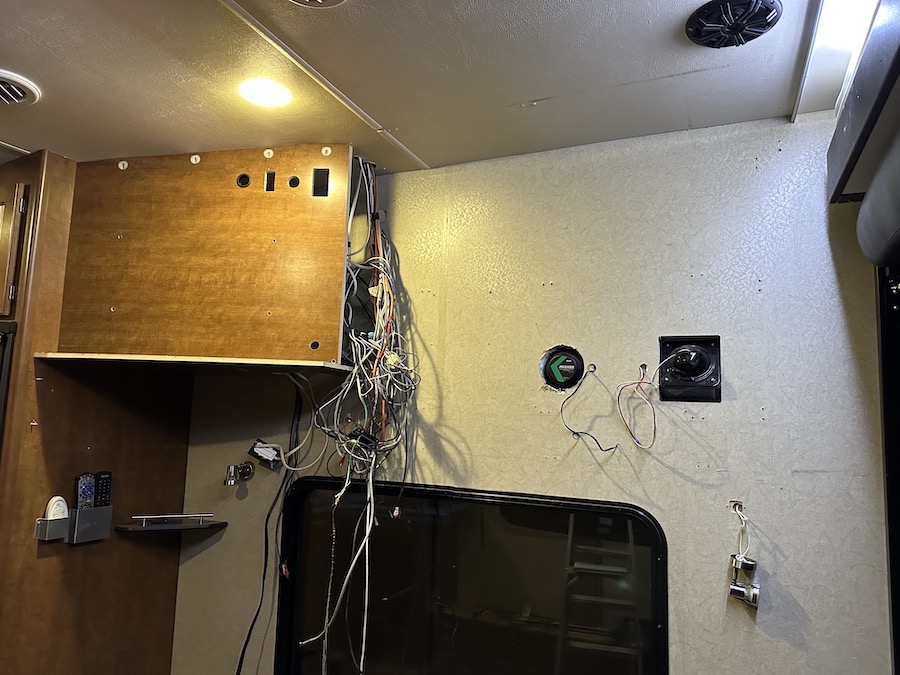
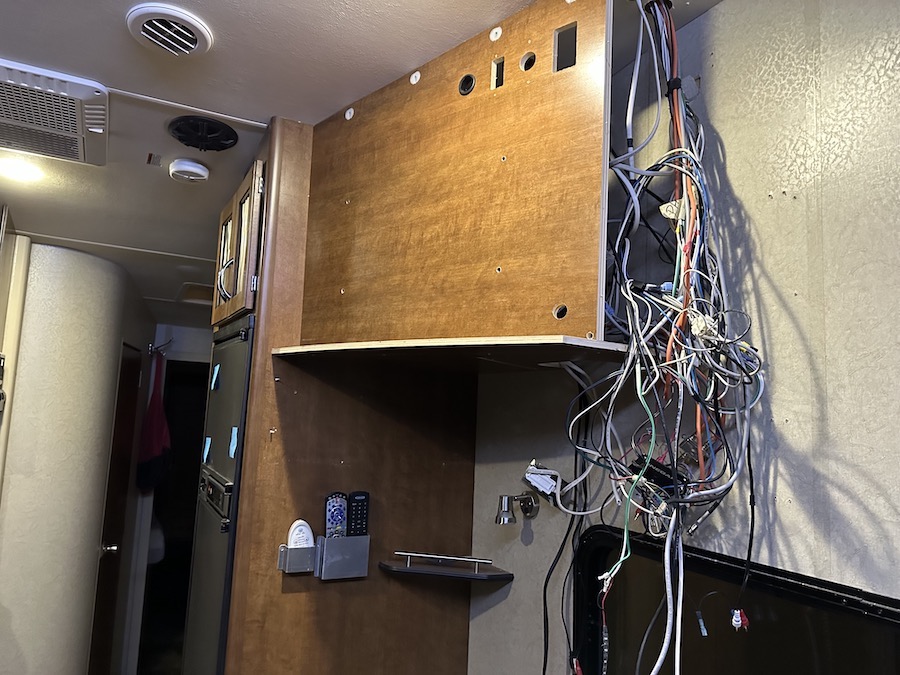
Since the TV was up too high and off to the side, I wanted to move it to a more comfortable location. Straight in front of the couch and down lower so we're not straining our necks. I was going to switch the location of the TV and the cabinet.
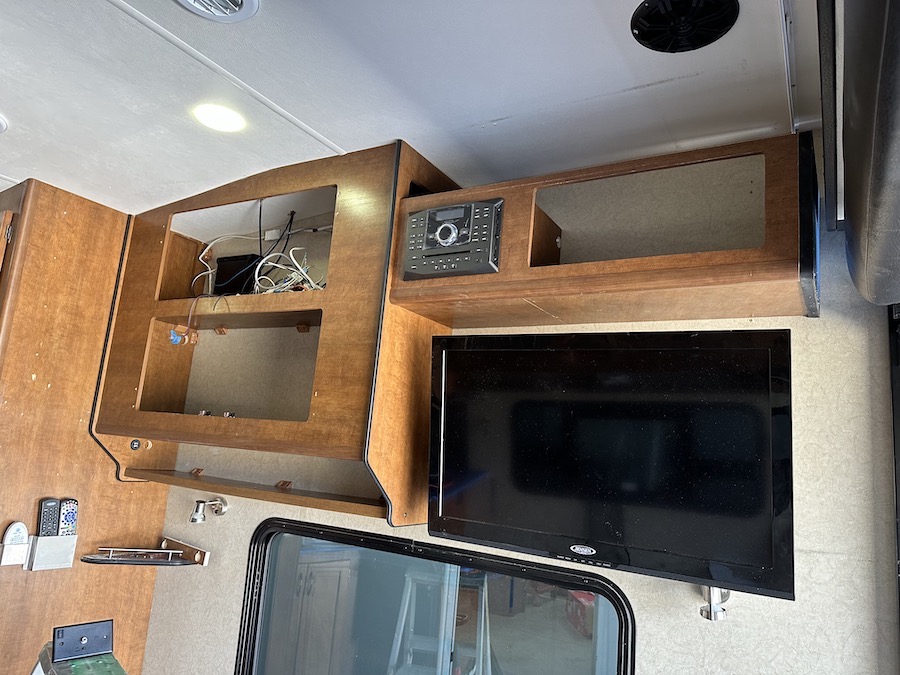
To get an idea of where things would fit, I took the shelf of the cabinet and placed it in the TV shelving. I now know where I'll have room to work.

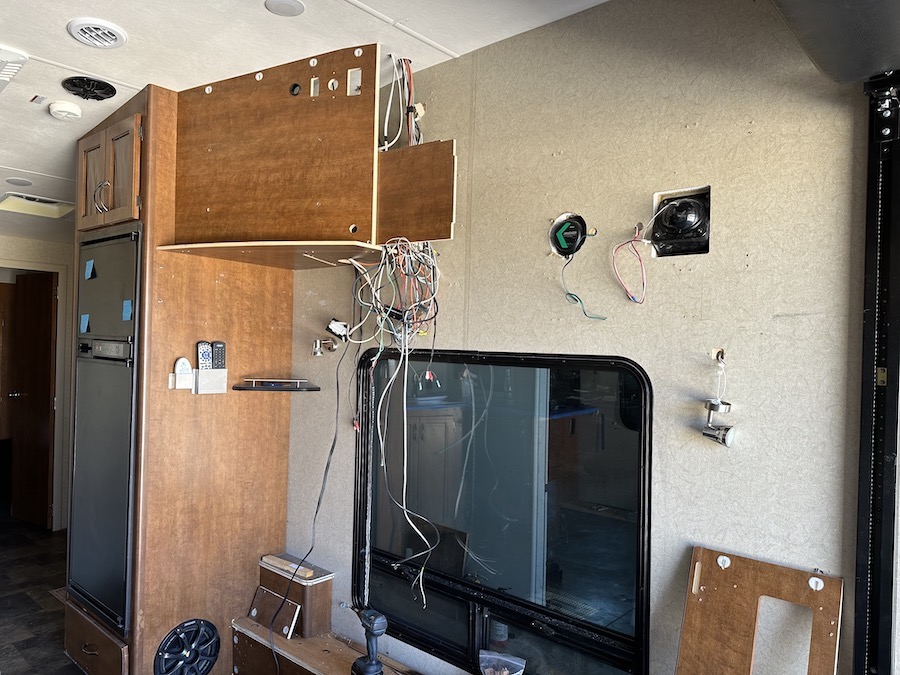
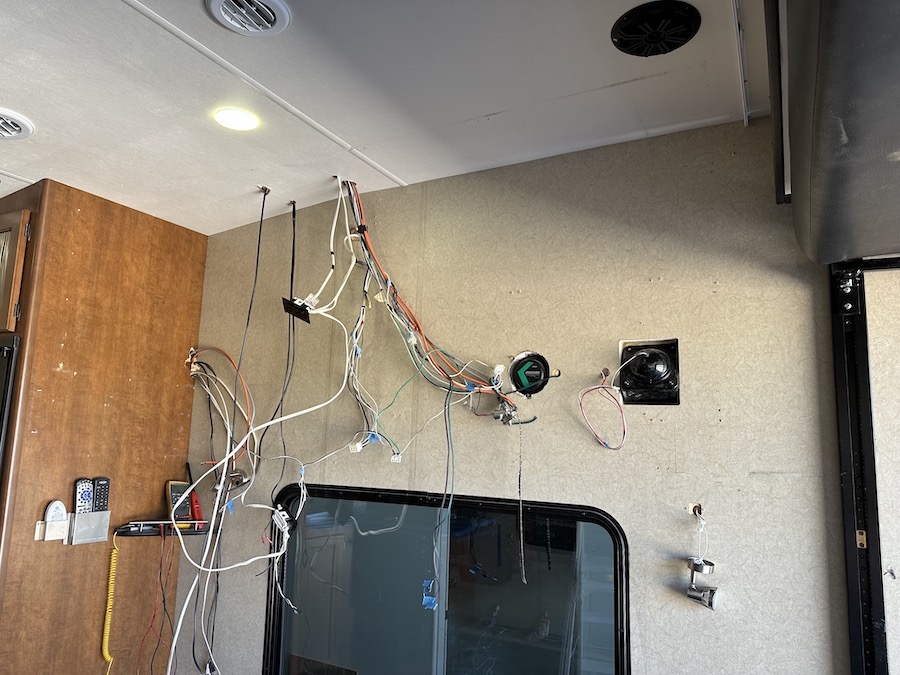
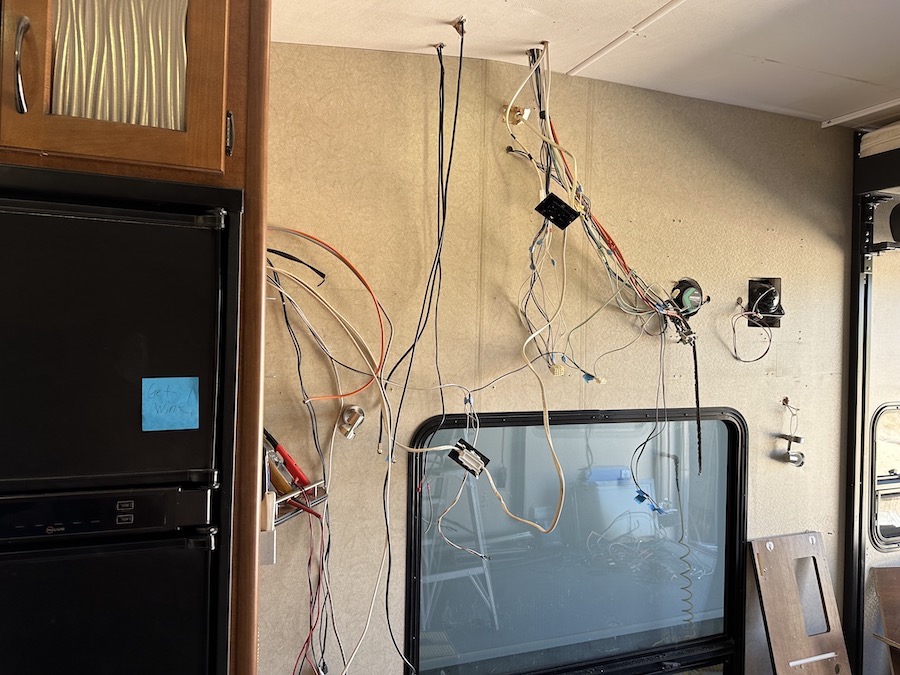
Once it was decided that the TV would fit where I wanted it to, everything was then pulled off the wall leaving nothing but a bunch of wires.
I reassembled the cabinet, cut the top of it to fit flush against the roof (thank goodness I found this before I got too deep into reinstallation).
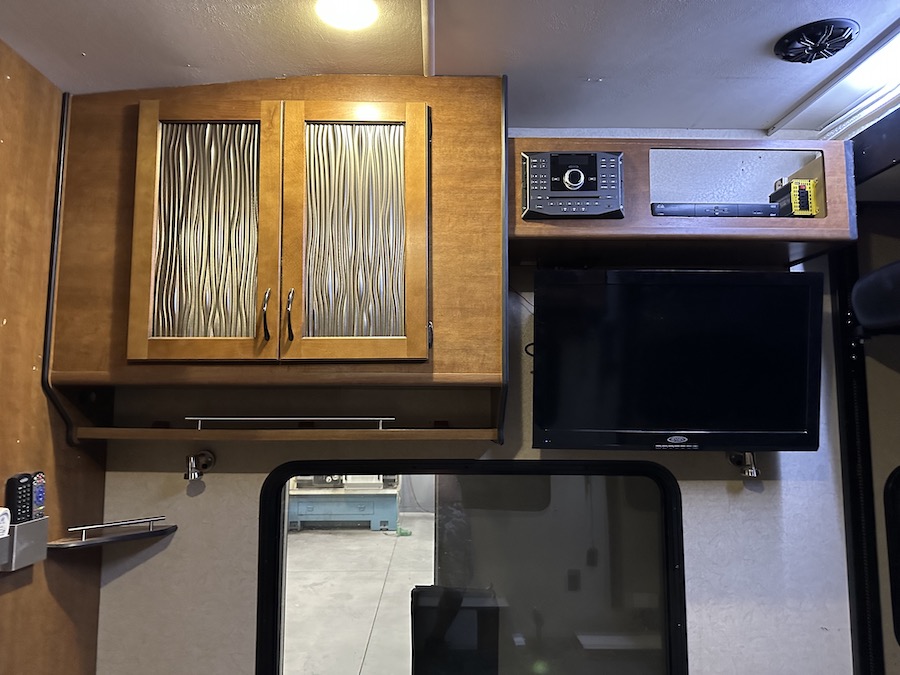
TV fits really well.

The entertainment shelf in place with a new control unit installed.
This is where I am as of today.
I still have to get a little bit of TV wiring done and then it's back to work on the kitchen counter. I'll be updating as I go along.
Happy Travels to all!
6/26/23
Been a bit... I've been side tracked with our new R&R Tour Bus (Polaris RZR). Now that it's finished, my focus is back on the Toy Hauler.
I'd just about finished up the entertainment center during my last entry into this page. It's now finished and I'm quite pleased with the results. I still need to figure out what to do with the large opening above the cabinet above the TV. I may try to turn it into some sort of shelving area - One can never have too much stowage space in a camper.

One of the issues I had to figure out was venting for the oven. The regular stove/oven combo uses the holes under the burners as venting. There's not a lot of heat that comes out of the oven but there's heat none the less and it's got to go somewhere. After looking over the venting setup of the stove, I realized that a couple of vent slots in the back of the counter top along with a some way to get air flow would work just fine.
Off to Amazon and a couple of small 12V computer fans were snagged as they would do just fine. I made a bracket that secured them just off of the vent from the oven and pointed them towards the back of the counter top where it hits the cooking backsplash.
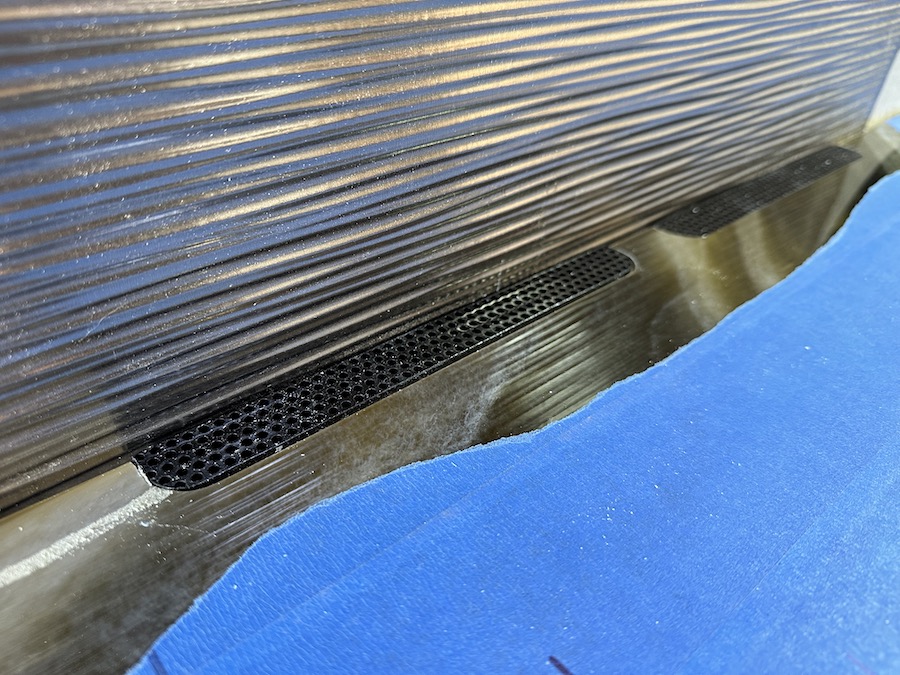
To get the hot air out I cut a couple of vents in the back of the countertop and then put perforated mesh in them. Routing out the vent slots was messy!
These two slots actually go all the way through the counter top. This pic was taken after I'd cut the first shallow section out to allow the vent louvers to sit flush with the counter top. I then cut all the way through the top to allow for airflow.
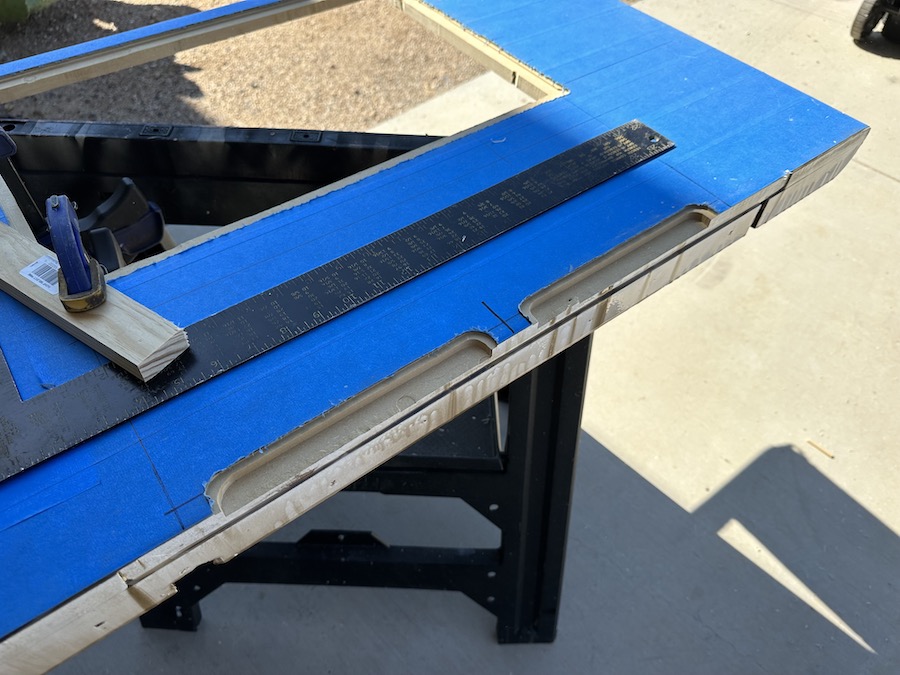

Close up showing a bunch of sawdust... It's cleaner than this when done.
The next aspect to tackle was how to power the fans and also the induction stove top.
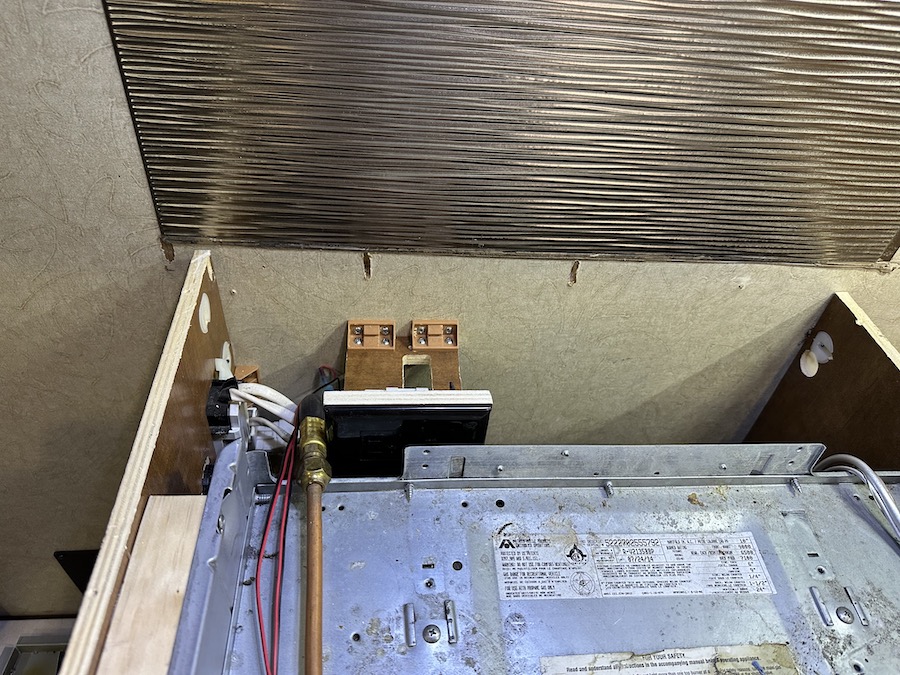
Fortunately the fuse panel is under the oven so access was pretty simple (you can see it the pic below). Bonus for the fan circuit is that there was an open fuse circuit in the power panel. I traced the non-connected fuse lead into the wire harness's plug, snipped the lead out of the plug and stuck another useable plug on it. I now have a fused line that powers the fans (they take minimal juice) and also a double USB port just under the end of the counter top so we have a convenient charging outlet.
I also needed a 120V outlet for the stove top. This took a little bit of thinking and planning and I ended up with a setup that allows for plug access once the countertop is installed.
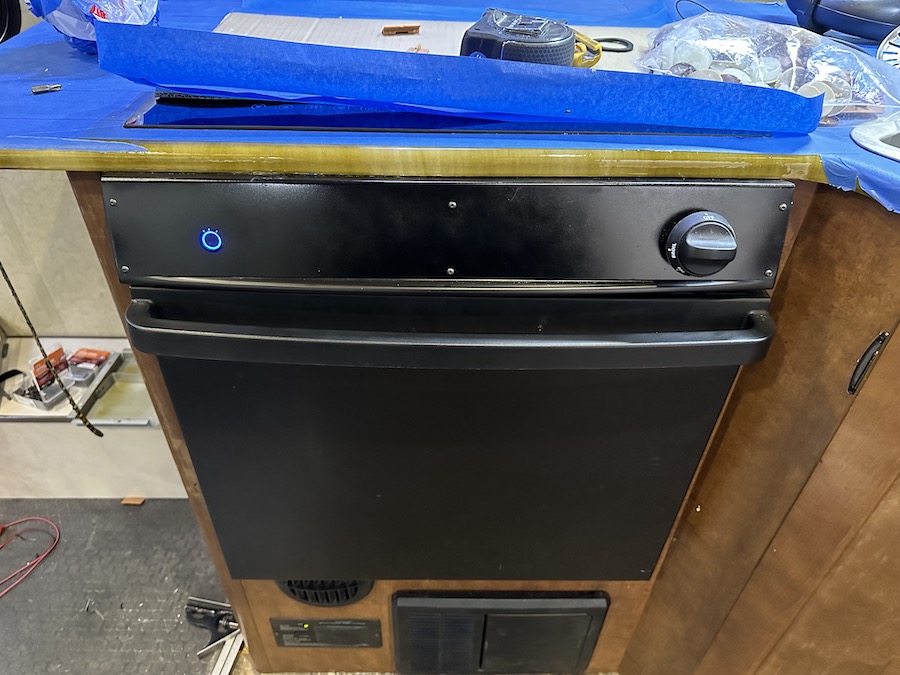
I redid the front of the oven's control panel. There's now a single switch on the left side to turn on the vent fans and the oven control knobby stayed in it's home on the right (in stock location). I just made a new panel that bolted onto the existing panel, covering the three burner control holes and blended in with the counter top nicely instead of leaving a 1/2" tall gap between the two.
Once I got the stove controls and wiring in place it was time to install the counter top. It drops in place PERFECTLY (gotta pat myself on the back for this - it really fits PERFECTLY. WOO HOO)
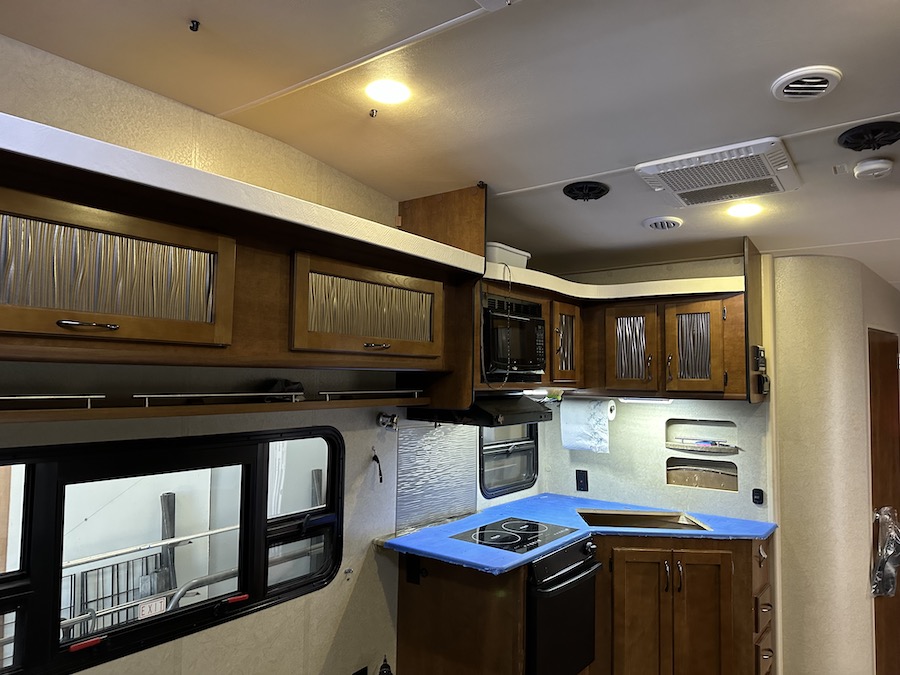
My wife attended to the trim work whilst I was working on the stove stuff. We pulled down the black trim and wrapped it in a light tan (matches the flooring that will be installed) material. When I first started putting the stuff back up I'm thinking "this is kinda loud" until I stepped back and looked at the whole thing and visualized the flooring. I think it's going to be an appropriate accent (and Robyn's really good at this sort of stuff).
The main room's trim
Bedroom trim

Above the bathroom vanity. That horrid lighting thingy will get replaced.

Next up is installing the sink and associated plumbing.
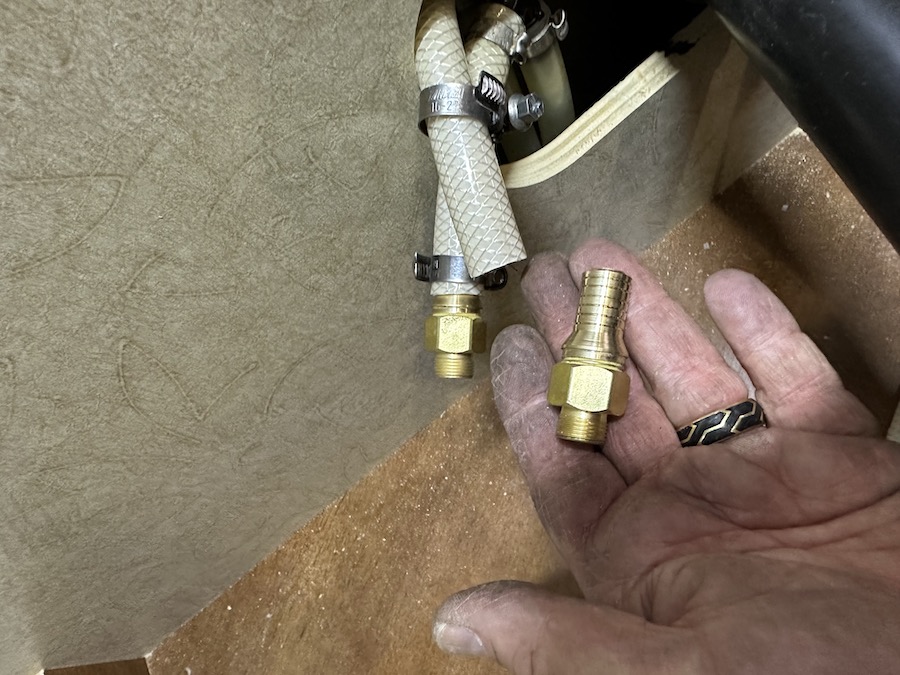
Of course this can't be simple and straight forward. RV stuff is it's own world. Sizes compared to what's found in housing is different. I needed to go from a smaller sized water feed line on the faucet to the 1/2" ID hose. I was able to find adapters for the faucet lines to 1/2" FIP but I can't find 1/2" FIP to hose barb so off to the lathe I went. Had two nice brass adapters after just a few minutes of pushing buttons.
As with the faucet water supply, the drain is also a cluster #*@^. As mentioned, it's funky sized and nobody at Lowe's, Home Depot or Ace carries what I need. I gathered up a bunch of PVC yesterday after wandering about the hardware store for an hour+ and plan on more lathe time today. I'm going to have to make a P-trap that adapts to the 1-1/2" drain line today. *this little bit KICKED MY ASS - more on that later in this tale of revamping.
Off to the shop with me to get this done. Once the sink is plumbed in, it'll just be flooring, window shades and get the couch and furniture put back in.
Hopefully final pix will be posted in the next day or so.
7/7/23
95% done but far from the finish line...
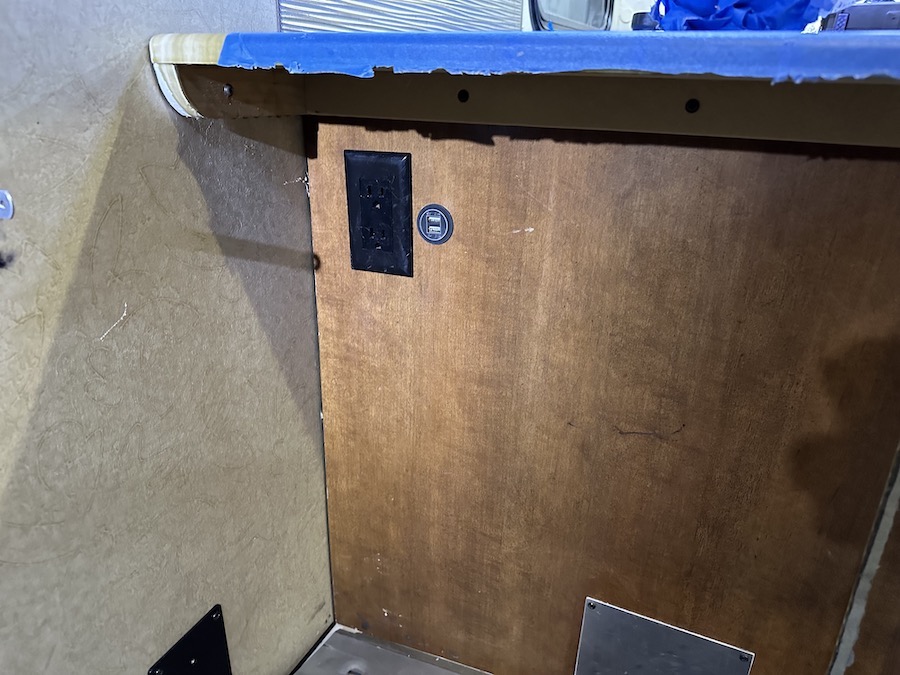
Finally got everything that I needed in hand to start finishing up. Electrical outlet and a convenient USB double port for easy device charging under the edge of the counter, next to the couch.
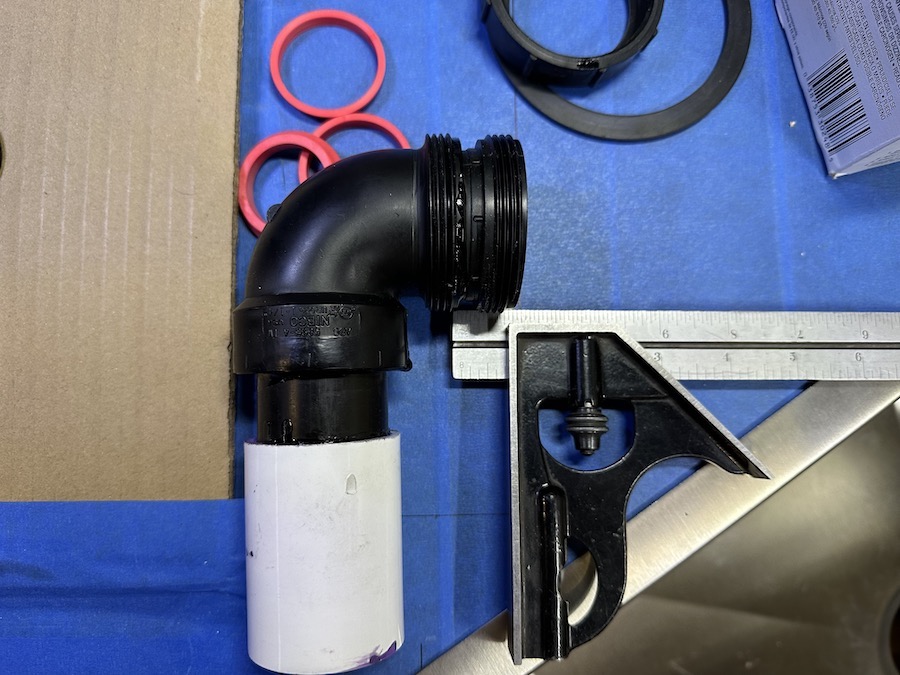
As with the faucet, the sink drain wasn't gonna play nice either. The Lance plumbing is 1-1/4" stuff. The sink, being residential, is 1-1/2". They don't play together well. The old hippy at Lowes (I can relate - we spoke the same language. In fact, he said "you know this place as well as I do. You wanna job?") tried to help me for about half an hour between other customers, all to no avail. I finally grabbed an assortment of PVC and headed home.
The drain line in the camper is just below the bottom of the sink. The OEM sink had probably four inches or so of clearance and now I'm staring at half an inch. The sizes are different, the drop is odd, looks like it's time to make stuff. Fortunately I'm good at that.
PVC is a funky material. It melts fairly easily, it doesn't like friction, it's sticky when warm. Why not try friction welding? I've a lathe so I can spin stuff and I can press things into the stuff in the chuck without loosing fingers. I have a plan! I'm gonna spin on the drop section that I need to screw to the bottom of the sink onto an existing drop section to get the clearance I need.
A bit of machining to match the extension to the P-trap and we have a perfect fit.
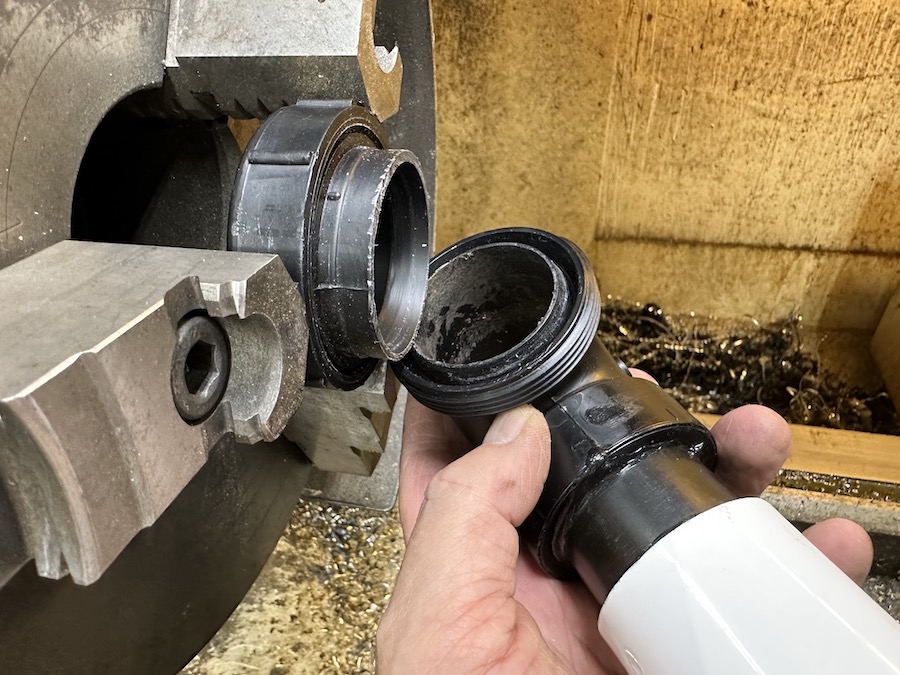
I tried spinning up the section in the jaws of the lathe and pressing the elbow into it it. It balled up a tad and didn't wanna stick. No problem - add a bit of PVC glue and do it again. Ah, yes a perfect result. This isn't something you'll find in Lowe's. It fits like a glove too. I like it when stuff goes correctly (because it goes really bad here soon...).
Flooring is next. Time to see how my skills are at this stuff. Turns out that I suck! - started at the wrong corner. I had to cut about three quarters through the bottom of each tile to make the break at the dove tail in the floor. To connect the tiles together they need to be flat. Cut, fit, cut next, flatten first, attach second, bend, fit, repeat. This would have gone well but the back cross bar of the trailer is pulled out about an eighth of an inch so things don't quite want to line up across the back. And there's the two inches of space that's not filled with tile. Kinda hard to keep things plumb across the back, first run. Anyhow, I proceeded to get the flooring down, albeit with a bit of a fight on and off.
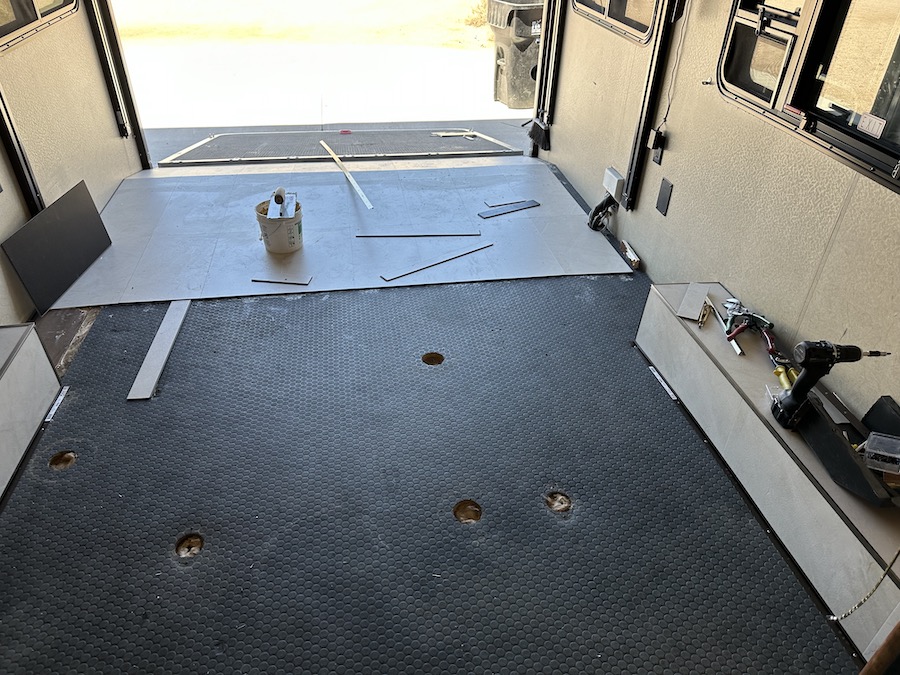
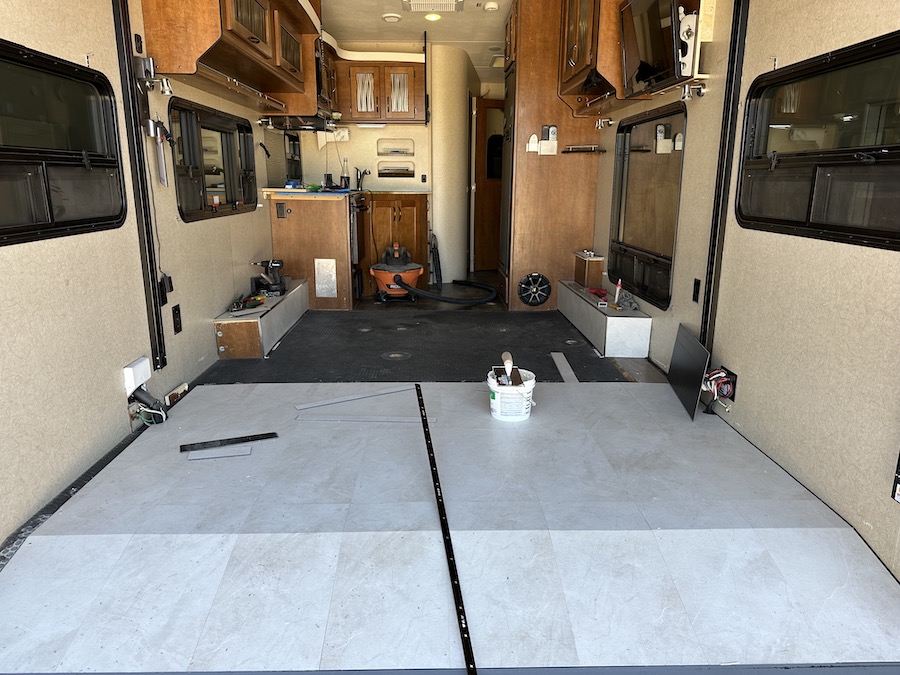
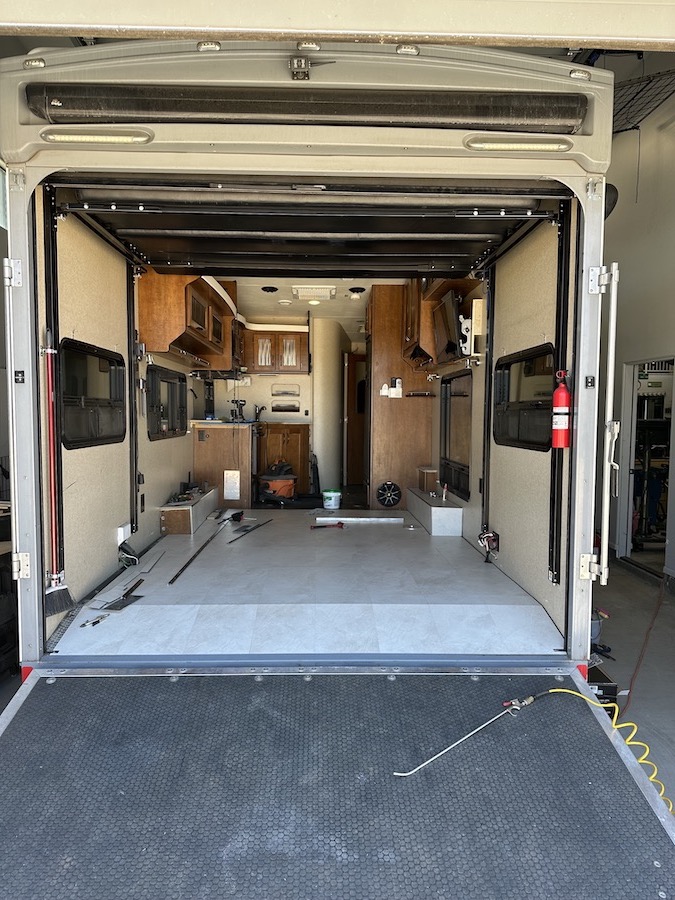
Not too terribly bad for an amateur, I guess. It really brightened the place up, which is exactly what we were wanting.
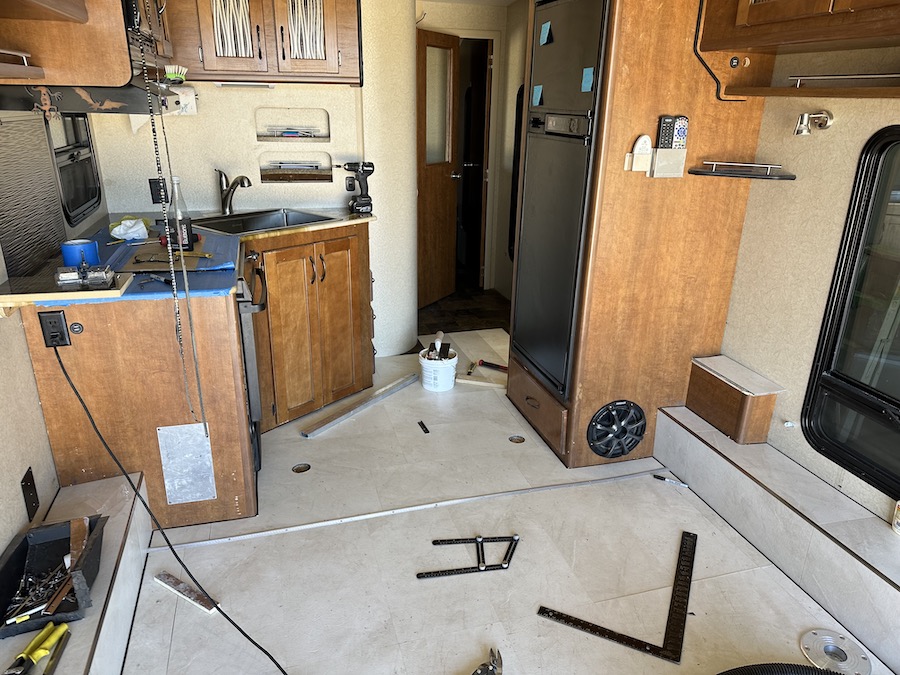
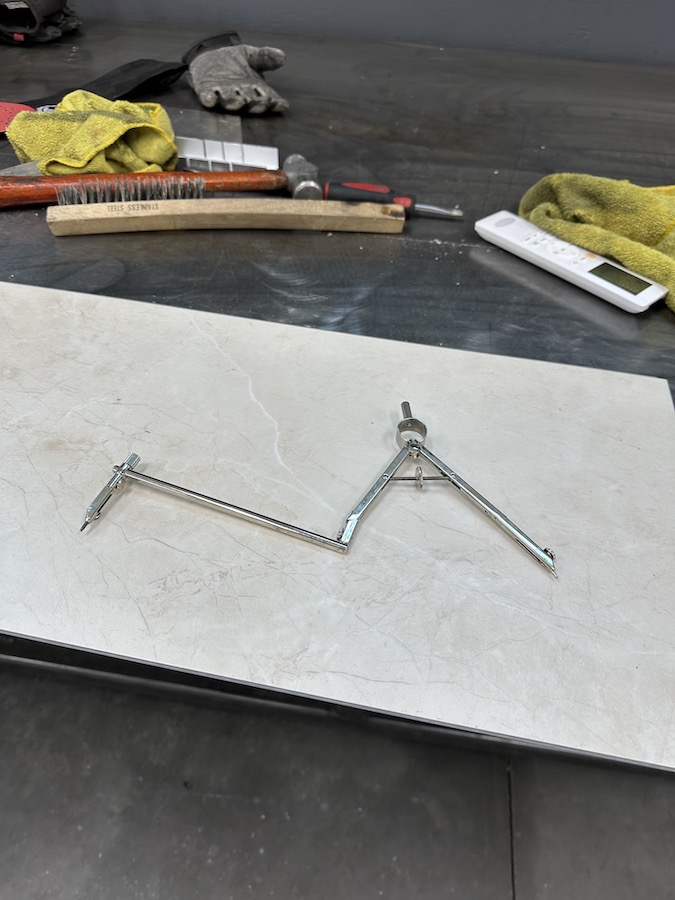
I had to get old school and pull out the compass to get the corner around the entrance to the hallway drawn. It worked like a charm too. Never discount the classics.
You can see the filler tile in this pic if you're paying attention.

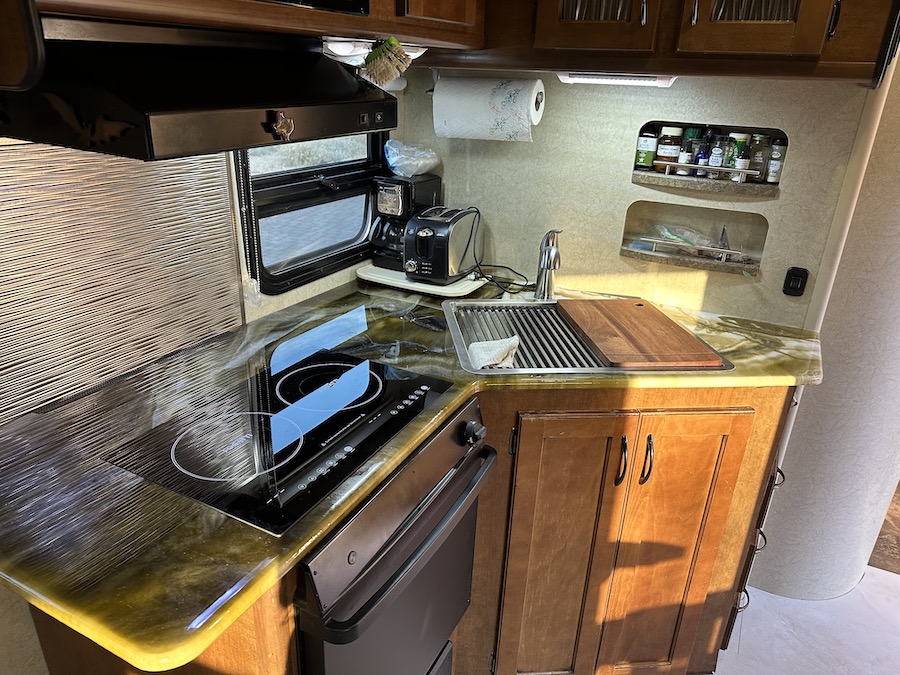
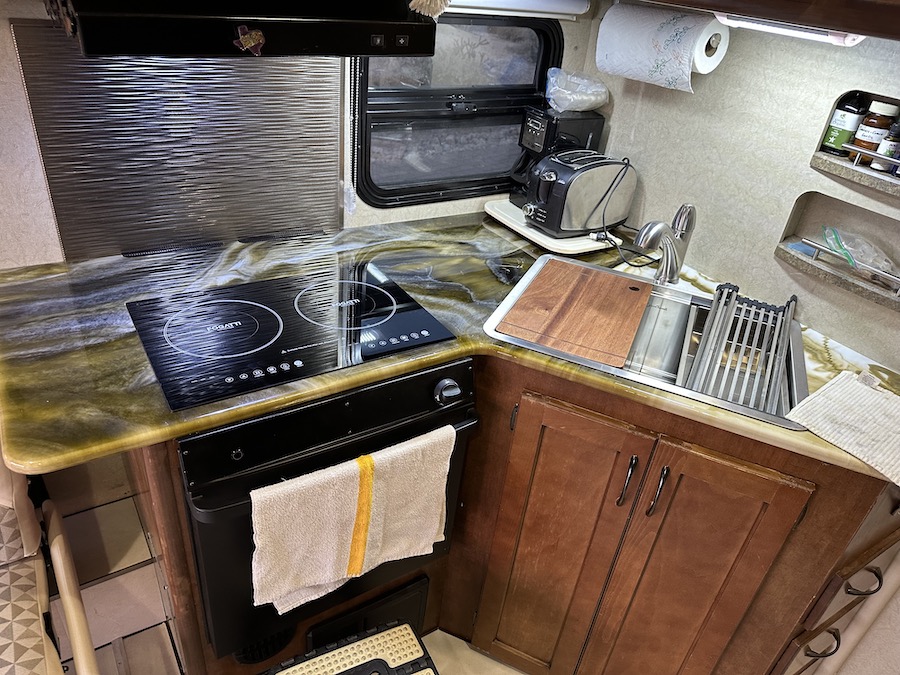
The counter reveal! I'm really pleased with the way things turned out. It fits like a glove, it looks good and my wife is happy (the key to it all).
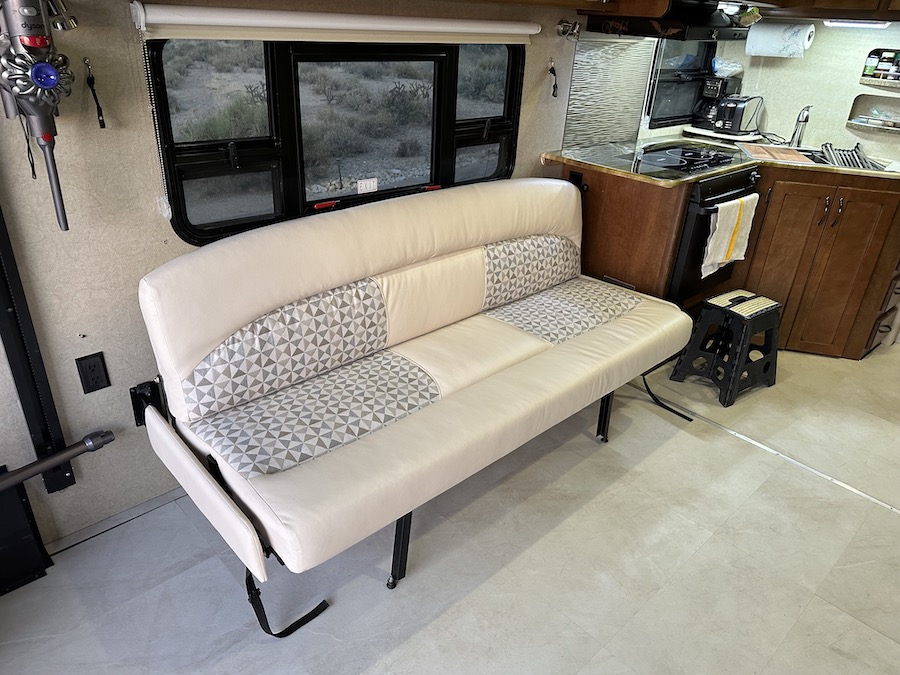
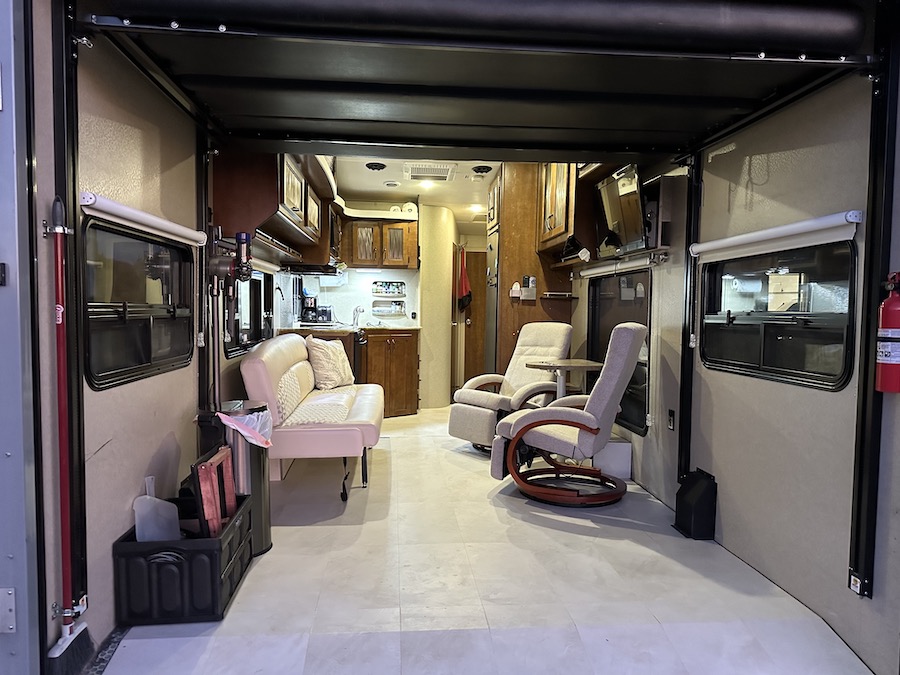
Once the kitchen area was dialed in it was time to get the rest of the interior done. We got the shades, couch and the recliners installed and it was time to head off on our first camping trip.

As I loaded up for the first trip of the newly remodeled toy hauler, I shut the electricity off and turned on the propane. Usually the fridge takes a few cycles to get fired up. I'm outside the hauler and suddenly hear the air sniffer screaming at me. WTF? I open the door and smell propane big time. This is NO BUENO!!!
I shut the propane off and start searching for the issue. Easy enough after pulling the induction stove top out - I've forgotten to tighten the feed line to the oven. No biggie (other than I could have made a really nice POOF-KA-BOOM). I aired the place out, tightened the lines, turned the gas on and wandered about the kitchen sniffing away. Neither I nor the gas detector sensed anything. Major problem avoided.
My wife wasn't happy with me that things weren't finished a couple of days before our trip so this was just icing on the cake. Anyone remember Clark Griswold throwing the fit in Christmas Vacation? Yeah, that was me.
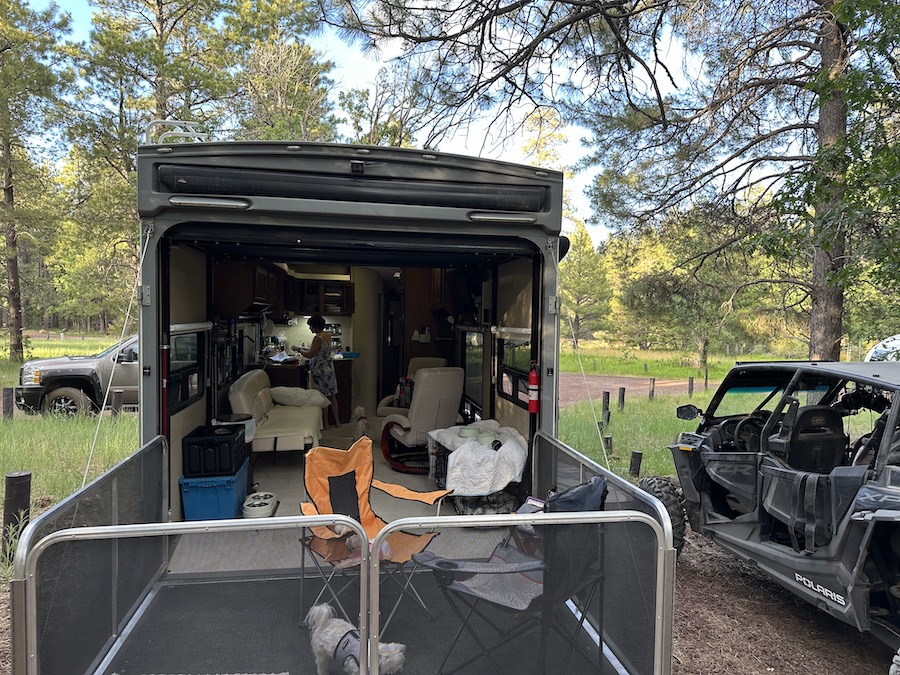
We got loaded up and ready to head north, up into the high country, away from the desert heat of July.
Got up to Mormon Lake Saturday (first of July) after 4.5 hrs of driving, which should have been 2 hrs.
Traffic SUCKED.
Got set up & settled in.
No power, water, sewer, just the water on board, a full tank of fuel & generator (which of course won't run. It was in storage mode so it should fire right up - dry carb and fuel stabilizer in what little gas was in trailer. Acts like a jet's plugged).
Honda briefcase genny brought as a backup. Fires on 3rd pull after putting fuel in it. Been stored dry. Won't run A/C but we didn't need.
Had dinner & conversation with our dear friends Murph & Shari. A relaxed Saturday night was had.
Sunday morning...
Uh... what's that trickle next to the bathroom?
Dog pee?
No, coming from under sink area.
Start inspecting and chase water.
Water line to faucet is dripping.
*%^$.
Already frustrated...
No TV antenna connection.
Sat not aiming.
Stereo not working.
WTF? It worked before we left.
Leak attended to first. I can only reach the clamps with my left hand.
Dicked with it for 30-40 min. Got clamp tight(er). Seems good.
Ladder out (came prepped).
Oh, plug the stereo in, dumb ass. Easy fix. Cool.
TV antenna has been a fight from the beginning of the mods. Phone calls need be made.
Sat is questionable as to why. I may have coax in wrong input. No biggy.
Off to camping dinner we go and things start going sideways. Robyn's had a couple of drinks and is having issues. No way she should be this bad - ah yeah she has issues with altitude sickness and it's decided to join in. Not good.
Get back to our camp about 9:30p
She spends next hr on bathroom floor telling the porcelain she'll be visiting while lay in bed next to the bathroom.
She finally quiets and seems to be getting some reprieve.
12:20 the threats she'd been making came to fruition and yacked for 30 min or so. I felt very badly for her.
Uh, what's that trickle on the floor?
NO! NOT AGAIN!! *&%ING WATER LINE!
Insert what ever swearing you can think of here...
Pump off, sleep time.
I'll deal with it later. *&%^!
Got up early to the dogs making noise.
Took them out, back to bed.
7:30ish this morning dogs start up again - I'm on couch now, they want Robyn.
We all go into bedroom and sleep until 9.
Get up, let dogs out, start working on leak. Hopefully it's fixed now.
Hurting Robyn emerges.
We chill until about noon and she says it's getting hot. (Mid 80s).
I look at her and say "It's air conditioned at home. Are you ready to go?"
"Yup" (music to my ears!)
Locked, loaded and on the road in 30 min.
We've been home about 90 min now and it's NICE!
Worst camping trip ever.
The only positive to it is that I have a punch list of shit to fix before we go camping in Colorado in a couple of weeks.
As much of a pain this has turned out to be, I'm still glad I've done it. I'll get the little things dialed in (like getting shades for the bedroom) and we'll have a grand time as usual.
7/9/23
Flooring time. I'm starting to get better at this stuff.
Hallway - Check
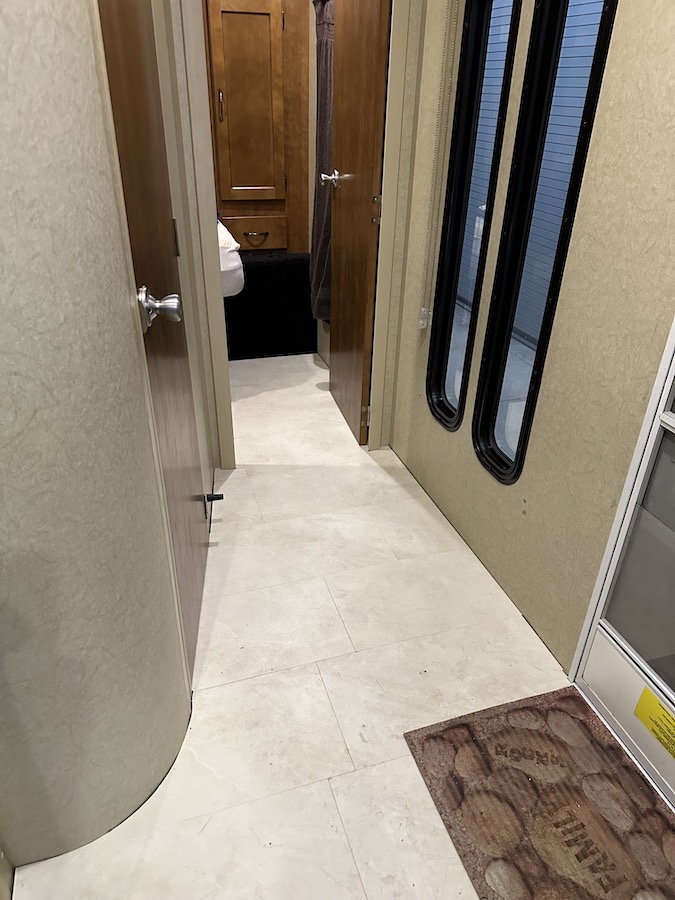
Bathroom - Check
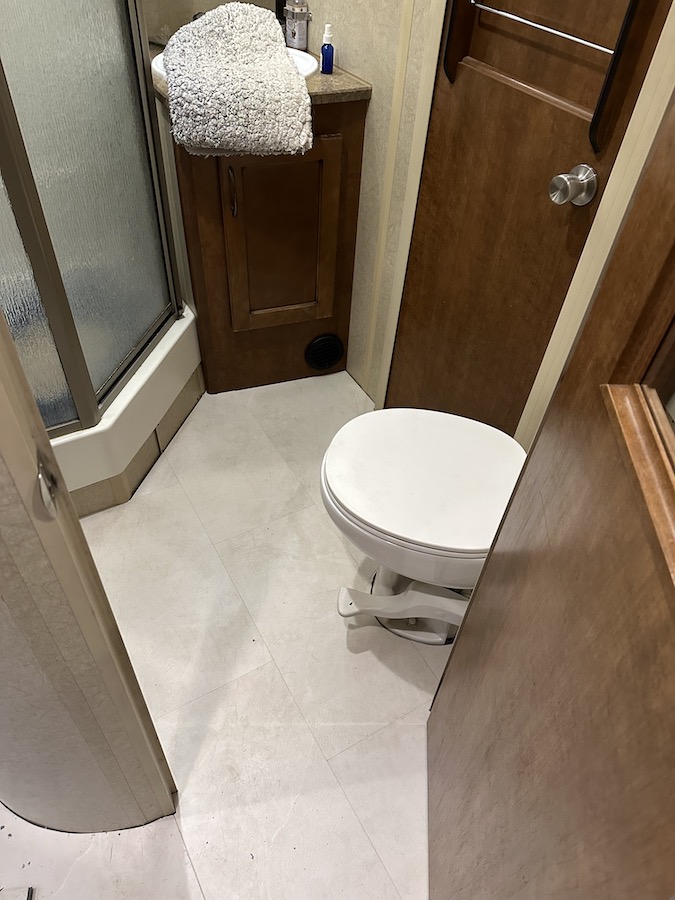
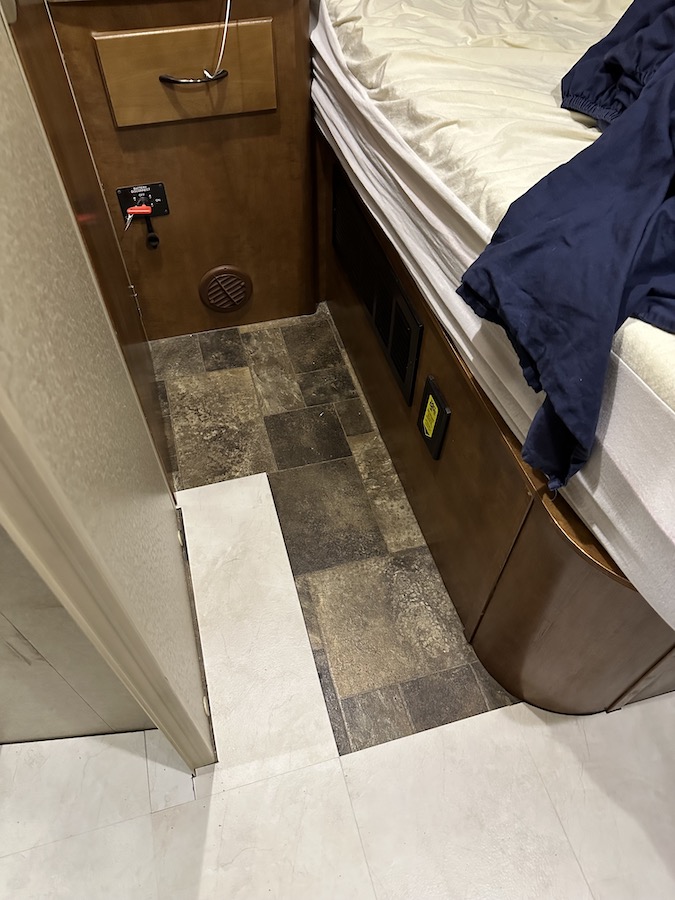
Bedroom - Crap.
Four tiles short and I can't find a single one in the greater Phoenix area. Got a box on order.
The stuff went down well, I didn't have any drama and I'm pleased with the results.
Now where'd I put that punch list?
Return Home