
Home of K-fab
 |
|
 |
Converting an Old Gold Futura to a Gold SE
Recently I've had a couple people write me and ask about my Old Gold Futura.
"Can a Gold be upgraded?", "How hard is it to upgrade?", "What parts can be changed?", "What parts have been changed?"
Well, sit back and I'll tell you!
My Gold is in it's third generation now. It will be eight years old the end of July, has had four different power plants (the 4-stroke being the latest), and has been my most reliable flyer (well, up to installation of the 4-stroke!). I flew it pretty much stock up until the SE came out. I managed to get my hands on the fourth SE to come into the country (and I know where the other three went...), so I had visions of upgrades on the Gold as soon as I started putting the SE together. Bearings being the main thing that I wanted to do.
I figured out that the easiest(?) way to go about upgrading was to replace crash damaged items with the latest part off an SE. I also discovered that any of the parts on an SE will bolt right into a Gold, some might take a bit more work, but there's nothing that can't be adapted. My latest upgrade (besides the 4-stroke power plant) has been to take what was left of my first SE, after what has to be the worst crash I've ever had, and put in on the Gold. It ended up being cheaper to just buy a new SE kit than it was going to be to put my original SE back together! Pretty much all that's left of the Gold is the frame, tail boom & mount, tail box & boom supports. Truly a Gold SE.
I'll break the heli down into it's major components, show what I've done, list parts and part numbers and show/tell of any specific modifications. At the end of each section you'll find a complete listing for all the parts in numerical order along with "upgrade" or "remove" for guidance.
HEAD
BELL CRANKS & THINGS WITH BUSHINGS
GEAR TRAIN
MECHANICS
FRONT STRUCTURE
TAIL
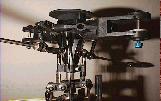 The SE head (S-4646) is a modified version of the original Gold head (S-4500). Machining to the head was done to lighten it. This included a channel that runs the length of the head, a more tapered lower section and a the window that the flybar passes through was opened up for more deflection.
Mechanical changes were:
The (S-4501) damper inserts that the main blade pivot shaft goes through were changed from plastic to (S-4682) aluminum pieces
The (S-4513) connector ball (support bearing) was also removed from the head
The (S-4645) flybar traverse shaft (part the flybar rides in) was changed so that it was capable of either 12 or 24 degrees of deflection and modified so the flybar rides on bearings
The (S-4502) main blade axle and (S-4503) thrust bearings were changed to (S-4542) axle that now use different (S-1551) thrust bearings
The (S-4504) blade grips were upgraded to (S-4534) four bolt grips. These use a (S-4533) spacer ring that is sandwiched between the bearings
A smaller (S-2868) head button/rotor brake was installed also.
 Upgrading a Gold Head is pretty straight forward. If you have access to a milling machine and a lathe, the it's a breeze to upgrade the head. Here's the path I took and the parts I used:
The first thing was to get the new flybar setup installed. The old setup had very limited flybar deflection. I don't know what the amount was, but I doubt it was 10 degrees. Only one part was needed - the (S-4645) Traverse Shaft, but the head had to be modified to accept it.
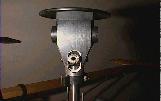 First I removed everything from the head and then put it in my mill and opened up the head where the flybar went through. A hole of 11 mm wide and 16 mm tall starting at the top of the main shaft was cut all the way through the head. I then clearance cut the hole 22 mm high, still 11 mm wide but only 4 mm deep from the side of the head. This hole is offset so that it starts 4 mm below the top of the main shaft. At the end of this pass, you can pull the head of the mill up 2 mm and continue until you are 8 mm from the top of the head - at least that's what Robbe did.
The last thing that I did was remove the (S-4513) Connector ball, 8 mm - it's a heim ball - from the head.
As your heli decides to meet the ground on that dreaded occasion, it's the perfect time to go ahead and upgrade some of the other parts to the SE. The (S-4542) blade pivot shaft, will require new (S-1551) thrust bearings, as the ends of the shaft are not shouldered down like the original (S-4502) blade pivot shaft. While you're upgrading the main blade shaft, you may as well install four bolt (S-4534) main blade grips and (S-4533) spacer rings. Assembly is now to slide the (S-4534) main blade grips over the complete bearing and spacer assembly and hold them on with four small bolts instead of the old "sandwich" style. Also available are (S-4549) aluminum main blade grips and (S-4734) light weight aluminum spacer rings instead of the plastic SE blade grips. These look very nice and work equally as well - once again, you have to upgrade the (S-4542) main blade axle and (S-1551) thrust bearings for them to fit.
I think that (S-2992) is a complete SE rotor head, including the new blade grips, bearings and traverse shaft.
A smaller (S-2868) head rotor brake can installed too.
The original (S-4505) mixer levers (the levers attached to the blade grips) can be replaced with (S-2996) mixer levers - these come as a pair, complete w/bearings. (S-4552) Aluminum mixer levers are also available. They come complete with bearings and balls, but you only get one per package, so don't forget to order a pair of them.
Another upgrade method with the original parts is to find flanged bearings with the same dimensions as the (S-3532) bushing that you see through out the links of the gold Futura. These would be 3x8x3 flanged. Don't forget to use enough (S-4029) washers between the bearings to allow you to torque down the bolt that goes through the bearings. You may have to use four of them and leave the outer washer off. Use your own judgment, you want the system to be free to rotate, but not move laterally or jiggle.
Moving down the main shaft, the (S-4440) collective pitch compensator hub can be changed out to the (S-4665) collective pitch compensator hub. It is brass bushed on the sliding surface. Robbe also has the (S-2994)collective pitch compensator, complete with (S-4626) collective pitch compensator levers w/bearings. You can also get a very nice (S-4551) aluminum collective pitch compensator hub alone or (S-1035) complete with (S-4550) aluminum collective pitch levers too.
You can upgrade to ball bearing (S-4626) collective pitch compensator levers or (S-4550) aluminum collective pitch compensator levers. Both of these come complete with bearings
The (S-2972) SE swash plate has been machined for lightness. It's not a needed modification unless you manage to have one that the balls no longer want to stay in - use that loctite! The new (S-2972) swash plate is lighter and looks nice, but it's expensive. Don't forget the (S-1025) collective pitch compensator drivers. These replace the original (S-3426) plastic pieces.
(S-1025) Collective Pitch Compensator Drivers - upgrade
(S-1035) Aluminum Collective Pitch Compensator, Complete w/(S-4550) Aluminum Collective Pitch Compensator Levers and bearings - upgrade
(S-1551) Thrust bearings (2 required)- upgrade
(S-2868) Head Rotor Brake - upgrade
(S-2972) Swash Plate - upgrade
(S-2992) SE Rotor Head, complete - upgrade
(S-2994) Collective Pitch Compensator, Complete w/Arms and Bearings - upgrade
(S-2996) Mixer Lever w/bearings (pack of 2) - upgrade
(S-3426) Collective Pitch Compensator Drivers - replace
(S-3532) Bushing - replace w/flanged bearing
(S-4029) Washers - upgrade
(S-4035) Bearing - upgrade
(S-4440) Collective Pitch Compensator Hub - replace
(S-4500) Rotor Head - modify
(S-4501) Damper Inserts - replace
(S-4502) Main Blade Pivot Shaft - replace
(S-4503) Thrust Bearings - replace
(S-4504) Main Blade Grips - replace
(S-4505) Mixer Arms (S-2) - replace
(S-4513) Connector ball, 8 mm - remove from Gold Head
(S-4533) Spacer ring (2 required) - upgrade
(S-4534) Main Blade Grips (2 required) - upgrade
(S-4542) Blade Pivot Shaft - upgrade
(S-4549) Aluminum Blade Grip Set (pr.) - upgrade
(S-4550) Aluminum Collective Pitch Compensator Lever w/bearings (2 required) - upgrade
(S-4551) Aluminum Collective Pitch Compensator Hub - upgrade
(S-4552) Aluminum Mixer Arm w/bearings (2 required) - upgrade
(S-4555) Aluminum Blade Grip (single) - upgrade
(S-4626) Collective Pitch Compensator Arm (2 required) - upgrade
(S-4645) Flybar Traverse Shaft - upgrade
(S-4646) SE Head - upgrade
(S-4665) Collective Pitch Compensator Hub - upgrade
(S-4682) Aluminum Damper Inserts - upgrade
(S-4734) Light Weight Aluminum Spacer Ring - upgrade
BELL CRANKS & THINGS WITH BUSHINGS
The bell cranks on the Gold are all bushed with delrin. These (S-3532) bushings look like small hats. It's easy enough to just replace them with flanged bearings of the same dimensions, but don't forget to use (S-4029) washers to space the bearings properly.
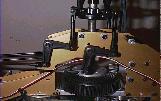 The (S-4142), (S-4143), (S-4144) bell cranks ride on (S-4137) bell crank mounts - those long black strips that mount to the frames under the swash plate This entire piece can be thrown away, saving weight, but there are three ways to go about doing the change:
If you have access to a lathe, you can make new stand offs that mimic the SE's (S-4659) spacer sleeves, but drill & tap them instead of making them slide over the bolt. This will allow you to set the amount of slop that you desire by screwing the bolt in or out of the sleeve that you've made. The bolts then pass through the frame at the same location they were mounted to the (S-4137) bell crank mounts. You can also use flanged bearings in place of the (S-3532) bushings. The nice thing about this setup is that you don't have to use the (S-4029) washers as crush sleeves.
Here's where it gets tricky:
You must move the two "flat" (S-4144) bell cranks to the front position on the frame and the (S-4142) (S-4143) dog legged bell cranks to the rear position. Don't forget to make sure that the (S-3495) balls are now to the outside of both ends of the (S-4144) bell cranks and on the outside of the (S-4142) (S-4143) dogged legs. They stay on the inside of the flat leg of the (S-4142) (S-4143) bell cranks.
You'll need to put a (S-4029) washer between the (S-4144) bell cranks and the frames and the spacer sleeves go between the (S-4142) (S-4143) bell cranks and the frames.

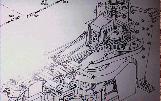 Looking at the links from the "tail in" view, let's call the left rear bell crank #1, left front #2, right front #3, right rear #4. On the frame, you'll notice that there are two sets of holes for mounting the bell cranks. Just in front of the large hole that you can see the main shaft through are a pair and the other pair are just behind the large hole near the starter assy. Mount the bell cranks in the following pattern: #1 lower hole, #2 upper hole, #3 lower hole, #4 upper hole. The control links to the servos now must go in this order: #1 to rear left servo arm, #2 to front left servo arm, #3 to right rear servo arm and then #4 to right front servo arm. You can also loose the little link between the two rocking servos. The collective servo only needs to act on the front rocking servo.
Last but not least is just upgrade to SE parts. This would include the (S-4659) spacer sleeves, (S-4029) washers, (S-4035) bearings, (S-0037) bolts, (S-0087) bolts, (S-4619) (S-4620) (S-4621) bell cranks. Assembly is the same as above. The (S-4659) spacer sleeves have a shoulder so you have to open up the hole they fit into. Instead of purchasing all this stuff separately, Robbe offers a (S-2998) bell crank set, complete w/bearings and of course you can purchase the (S-1024) aluminum bell crank set - as always, complete w/bearings and ball ends.
(S-1024) Aluminum Bell Crank Set w/bearings - upgrade
(S-2998) Bell Cranks w/bearings (set of all four) - upgrade
(S-3532) Bushing - replace w/flanged bearing
(S-4029) Washer (16) - upgrade
(S-4035) Bearings (8) - upgrade
(S-4137) Bell Crank Mounts - replace
(S-4142) Bell Crank - replace
(S-4143) Bell Crank - replace
(S-4144) Bell Cranks (2) - replace
(S-4619) Bell Crank - upgrade
(S-4620) Bell Crank - upgrade
(S-4621) Bell Cranks (2) - upgrade
(S-4659) Spacer Sleeves (2) - upgrade
Now that I've told you all the part numbers and such, how about I share a secret? Robbe makes a complete (S-9502) ball race conversion set - a full bearing upgrade kit! It includes everything you need to convert your bushed heli to a full ball bearing heli.
The (S-9502) kit includes the following:
(S-1025) Collective Pitch Compensator Driver (pair)
(S-2994) Collective Pitch Compensator, Complete (with levers)
(S-2995) Futura SE Front Structure (servo tray), Complete (with rocking servo mounts)
(S-2996) Mixer Lever (pair)
(S-2997) Tail Rotor Bell Crank
(S-2998) Bell Crank Set
Upgrading the gear train is actually very easy. It's available as a kit!
The (S-2999) Conversion Set: 73T RH Futura SE kit changes the drive ratio from 9.60:1 to 9.29:1 and contains everything you need. You get a new clutch bell, clutch, engine mount, upper and lower aluminum bearing strips, drive belt, main pulley, drive pinion, main gear and retainer ring.
You do have to cut the frames a touch where the driven pulley goes through them to make this kit fit, but the instructions show exactly what needs to be done. You also will want to put in a couple frame stiffeners - (S-4613) front dome bearer and (S-4614) rear stiffener. More about this in the section below.
If you don't feel like upgrading the entire gear train, I recommend switching the (S-3099) 50-tooth spur gear to either the (S-4468) 50-tooth Delrin gear or the (S-1023) 50-tooth brass gear (my choice). These only work with right hand (clockwise) rotation mechanics. You can also upgrade the plastic (S-4116) 48-tooth belt pulley to a (S-4652) aluminum 48-tooth belt pulley if you're happy with the original 9.60:1 gear ratio.
(S-1023) 50-tooth Brass Gear - upgrade
(S-2999) Conversion Set: 73-tooth, Right Hand Rotation - upgrade
(S-3099) 50-tooth Spur Gear - replace
(S-4468) 50-tooth Delrin Gear - upgrade
(S-4613) Front Dome Bearer - upgrade
(S-4614) Rear Stiffener - upgrade
Robbe has a part - (S-4170) Futura Side Panel, 1.5 mm. These are Gold in color and the same thickness of the SE frames. You can also upgrade to (S-4600) black SE frames, or even (S-4690) carbon fiber SE frames, but you loose the "Grand Gold" appearance.
I chose to go about modifying my frames by only doing a couple of changes. The only required change is if you do the (S-2999) drive train update. You have to cut the frame below the tail boom where the drive pulley resides. The rest of my cutting modifications are just weight savers.
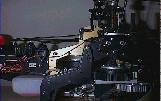 I removed the entire push down starter assembly (saves a TON of weight) and then cut the frame section that it mounts into away. If you'll look at the photo to the right, you'll see a comparison of SE frames and my Gold frames. (got carried away with the Dremel tool!) I didn't trim the back side of the frame to match the SE, though.
If you still have the cone starting system you'll want to change the (S-4126) starter driver out to the hex drive setup. You need (S-4172) starter driver, (S-3467) countersunk socket screw and (S-4651) hexagon starter driver. This is a pretty common upgrade for Gold flyers. You'll want to get a (S-1387) hexagon starter extension for your electric starter. It's a nice piece with a long hex shaft and one way bearings.
If you decide to do the frame cut, you have to add a (S-4613) front dome bearer. It gives the support that you removed when you pulled out the starter assembly. Also, remove the (S-4136) hexagon spacer and replace it with the (S-4614) rear stiffener. You'll want to do this if you change to the new gear train anyhow, as the stiffeners and the bearing strips lock together and support each other.
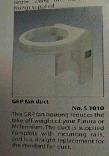
Get rid of that (S-4101) beast of a lower frame and switch out to the (S-4601) aluminum channel rail. Don't forget the (S-4611) nut plate. It goes up in the front of the (S-4601) aluminum channel rail. You can still remove the engine fairly easily, but you'll have to cut the bottom of the fan shroud. Speaking of the fan shroud, Robbe makes a (S-1010) single piece GRP fan shroud. Then you can get (S-1036) carbon fiber fan shroud supports to hold it or your stock fan shroud up. A (S-1022) aluminum cooling fan is a really nice upgrade too. Robbe also offers a (S-4108) brass cooling fan for four strokes - perfect because of the extra mass. I'll be ordering mine soon!.
I also changed out all the steel locknuts for aluminum - except on the main shaft and head. They weigh about 1/4 of the steel. You can get a full assortment of sizes and colors from Hobbies and Heli's International.
 Another place on the mechanics to save quite a bit of weight is to change the SE's (S-3143) landing struts and (S-4636) skids. You'll also need the (S-3145) skid connectors to assemble them. I also went ahead and added the (S-4649) strut brackets on both the rear and front landing struts. You have to drill through the frames on the front pair, but it adds a lot of support to the struts.
(S-1022) Aluminum Cooling Fan - upgrade
(S-1010) GRP Fan Shroud - upgrade
(S-1036) Carbon Fiber Fan Shroud Supports - upgrade
(S-1387) Hexagon Starter Extension - field box accessory
(S-3143) Landing Struts - upgrade
(S-3145) Skid Connectors - upgrade
(S-3467) Countersunk Socket Screw - upgrade
(S-4101) Base Frame - replace
(S-4108) Brass Cooling Fan - upgrade for 4-strokes
(S-4126) Starter Driver - replace
 (S-4136) Hexagon Spacer - replace
(S-4170) Futura Side Panel, 1.5 mm - upgrade
(S-4172) Starter Driver - upgrade
(S-4600) Black SE frames - upgrade
(S-4601) Channel Rail - upgrade
(S-4611) Nut Plate- upgrade
(S-4613) Front Dome Bearer - upgrade
(S-4614) Rear Stiffener - upgrade
(S-4636) Skids - upgrade
(S-4649) Strut Brackets - upgrade
(S-4651) Hexagon Starter Driver - upgrade
(S-4690) Carbon Fiber SE Frames - upgrade
Canopy standoffs/supports
There's not a lot of things that you can do to the servo tray, but those that you can make a fairly descent reduction in weight.
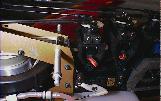 I waited until I HAD to buy a new front structure - darn trees. This is the (S-2295) SE front structure, complete. It comes with new rocking servo mounts, bearings and a pair of long bolts. I took a jewelers saw to it right behind the rear rocking servo and removed the "T" shaped section from the structure just at the front/upper edge of the frame rails. Hopefully you can see what I'm talking about in the photo. Also, take a look at the end of the canopy mounting stalk. Notice the little machined end? It slips into a grommet in the canopy, securing it very well. There is also another pair of stalks (only 35 mm long) with the little machined ends that mount at the hole that goes through the (S-4429) swash plate holder mounts to the frames. Another pair of grommets is installed in the flat spots on the back of the canopy. It works wonderfully. As soon as I find the part number, I'll post it.
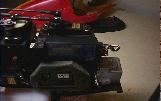 Another place to save weight is don't install that silly (S-4404) wooden radio tray (or the little (S-4670) side plates that they included in later kits). You don't need them. Instead, mount the gyro up in the front "tray" and put the battery and receiver together in the hole under the collective servo where you're supposed to mount the gyro. I used a fairly dense closed cell foam (like you find in transmitter cases) and just cut out a slot each for the battery and receiver then cut the foam about 10 mm larger than the hole. Push it in and I've never had a battery or receiver come out - and that includes some NASTY crashes. Last on my "list of tricks" is to cut away the front ledge of the area next to the collective servo. It makes a perfect little shelf for your gyro's control box.
While you have the front structure off, may as well put in a (S-4146) 600 ml fuel tank and up the flight time.
(S-2295) SE Front Structure, Complete (full bearings) - upgrade
(S-4146) 600 ml Fuel Tank - upgrade
(S-4404) Wooden Radio Tray - remove
(S-4670) Front Section Spreader - remove
Starting at the front and working back, I'll try to cover the tail of the Gold in full. There are quite a few roads that one can go down while upgrading the tail of the heli. I'll also be using the words "tube drive" and "rigid drive" to describe the same system. Most heli flyers know it as "tube drive", but Robbe calls it "rigid drive".
Up front, the plastic (S-4302) tail bearing bracket was changed to the (S-4605) aluminum tail bearing bracket. This eliminates the possibility of any flexing in the t/r drive system and keeps the gear mesh nice and constant. You can keep the original wire drive setup if you like with this upgrade.
Here's where things might get a bit tricky....
The one thing that I'm not sure of is the tube drive conversion. I have a salmon colored aluminum tube in my (S-4335) empty tail boom. I think it's a Bergen Machine tube drive, but I'm not sure. I don't think he carries it anymore, anyhow. You might try Rick's R/C Helis and see if he offers something. His site does have full diagrams of the SE, so it's well worth a quick look. Use the "plans" button on the left side of the screen and then select the appropriate heli.
When I do end up having to replace the tail boom and tube drive (we all know it will happen at one time or another), I'll use the parts out of an SE. Here's what I plan on doing:
I'll remove the (S-3300) tail drive shaft connector from the (S-4304) bevel gear and put either a (S-4742) aluminum front coupling or (S-4675) steel front coupling on. I'll then just install a (S-2975) Futura SE rigid drive system in the tail. This comes complete with the male ends, aluminum tube, bearings and bearing carriers. In the tail box I'll have to change to a (S-4478) steel rear coupling, replacing the (S-3380) tail rotor drive shaft that the wire fits into.
If you go this way, you may have to do some custom work on the bearing carriers. The original SE bearing carriers had a tendency to spin inside the tail boom, eventually cutting the boom in two. (Boy, that's got to be a rude awakening to have your tail boom suddenly break off while flying!) To combat this problem, Robbe came up with the new (S-4748) aluminum 24 mm bearing support. It uses an o-ring to hold itself in place and won't hurt the inside of the boom. I don't know if this will fit into a hexagon tail boom or not. Fortunately I have a lathe and mill, so I'll just whip out my own pieces. (:
Robbe used to (does?) offer a tube drive conversion for the Gold, but it wasn't worth it's weight in dirt. It had these little "X" shaped drive rubbers that fit between the couplers. They were very hard to get aligned when putting the system together and a good torque shock load would make them pop out of engagement - not only loosing tail rotor but the thing would bounce around inside the boom and tear it apart from the inside out. NOT GOOD! There's a picture of it in the Robbe main catalog, but I don't find the part number. You don't want it anyhow.
While you're at it and have the tail boom off, you may as well go ahead and install a pair of (S-0942) servo mounts and then switch to the (S-1056) carbon fiber t/r push rod. I opted for a Rick's R/C Helis part number RCHCR. These use a 5 mm carbon fiber tube with threaded inserts made of titanium. It has little aluminum sleeves (available in a variety of anodized colors) that goes over the ends of the inserts and cf tube.
The tail box is next. If your pockets are deep, opt for the (S-4346) Aluminum Tail Gearbox. I think this is the one that fits the hex tail boom, but don't hold me to it. Check with your Robbe dealer. One piece that I do recommend over the SE's plastic (S-2997) bell crank w/bearings is the (S-4559) aluminum t/r bell crank. It has a small Delrin cup pressed into the end that the ball on the t/r pitch slider (Robbe calls this the "control bridge") fits into just right. (If you are anywhere near the intersection of Cactus and 32nd Ave. in Phoenix, AZ, keep an eye out for one, as I never did find it!) The stock (S-3331) bell crank has a bit of slop, both in the bearing area and at the pitch slider. You can also just upgrade to the (S-2997) bell crank w/bearings, but there's still just a touch of slop at the pitch slider.
Speaking of the pitch slider (control bridge), upgrade to the (S-1038) SE's control bridge. It's smaller and stiffer with better bearing support than the one that came on the Gold. Of course, Robbe offers the (S-1078) aluminum control bridge if you so desire.
Now let's look at the entire output shaft section of the Gold. Get rid of it all and upgrade to SE parts! Pretty much everything from the shaft out was changed. Loose the (S-4311) tail rotor shaft and change to a (S-4628) shaft. No more rubber damping, multi part tail rotor hub held on by a pin (which liked to break off) either. Instead, upgrade to a (S-4630) rigid hub. It's held on with a grub screw that sets against a flat ground into the tail rotor shaft. Next, get rid of the (S-3347) blade grips and switch to either (S-4631) blade grips or (S-4572) aluminum blade grips. The new setup uses two bearings and a thrust bearing as opposed to just one bearing and a thrust bearing. You'll need to get two (S-3367) 4x10x4 mm bearings and (S-0053) shim washers, 7x10x0.2 mm. The (S-0053) shim washers go between the thrust bearing and the bearing. Working from the inside out, you should have: bearing, collar, bearing, shim, thrust bearing, washer, bolt. The t/r blade grip slides over this bearing assembly and is held on with a pair of bolts.
(S-0053) Shim Washer 7x10x0.2 mm - upgrade
(S-0942) Hex Tail Boom Servo Mount - upgrade
(S-1038) Control Bridge, Assembled - upgrade
(S-1078) Aluminum Tail Rotor Control Bridge (pitch slider) - upgrade
(S-2975) Futura SE Rigid Tail Drive System - upgrade
(S-2997) Bell Crank w/bearings - upgrade
(S-3300) Tail Drive Shaft Connector - remove
(S-3331) Tail Rotor Bell Crank - remove
(S-3347) Tail Rotor Blade Grips - remove
(S-3367) 4x10x4 mm Bearing - upgrade
(S-3380) Tail Rotor Drive Shaft - remove
(S-4311) Tail Rotor Shaft - remove
(S-4346) Aluminum Tail Gearbox - upgrade - I think this is the one that fits the hex tail boom.
(S-4478) Steel Rear Coupling - upgrade
(S-4559) Aluminum Tail Rotor Bell Crank - upgrade
(S-4572) Aluminum Tail Rotor Blade Grips - upgrade
(S-4605) Aluminum Tail Bearing Bracket - upgrade
(S-4628) Tail Rotor Shaft - upgrade
(S-4630) Rigid Tail Rotor Hub - upgrade
(S-4631) Tail Rotor Blade Grips - upgrade
(S-4675) Steel Front Coupling - upgrade
(S-4742) Aluminum Front Coupling - upgrade
(S-4748) Aluminum 24 mm Bearing Support - upgrade
Full Parts Listing by Part Number:
(S-0053) Shim Washer 7x10x0.2 mm - upgrade
(S-0942) Hex Tail Boom Servo Mount - upgrade
(S-1010) GRP Fan Shroud - upgrade
(S-1022) Aluminum Cooling Fan - upgrade
(S-1023) 50-tooth Brass Gear - upgrade
(S-1024) Aluminum Bell Crank Set w/bearings - upgrade
(S-1025) Collective Pitch Compensator Drivers - upgrade
(S-1035) Aluminum Collective Pitch Compensator, Complete w/(S-4550) Aluminum Collective Pitch Compensator Levers and bearings - upgrade
(S-1036) Carbon Fiber Fan Shroud Supports - upgrade
(S-1038) Control Bridge, Assembled - upgrade
(S-1078) Aluminum Tail Rotor Control Bridge (pitch slider) - upgrade
(S-1387) Hexagon Starter Extension - field box accessory
(S-1551) Thrust bearings (2 required)- upgrade
(S-2868) Head Rotor Brake - upgrade
(S-2972) Swash Plate - upgrade
(S-2975) Futura SE Rigid Tail Drive System - upgrade
(S-2992) SE Rotor Head, complete - upgrade
(S-2994) Collective Pitch Compensator, Complete w/Arms and Bearings - upgrade
(S-2295) SE Front Structure, Complete (full bearings) - upgrade
(S-2996) Mixer Lever w/bearings (pack of 2) - upgrade
(S-2997) Bell Crank w/bearings - upgrade
(S-2998) Bell Cranks w/bearings (set of all four) - upgrade
(S-2999) Conversion Set: 73-tooth, Right Hand Rotation - upgrade
(S-3099) 50-tooth Spur Gear - replace
(S-3143) Landing Struts - upgrade
(S-3145) Skid Connectors - upgrade
(S-3300) Tail Drive Shaft Connector - remove
(S-3331) Tail Rotor Bell Crank - remove
(S-3347) Tail Rotor Blade Grips - remove
(S-3367) 4x10x4 mm Bearing - upgrade
(S-3380) Tail Rotor Drive Shaft - remove
(S-3426) Collective Pitch Compensator Drivers - replace
(S-3467) Countersunk Socket Screw - upgrade
(S-3532) Bushing - replace w/flanged bearing
(S-4029) Washers - upgrade
(S-4035) Bearing - upgrade
(S-4101) Base Frame - replace
(S-4108) Brass Cooling Fan - upgrade for 4-strokes
(S-4126) Starter Driver - replace
(S-4136) Hexagon Spacer - replace
(S-4137) Bell Crank Mounts - replace
(S-4142) Bell Crank - replace
(S-4143) Bell Crank - replace
(S-4144) Bell Cranks (2) - replace
(S-4146) 600 ml Fuel Tank - upgrade
(S-4170) Futura Side Panel, 1.5 mm - upgrade
(S-4172) Starter Driver - upgrade
(S-4311) Tail Rotor Shaft - remove
(S-4346) Aluminum Tail Gearbox - upgrade
(S-4404) Wooden Radio Tray - remove
(S-4440) Collective Pitch Compensator Hub - replace
(S-4478) Steel Rear Coupling - upgrade
(S-4500) Rotor Head - modify
(S-4501) Damper Inserts - replace
(S-4502) Main Blade Pivot Shaft - replace
(S-4503) Thrust Bearings - replace
(S-4504) Main Blade Grips - replace
(S-4505) Mixer Arms (S-2) - replace
(S-4513) Connector ball, 8 mm - remove from Gold Head
(S-4533) Spacer ring (2 required) - upgrade
(S-4534) Main Blade Grips (2 required) - upgrade
(S-4542) Blade Pivot Shaft - upgrade
(S-4549) Aluminum Blade Grip Set (pr.) - upgrade
(S-4550) Aluminum Collective Pitch Compensator Lever w/bearings (2 required) - upgrade
(S-4551) Aluminum Collective Pitch Compensator Hub - upgrade
(S-4552) Aluminum Mixer Arm w/bearings (2 required) - upgrade
(S-4555) Aluminum Blade Grip (single) - upgrade
(S-4559) Aluminum Tail Rotor Bell Crank - upgrade
(S-4572) Aluminum Tail Rotor Blade Grips - upgrade
(S-4600) Black SE frames - upgrade
(S-4601) Channel Rail - upgrade
(S-4605) Aluminum Tail Bearing Bracket - upgrade
(S-4611) Nut Plate- upgrade
(S-4613) Front Dome Bearer - upgrade
(S-4614) Rear Stiffener - upgrade
(S-4619) Bell Crank - upgrade
(S-4620) Bell Crank - upgrade
(S-4621) Bell Cranks (2) - upgrade
(S-4626) Collective Pitch Compensator Arm (2 required) - upgrade
(S-4628) Tail Rotor Shaft - upgrade
(S-4630) Rigid Tail Rotor Hub - upgrade
(S-4631) Tail Rotor Blade Grips - upgrade
(S-4636) Skids - upgrade
(S-4645) Flybar Traverse Shaft - upgrade
(S-4646) SE Head - upgrade
(S-4649) Strut Brackets - upgrade
(S-4651) Hexagon Starter Driver - upgrade
(S-4659) Spacer Sleeves (2) - upgrade
(S-4665) Collective Pitch Compensator Hub - upgrade
(S-4670) Front Section Spreader - remove
(S-4675) Steel Front Coupling - upgrade
(S-4690) Carbon Fiber SE Frames - upgrade
(S-4468) 50-tooth Delrin Gear - upgrade
(S-4682) Aluminum Damper Inserts - upgrade
(S-4734) Light Weight Aluminum Spacer Ring - upgrade
(S-4742) Aluminum Front Coupling - upgrade
(S-4748) Aluminum 24 mm Bearing Support - upgrade
Canopy standoffs/supports
The (S-9502) kit includes the following:
(S-1025) Collective Pitch Compensator Driver (pair)
(S-2994) Collective Pitch Compensator, Complete (with levers)
(S-2995) Futura SE Front Structure (servo tray), Complete (with rocking servo mounts)
(S-2996) Mixer Lever (pair)
(S-2997) Tail Rotor Bell Crank
(S-2998) Bell Crank Set
One Last Note: Some of the part numbers off the SE plans and from the accessories section of the Robbe Main Catalog don't quite match. An example is the SE plans have a part number of (S-4629) and the accessories listing has a part number of (S-4478) for the Steel Rear Coupling - the input shaft of the tail box. In general, I've tried to stay consistent and use the accessories part number, but you might want to cross check the numbers against the SE plans (found on Rick's R/C Helis web pages). Who knows, the stock SE part numbers may cost less than an "upgrade" part number, even though it's the same piece.
Well, there you have it. A step by step and part by part listing of what I have done (and what can be done) to upgrade your old Gold Futura to SE standards. If you find any other items that can be used or any errrors, please contact me and let me know about them. I wouldn't doubt that I've made more than one mistake in doing this page!
If you live in the United States and want to do any of these upgrades, get in touch with Slim's Chopper Repair (SCR). Slim can get hold of anything you need when it comes to Robbe Helis. You can reach SCR at (513) 831-3173 or 1033 St. Rte. 131, Milford, Ohio 45150
For those of you on the "other side of the pond", you can get your parts from Midland Helicopters. You can contact them via Tel: +44 (0) 1455 637762, Fax: +44 (0) 1455 619348 and in the UK dial 070004 Helicopter. Or you can find them at 51 Sapcote Road, Burbage, Hinckley. LE10 2AS. England. They have a wonderful compatibility and price list on line.
Other Vendors I've used in my upgrades:
Bergen Machine - Tube Drive
Hobbies and Heli's International - Anodized Aluminum Nuts & Finishing Caps
Rick's R/C Helis - Carbon Fiber Tail Rotor Push Rod