

Home of K-fab

|
|
|
|
Three More Orbitals & Another TALON
This page will get updates as I move along with the projects. I've four bodies that are about 90% done and still need to make the frames/cradles/bases. Each kaleidoscope, while may be of the same style, will be different from any other. They have to have a little bit of individual character after all. All the same is boring.
I suffer from PBO (Project Burn Out) and tend to jump from one thing to another. I got to a point in the build of these and then had other stuff that needed attention take my direction away from the artistic side of life for a bit. I'll get bitten by the bug and start back in on these here soon enough.
 In the TALON build I'd made one end of the ring seating tool a bezel driver. It works great - lots of surface area so I can really get a good grip on it and tighten stuff waaaaay too much. I needed a smaller pin driver for the bezels and so I took a piece of scrap and made it a pin driver. it works better, is easier to handle and I can't gorilla grip stuff overly tight. with it.
 As stated before, one can never have too many tools and one can NEVER have too many specialty tools. Having the right one for the right job makes life SO much easier. Any quality mechanic knows this (and that's why Snap On has a catalog full of very expensive items).
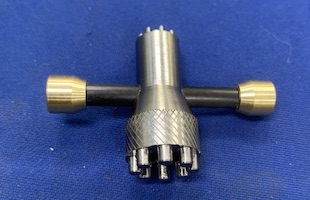
Keeping in the theme of these things being made of "exotic" materials, I had to make another fastener driver. This one has radiused pin ends (my first one has square edged pins) and I had to throw in a little driver lever so I could put a tad more torque on the fasteners. The lever slides in the pin.
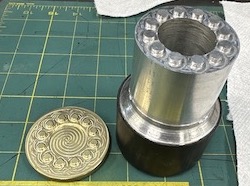
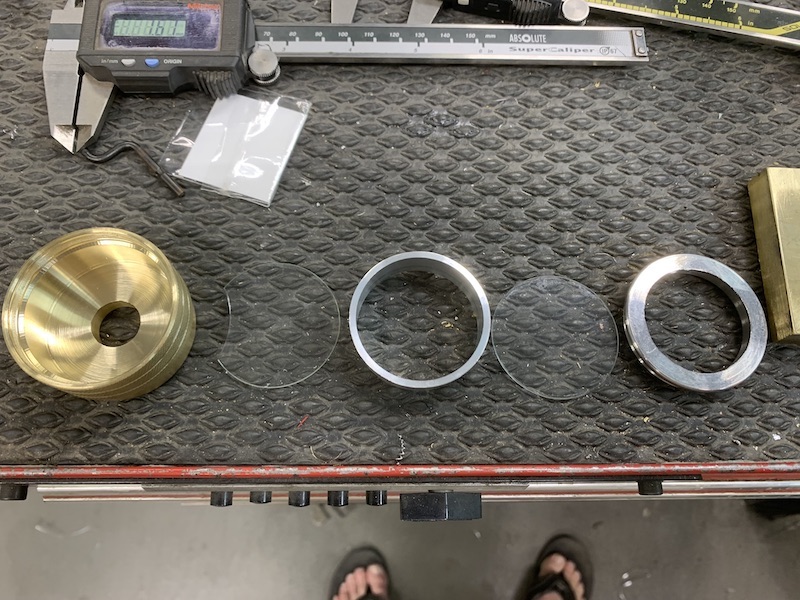
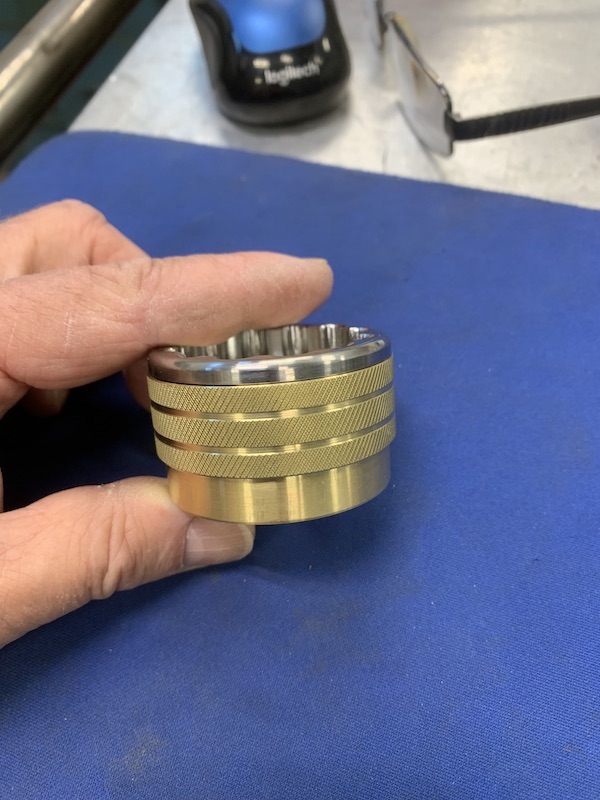
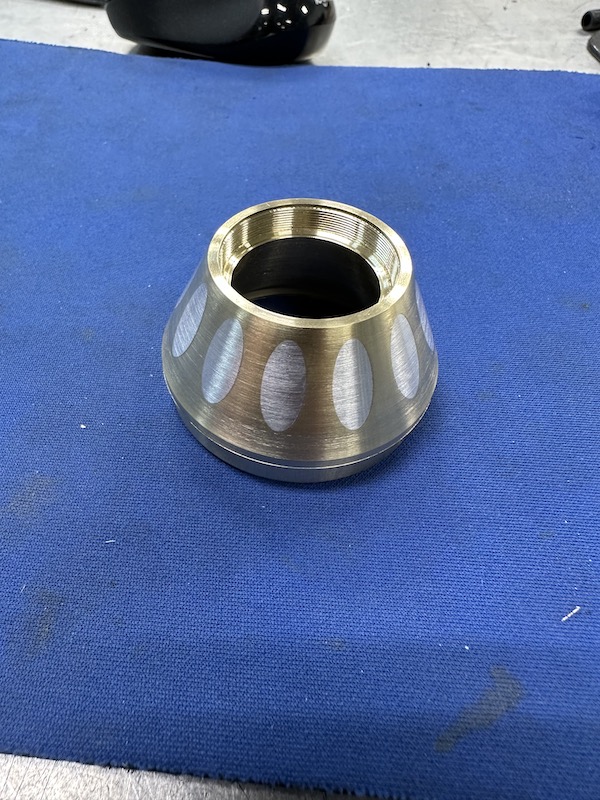
I started out making a few object ends. Once again, they consist of titanium, brass, an aluminum spacer ring and a couple of clear lenses to keep everything in place while it spins and hopefully visually delights anyone that looks into one of my creations. This time I wanted to mix it up a little and try using the different materials in different places so I made two of each - brass bodies with Ti bezels and Ti bodies with brass bezels.
Here's a brass body with a Ti bezel in process. Got the fit of the lens into the object body a little tight and "ting" goes the lens when I popped it out. Bummer - it happens and I order half a dozen lenses at a time off of Amazon. (You can find EVERYTHING on Amazon).
|
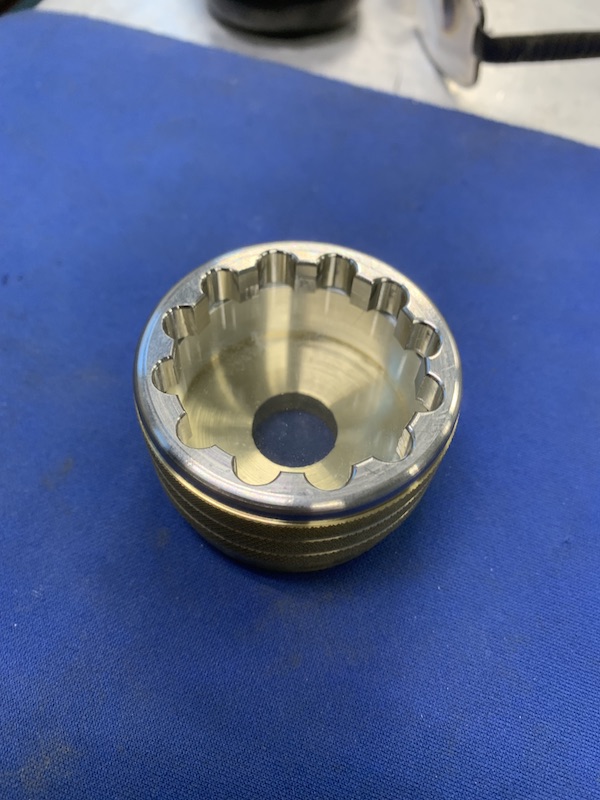
The parts assembled and a side view of the brass body with Ti bezel object end.
 |
 |
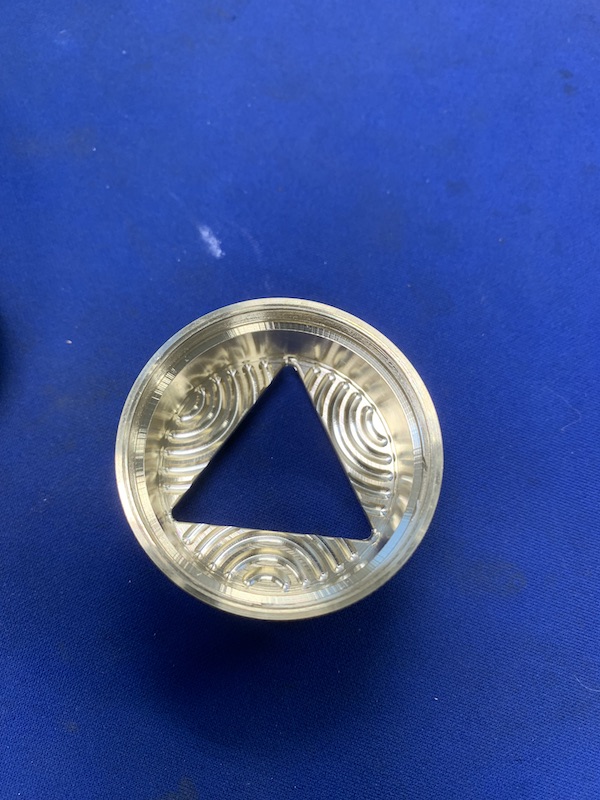
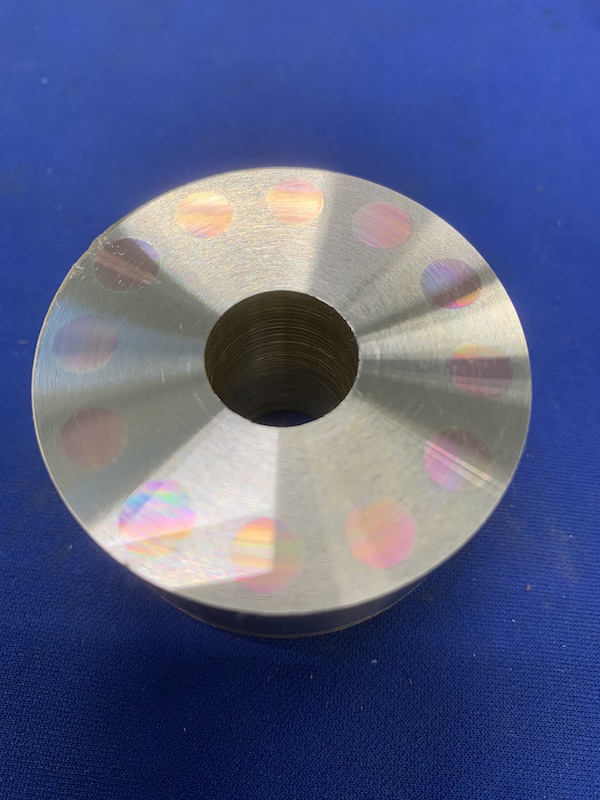
Time to make it pretty! A little mill action with a .125" (3.175 mm) ball end mill and I have a nice pattern in the object's body.
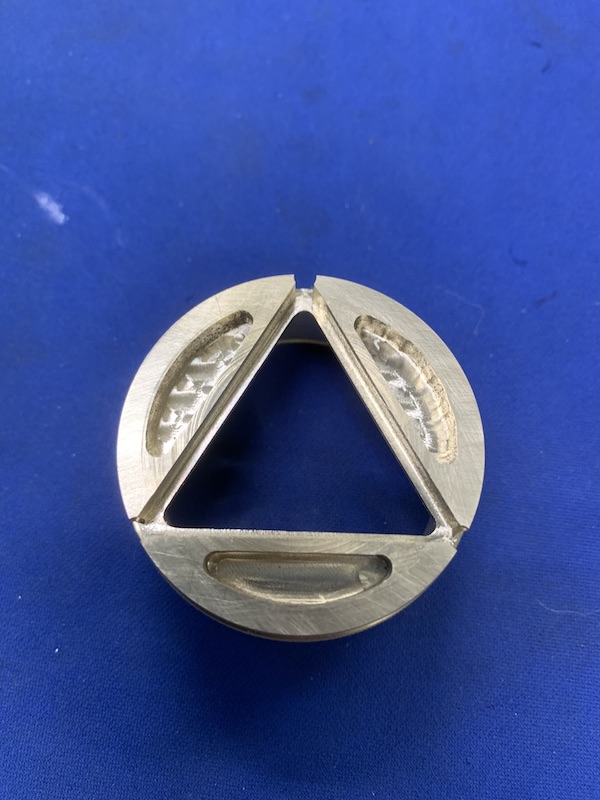
While I was at it, and even though this will never be seen unless someone breaks the thing or takes it apart (and breaks it), I couldn't just leave the mirror holding end alone. It got attention to detail added to it also.
 |
 |
Assembled.
 |
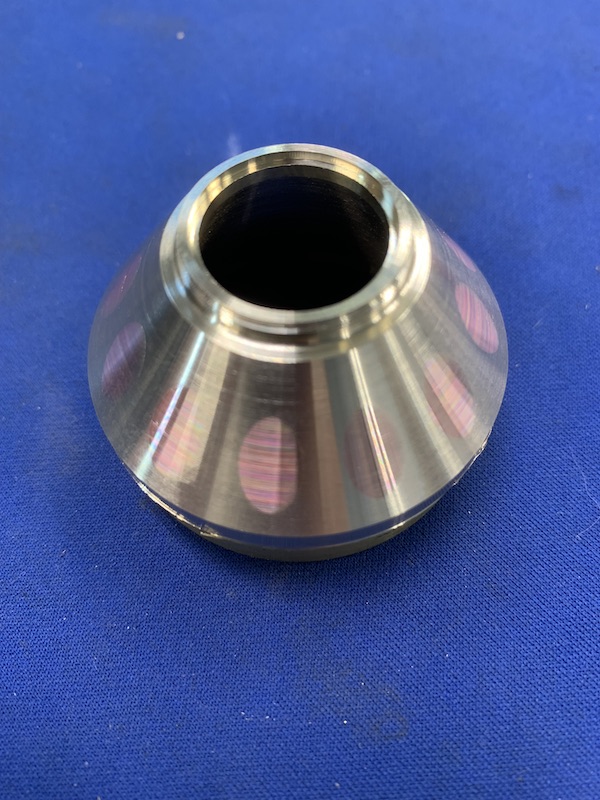
The assembled object end under different lighting. I think it looks pretty darned cool.
Titanium is an interesting material to work with. It's very sensitive to cutting speeds and feeds. If you spin the cutter too fast in the mill, or the piece of Ti too fast in the lathe, things go bad. It heats up and hardens. It requires a fairly aggressive cut to break the surface tension but not so aggressive that the tooling goes poof-ka-boom.
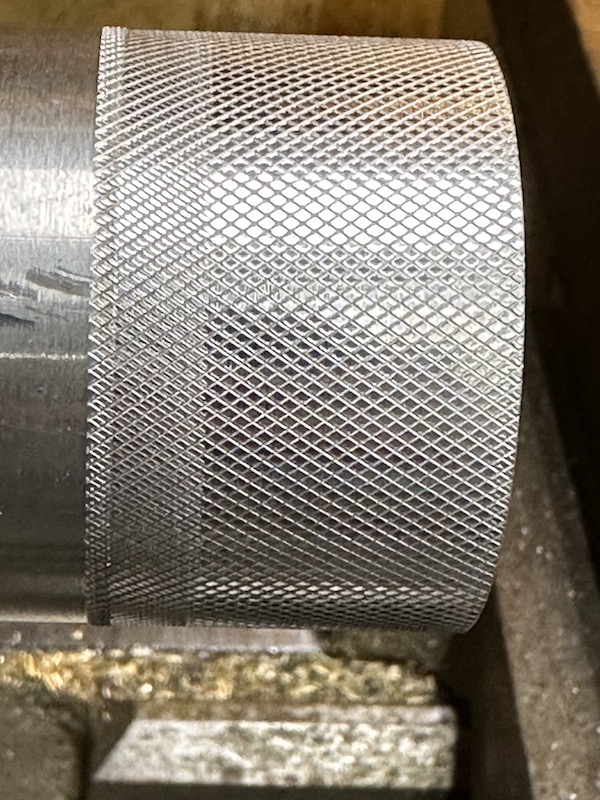
Knurling has proven to be a challenge. I either get too much part deflection or I can't get the cutters to bite or.... Practice thus far hasn't made perfect but I've managed to get a couple decent results.
 |
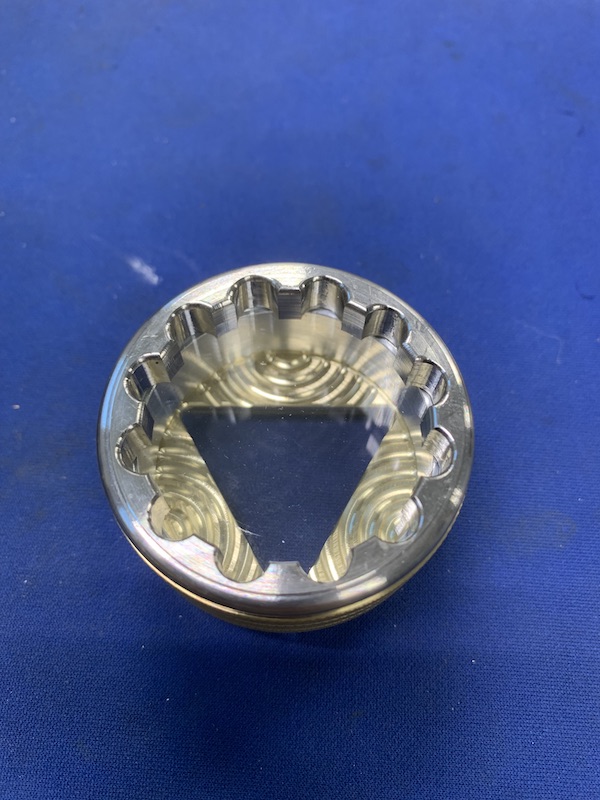
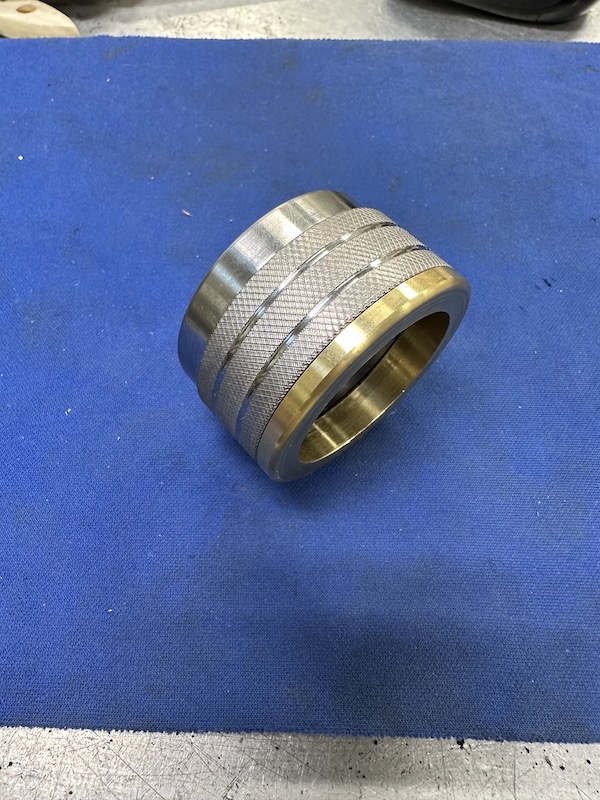
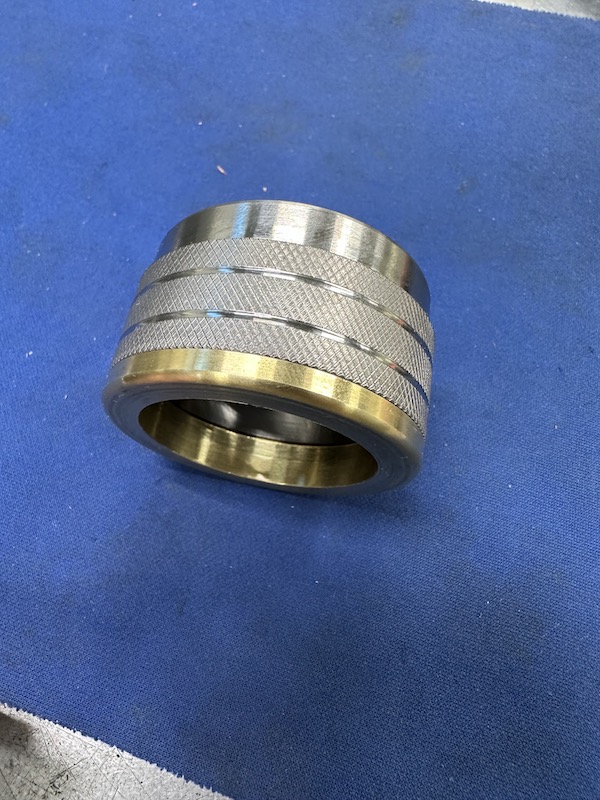
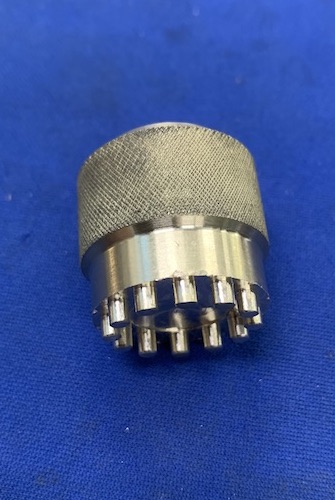
First Ti body unit. Notice the bezel doesn't have drive lug detailing yet.
 |
 |
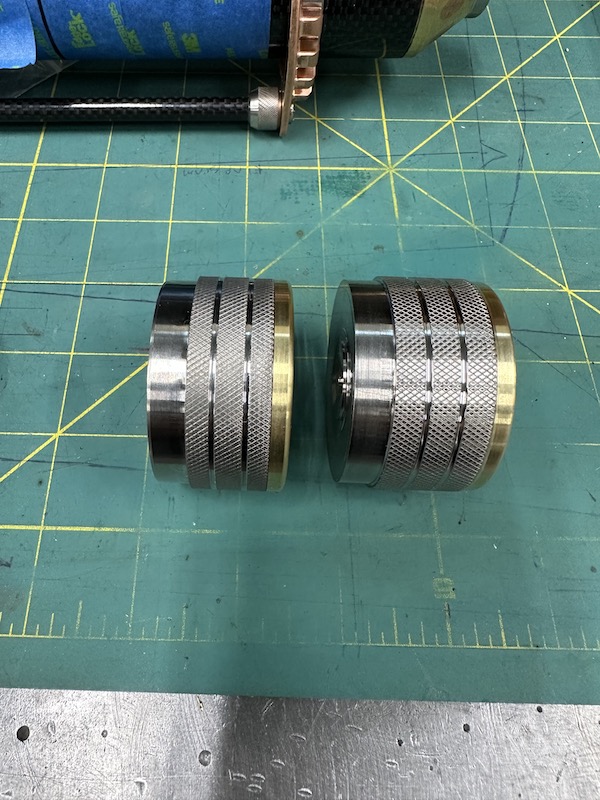
Making the bands on the knurled bodies.
 |
 |
I wanted a bit more, uh, "sumptin" on the next couple of kaleidoscopes. A little bit of an accent would be nice.
side note - I have a ring that's sat on my shop desk for years. Probably fifteen or so. It was an experiment with rose gold and Ti. I drilled holes in the Ti and then poked them full of rose gold. It didn't work out quite like I wanted but it's been a reminder of a pattern I wanted to play with.
Turned down a piece of brass and drilled a dozen .250" (6.35 mm) holes into it.
Then I took a dozen copper pins that I'd turned down to be a tolerance fit and used all 40 tons that my press is capable of and shoved the copper into the brass. It got warm from the friction.
I was actually disappointed with the outcome. I thought that the copper would be more red in comparison to the brass but it sort of disappears into the brass, especially after polishing. Fortunately as the pieces sit, the copper oxides a tad and the color comes out fairly well.
 |
 |
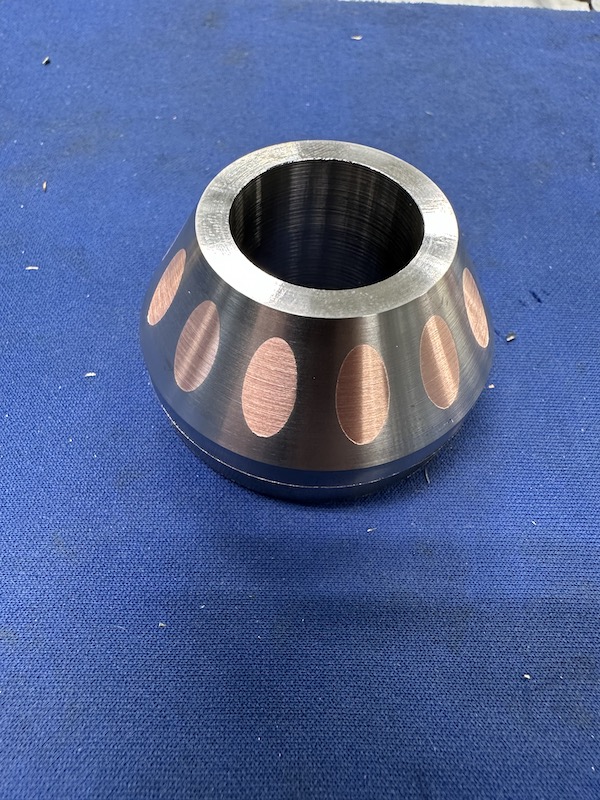
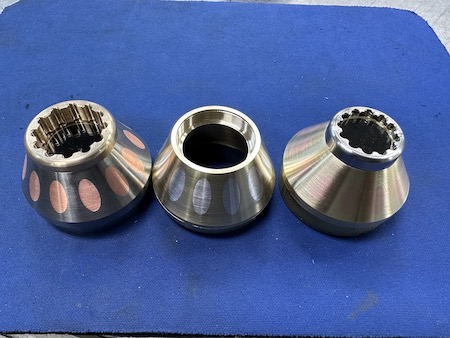
While I was at it I made a Ti body with copper inserts and a brass body with magnesium inserts. Both of these came out really nicely.
 |
 |
Progressing along.
 |
 |
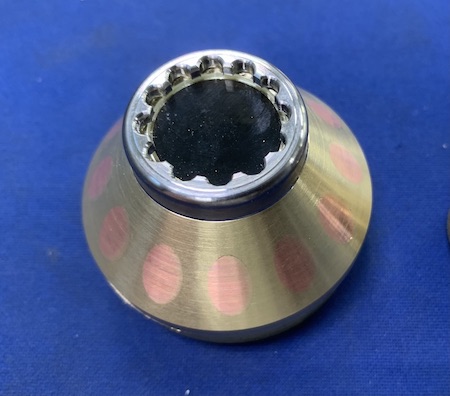
Here's the brass & copper eyepiece with a titanium bezel. Of course I had to make a tool to install the bezel. (noticing a theme?)
 |
 |
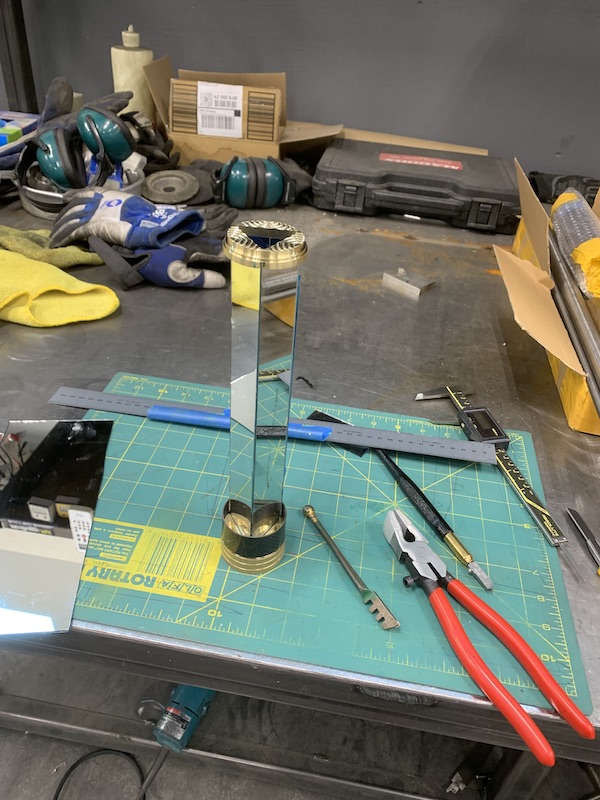
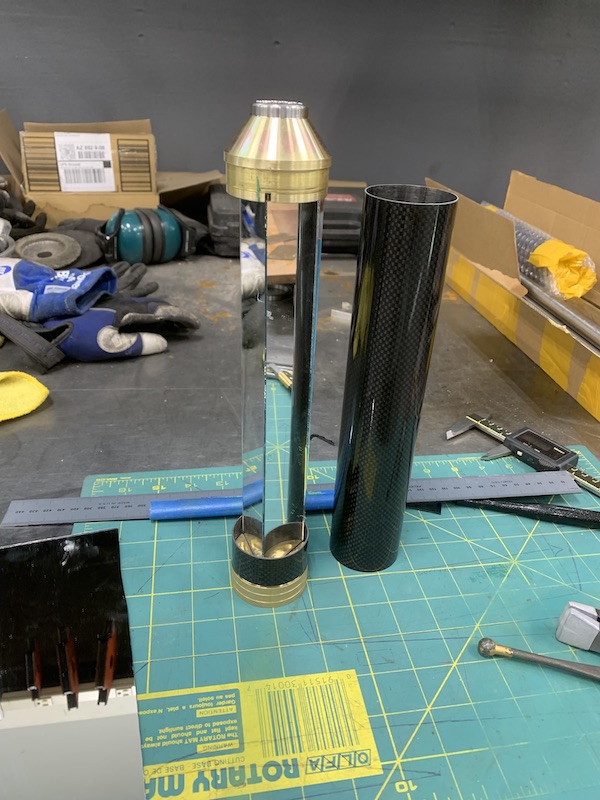
Not sure why I don't have more (any?) pictures of the lens holder. You can see it on the top of the mirrors while I was test fitting them to the ends. It's pretty much a copy of the object body without the chamber. You can see how the eyepiece fits onto the lens holder. These two pieces float so the mirrors don't get twisted when I seat the eyepiece body into the end of the carbon tube.
 |
 |
Just making sure everything fits like it's supposed to.
 |
I'm not overly pleased with the feeling of my first Orbital. I missed the precision by just a tiny bit and I can feel it. I don't think most people would notice but I do. Trying to get the rings and the three bearings set up so that they didn't move too easily nor too loosely was a challenge. I needed to to about it a different way.
How about one big bearing instead? That should work! So I sourced a set of 50mm inner diameter, thin bearings (You can find ANYTHING on Amazon!) and started machining away.
Copper's weird to work with. It's gummy, sticky and doesn't want to leave pretty surfaces. It's a lot like 5000 series aluminum.
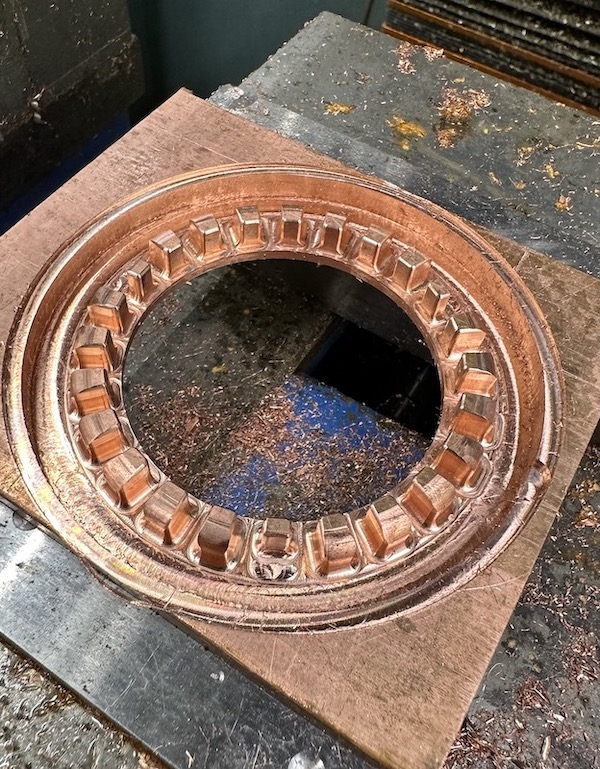
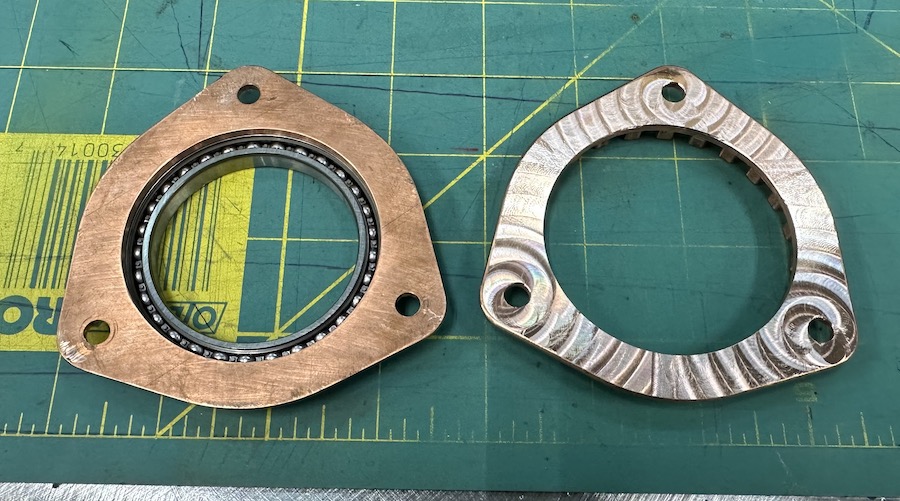
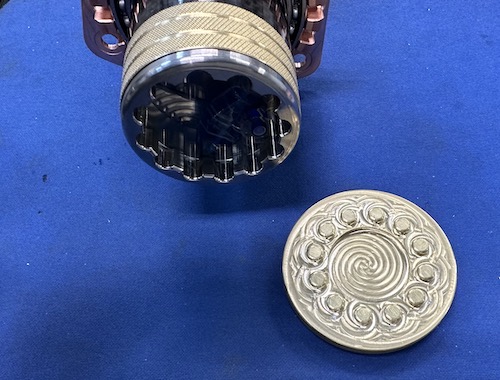
Came up with a wankle rotor looking bearing carrier.
 |
 |
 |
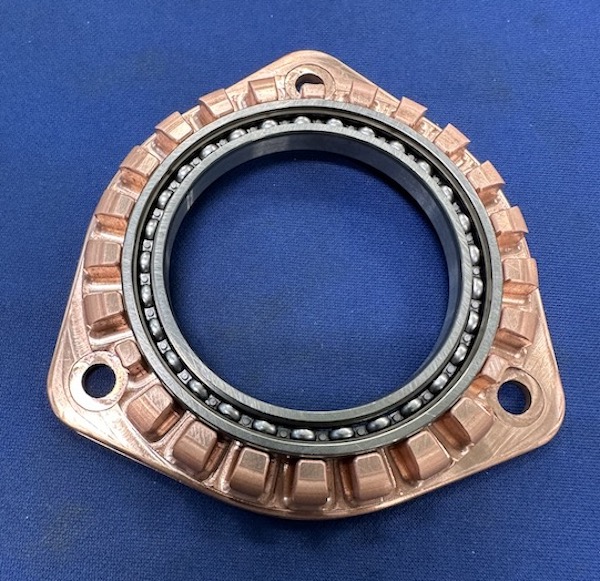 |
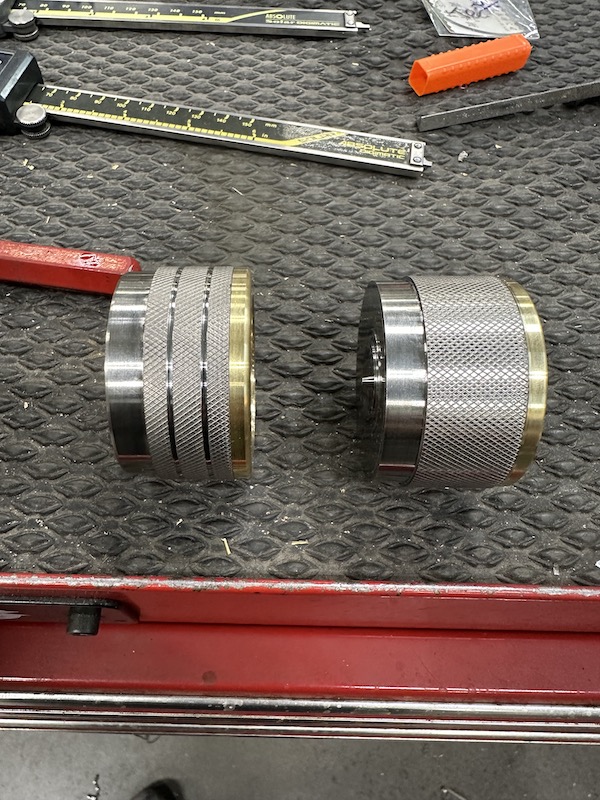
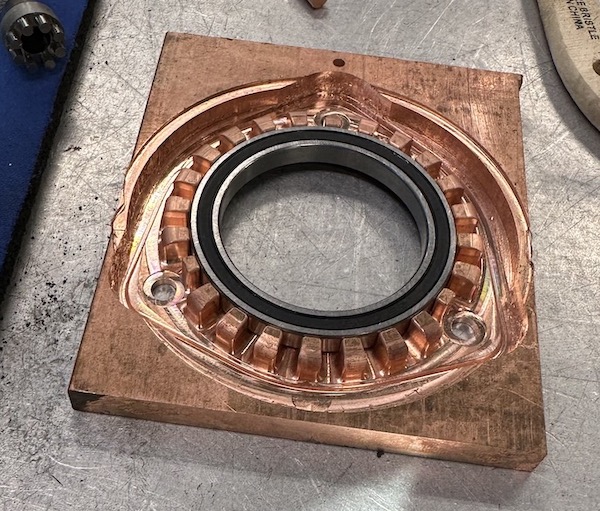
Pre machining on the left, post on the right.
 |
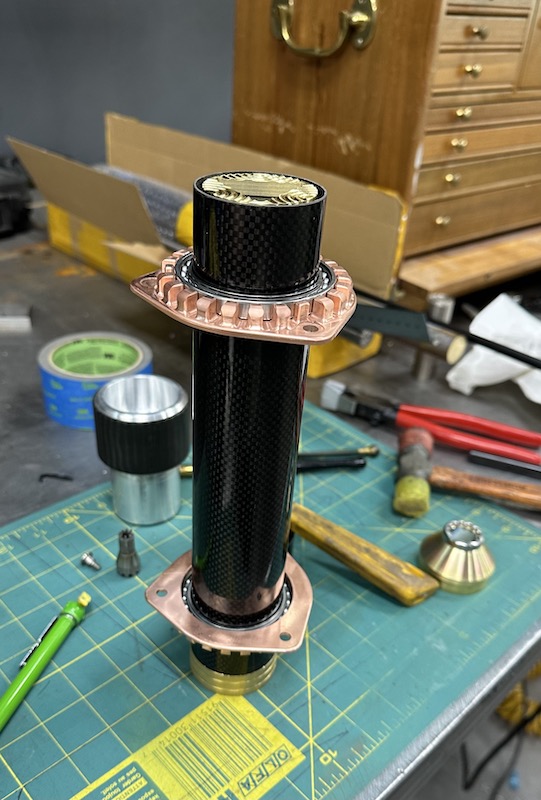
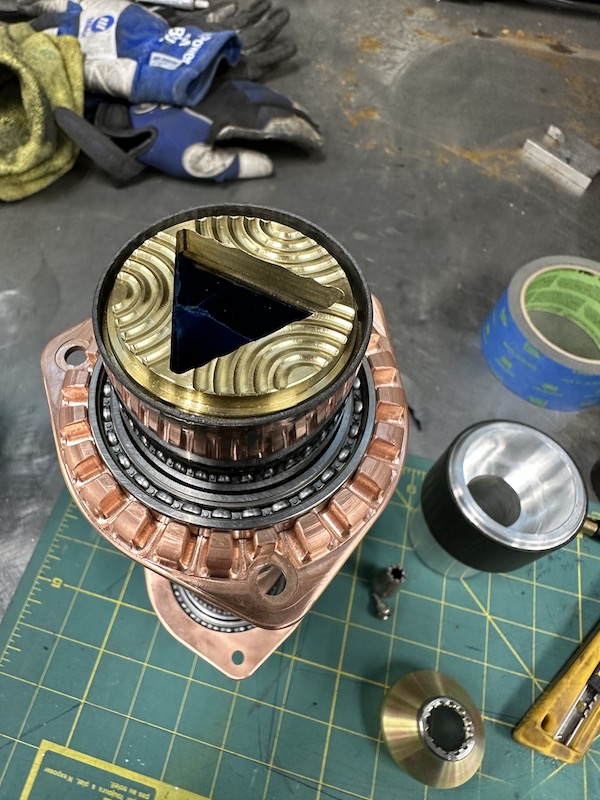
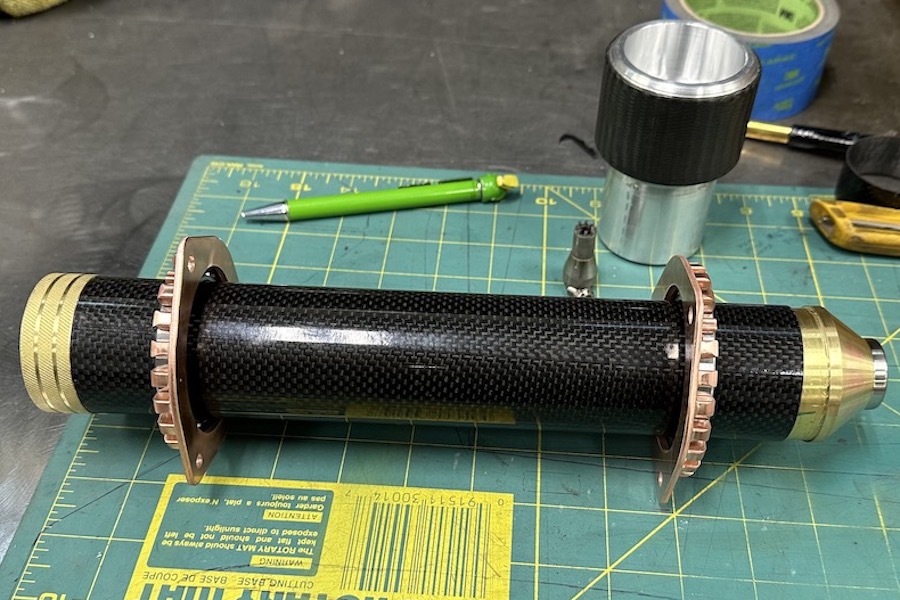
Bearings installed in the carriers and then onto the carbon body. This is where the tool in the background comes in so handy. It keeps the bearings perfectly aligned on the tubes which is very critical for smooth operation.
The floating mirror carrier is installed and holding the mirrors in place too.
 |
 |
Fitting things together.
 |
See, tools for everything!
 |
 |
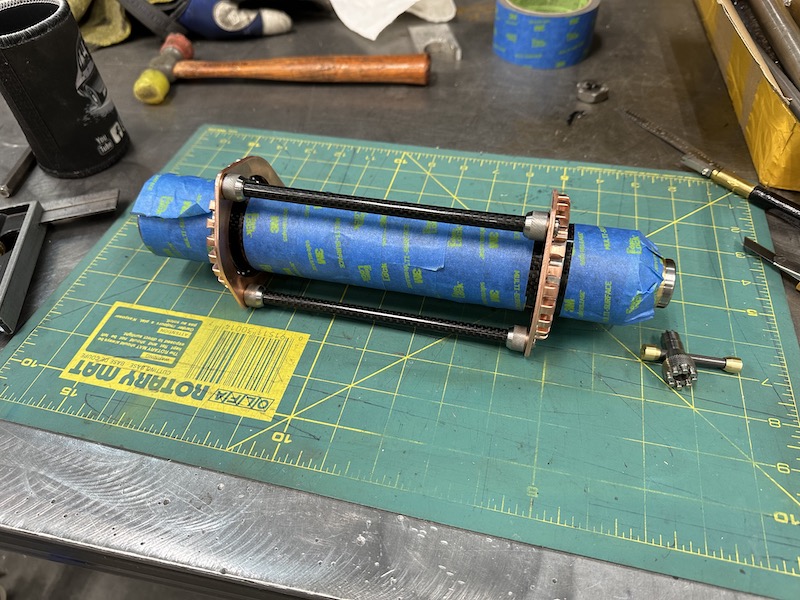
Got the carrier rods cut and installed. The tips are titanium, rods are carbon fiber tubing. The body's wrapped to keep me from scratching it up. With the three rods installed, it showed any misalignment - hence the hammer in the background. Teeny Tiny taps... YIKES!
 |
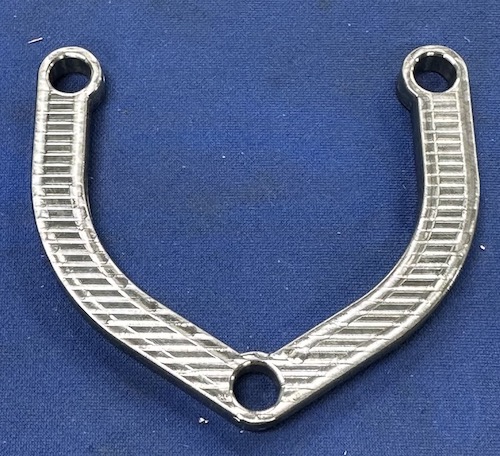
Tuning Fork Time!
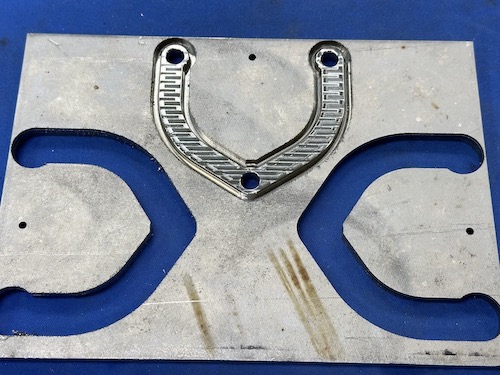
Three titanium carriers. The three rods seen in the pic above go through these holes and the carrier gets set to the center of gravity of the body (not to the center of the tubes) so it pivots easily.
 |
 |
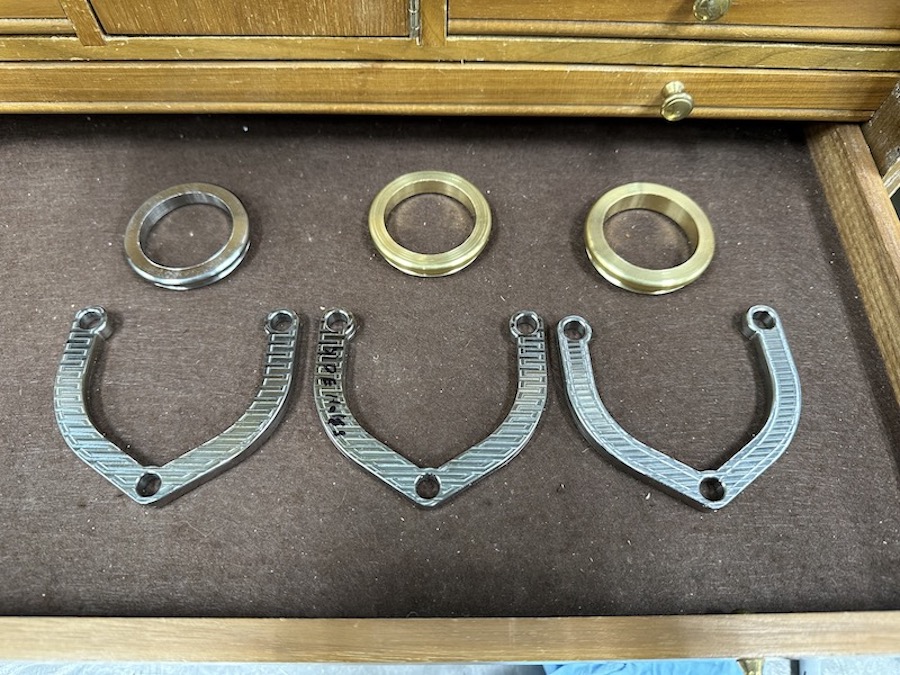
Three forks and three bezels in wait.
 |
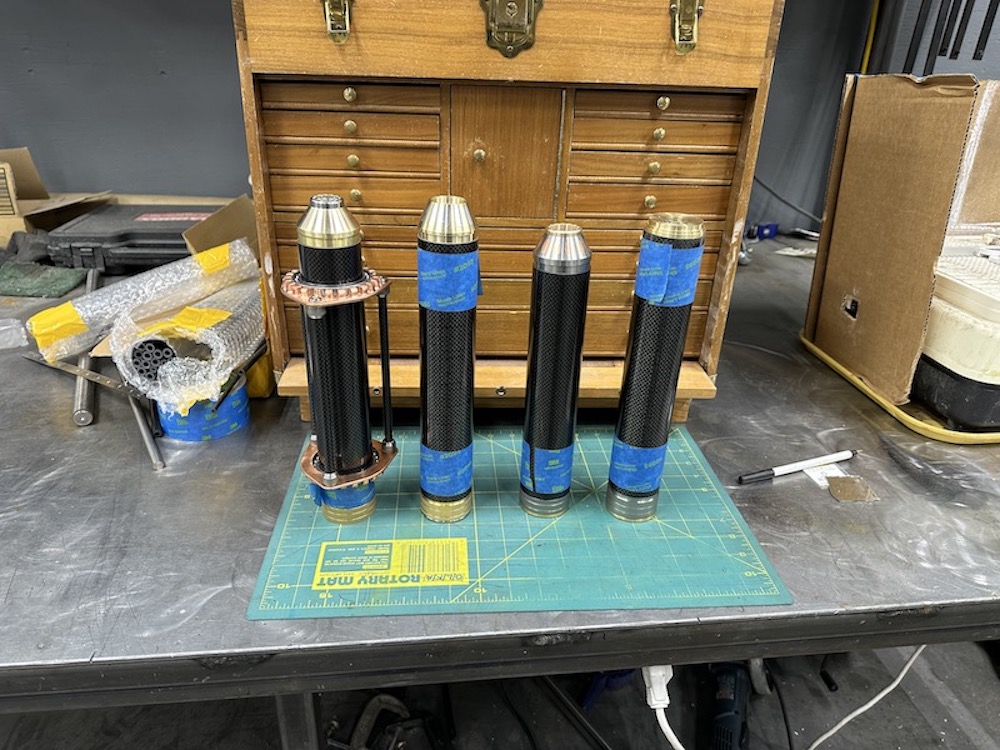
Three Orbitals & one TALON in a state of wait. I'll get back to them here sometime and update when I do.
 |
Just for fun!
I actually found out Ti burns many years ago in an old lathe that I had, VERY much to my surprise. I'd been told it would by an aerospace engineer I knew but never knew if he was messing with me or not. Or not would be the correct box to check.
Return Home